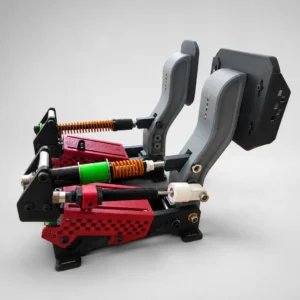
The new merch store is open!
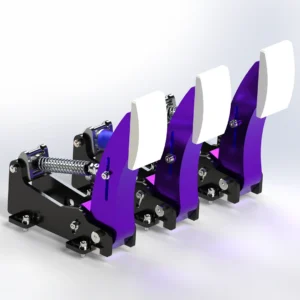
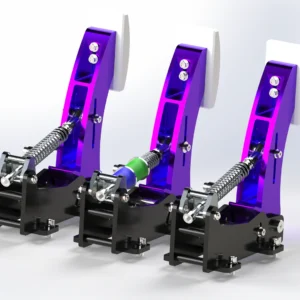
DIY Active Pedals Plans released!
Stainless Steel H-Pattern released!

Quick Start Guide

We will explain the DIY Sim Studio process to you, step by step.

Step 1
01. Choose your Sim Racing DIY project
You can download CAD Plans for the project of your choice (shifter, pedal set, cockpit, steering wheel...). Bundles and special offers are available.
Step 2
02. Download your files
After your purchase, you will be able to access your files. You will receive an invoice via email, along with download links. You can also download the files from your account, if you have created one (guest checkouts are permitted).
Step 3
03. Purchase of required parts (BOM)
You will need to purchase the parts required to build your project. A "Bill of Materials" (BOM) document is provided in PDF format; additionally, you can consult the "BOM & Sourcing" page.

Every single required part is listed — including hardware — along with specific details for each item (such as quantity, length, diameter, etc.).

All the required parts are easily available from most major online retailers, such as AliExpress, eBay, Amazon, etc. DIY Sim Studio uses only inexpensive, widely available components.
Step 4
04. Manufacturing of parts
There are generally 4 manufacturing methods available for DIY Sim Studio projects: laser cutting, 3D printing, CNC machining, and manual cutting.

Depending on your resources and the machinery you have access to, you will need to obtain the parts required to assemble your product.

The files are provided in DXF, STEP, STL, and PDF formats. The required quantities are specified, and the thickness of each 2D part is indicated.
Step 5
05. Assembly
Now that you have everything you need, all that remains is to assemble your product by following the provided guide (in formats such as PDF, video animations, etc.).

Finally, complete the electronic soldering (a schematic and an Arduino sketch are provided for each project).
Step 6
06. Quality testing and adjustment
Once the equipment has been assembled, it must undergo quality testing and electronic calibration; it is also adjusted to meet your specific requirements (spring tension, trajectory, etc.). An adjustment manual is provided for every project.
Step 7
07. Share your work and earn money (optional)
You’ve finished your DIY project — congratulations! You can showcase your work on social media (Reddit, Forums, YouTube, etc.) and include an affiliate link, which will allow you to earn a commission on every purchase through your links. This will help you offset the cost of your materials, and why not earn some extra money.

Signing up for the DIY Sim Studio affiliate program is free.
Step 8
08. Write a review (optional)
A few weeks after purchasing your plan, you will automatically receive an invitation to write a review regarding your project. You may include a photo if you wish.

frequently asked questions

Find answers to common questions about our products, services, and policies.

DIY Sim Studio is a platform dedicated to DIY sim racing hardware.
We design and sell CAD plans and guides that allow sim racers to build their own steering wheels, pedals, shifters, and accessories.

You should consult the “Build Cost” section for each project.

This is an estimate of the manufacturing cost for a DIY project; however, it can vary significantly depending on the specific project and the equipment you already own.

There are several ways to save money when purchasing DIY Sim Studio plans or manufacturing your product.

How to save money on DIY Sim Studio plans (Digital Download):

  • Save 30% with the Bundle Discounts when purchasing 3 plans.
  • Subscribe to the newsletter to receive a 15% discount promo code.
  • Purchase a bundle via the Builder Packs category.
  • Buy the complete DIY Sim Studio library to access all current and future plans.
  • Earn a promo code by providing a review with photo

How to save money on the manufacturing of your product:

  • For 3D-printed parts, ideally, you should own a 3D printer. If not, you can order prints online using a service like Treatstock.
  • For laser cutting, you can request a quote from a factory near you, or place an order directly through an online service (JLCCNC or PCBWay, for example)
  • The same applies to CNC machining.
  • Some projects offer manual cutting using PDF plans.

In general, we recommend working on several DIY Sim Studio projects at the same time; this allows you to place a bulk order, resulting in lower costs for your parts.

You can join the affiliate program (free to sign up) and earn a commission on every sale made through your affiliate links.

This would allow you to recoup the costs of your project, without any effort other than sharing your project and including an affiliate link.

The list of required parts is provided in a PDF file under the “Bill of Materials” tab, and is also available as a supplement on the “BOM & Sourcing” page.

No.
Most projects are designed to be accessible to beginners, with clear geometry, logical assembly, and step-by-step documentation.

If you can:

  • Use basic hand tools
  • Follow instructions
  • Take your time

You can build these projects.

You have access to videos posted on our YouTube channel, and, most importantly, a 3D viewer that allows you to examine the plan in detail.

Yes.
You can:

  • Ask questions in the Help & Questions section of the product
  • Contact us directly

You’re never building alone.

You receive a digital download that may include:

  • CAD files (STL / DXF /  PDF / STEP depending on the project)
  • Assembly guides
  • Electronics diagrams
  • Shopping list for parts
  • Configuration tips

Everything you need to build at your own pace.

All products are digital CAD plans (except for the Merch Store), not physical Sim Racing hardware.

Free plans are great to start — and some are available on DIY Sim Studio too.

Paid plans offer:

  • Refined design & tested geometry
  • Realistic feel and durability
  • Clear documentation
  • Ongoing improvements
  • Personal support if needed

You pay for quality, reliability, and time saved.

Depending on the project, you can use:

  • 3D printing
  • CNC machining
  • Laser cutting
  • Manual fabrication (metal / wood)

Each product page clearly states the recommended methods.

Yes.
DIY Sim Studio hardware is designed to work with standard USB controllers, making it compatible with:

  • Assetto Corsa / EVO / Rallye
  • iRacing
  • Automobilista 1 & 2
  • rFactor 2
  • RaceRoom RE
  • Dirt 1 & 2

…and most other PC sim racing titles.

There is no official compatibility with game consoles (Playstation, XBOX, Switch), although it is technically feasible, our plans are intended for PC.

Basic electronics understanding helps, but it’s not mandatory.

Wiring diagrams and component lists are provided, and most projects rely on:

  • Arduino / USB boards
  • Buttons and MicroSwitch
  • Potentiometers and Loadcells

Support is available if you get stuck.

Absolutely.
Customization is a core part of the DIY philosophy:

  • Materials
  • Finishes
  • Button layouts
  • Stiffness and resistance
  • Ergonomics

You build it your way.

No.
All CAD files are sold for personal use only.


Commercial use, resale, or redistribution is not permitted.

Due to the digital nature of the products, refunds are not available once files are downloaded.

If you’re unsure, feel free to contact us before purchasing.

Absolutely not. DIY Sim Studio is 100% human-made, and the project began in 2019 (as evidenced by the YouTube videos posted since 2022).

Contact Us

If you have an issue or question that requires immediate assistance, you can click the Contact button below.

Useful links

Shopping Cart
Your cart is currently empty!.

You may check out all the available products and buy some in the shop.

Continue Shopping

Add Order Note
Estimate Shipping