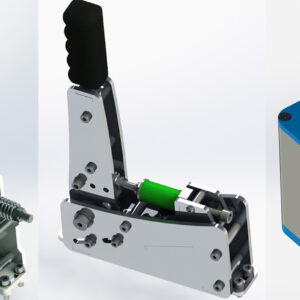
Sim Racing Pedals

(5 customer reviews)

29.99

What’s included:

  • CAD Model Files of the Sim Racing Pedals, it includes four ways of making according to your choices:
    • Laser cutting (DXF files)
    • 3D printing (STL files)
    • Hand cutting (A4 Sheets of papers PDF files)
    • CNC Machining (STEP files)
  • Arduino Sketch and Wiring diagram for Arduino Pro Micro/Leonardo USB Board
  • Complete tutorial to build the pedal without advanced skills and expensive tools
  • Complete list of all parts you need to build the pedal (Screws, electronics…)
  • Free Assistance in the Help and Questions section
secure payment

SIM RACING PEDALS – FEATURES

EASY TO BUILD

This DIY Sim Racing Pedals building kit has been designed to be easy to build without expensive tools or advanced knowledge!

ACCURATE

The sim racing pedals offers accurate realism, with a feeling adapted to each pedal (degressive clutch, soft and hard two-phase brake, linear accelerator).

WELL DESIGNED

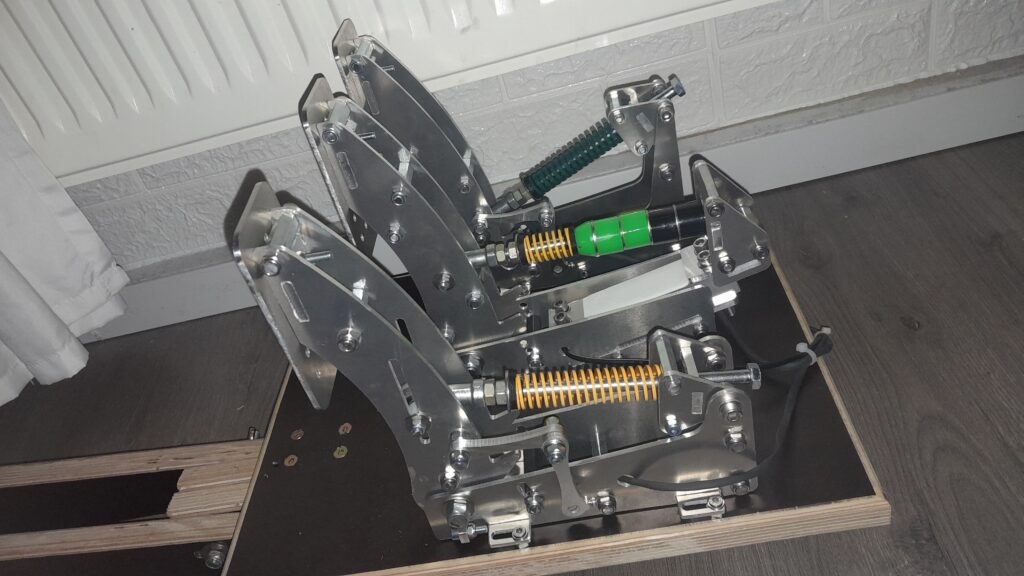
The design was very well worked, with shapes inspired by those used in real cars. The 3D Printed edition is just as pretty as the standard metallic version.

ADJUSTABLE

The load cell pedals have been designed to allow a maximum of adjustments! You can adjust the angle, hardness, stop and positioning of each pedals according to your feeling.

SAVE MONEY

The pedals can be made on a small budget, depending on the parameters you have chosen (choice of material, electronics…) and the equipment you have (3D Printing machine, CNC Machine…).

FREE ASSISTANCE

In the event of an issue, the customers will receive free assistance in the “Help & Questions” section.

SIM RACING PEDALS SET

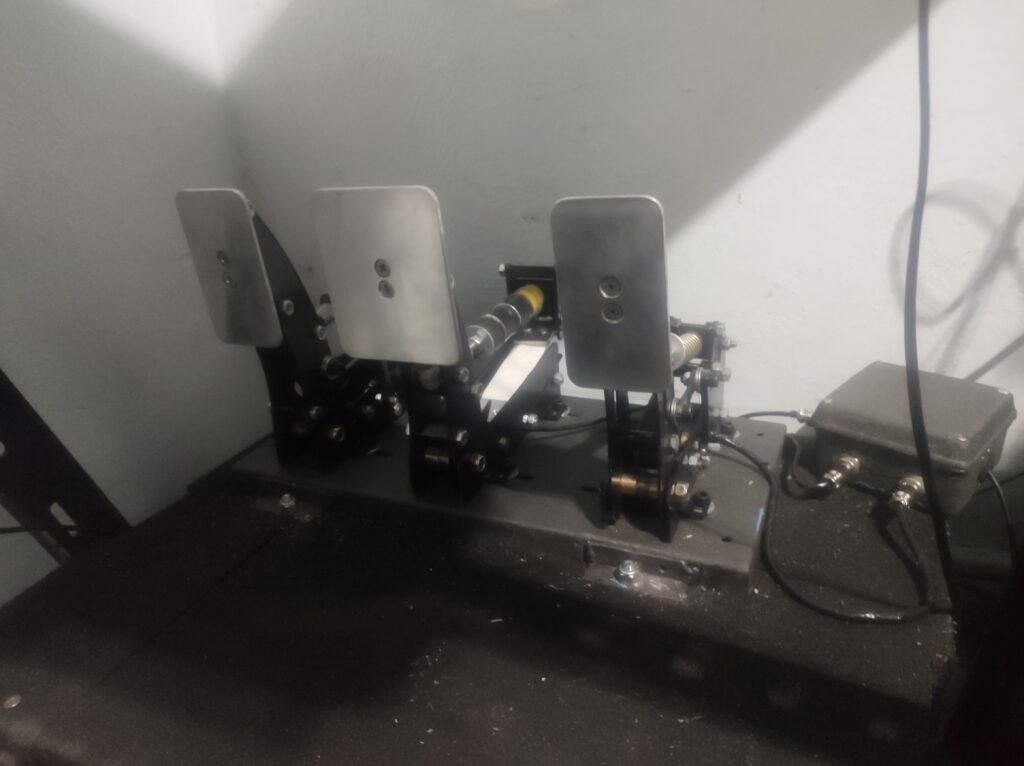
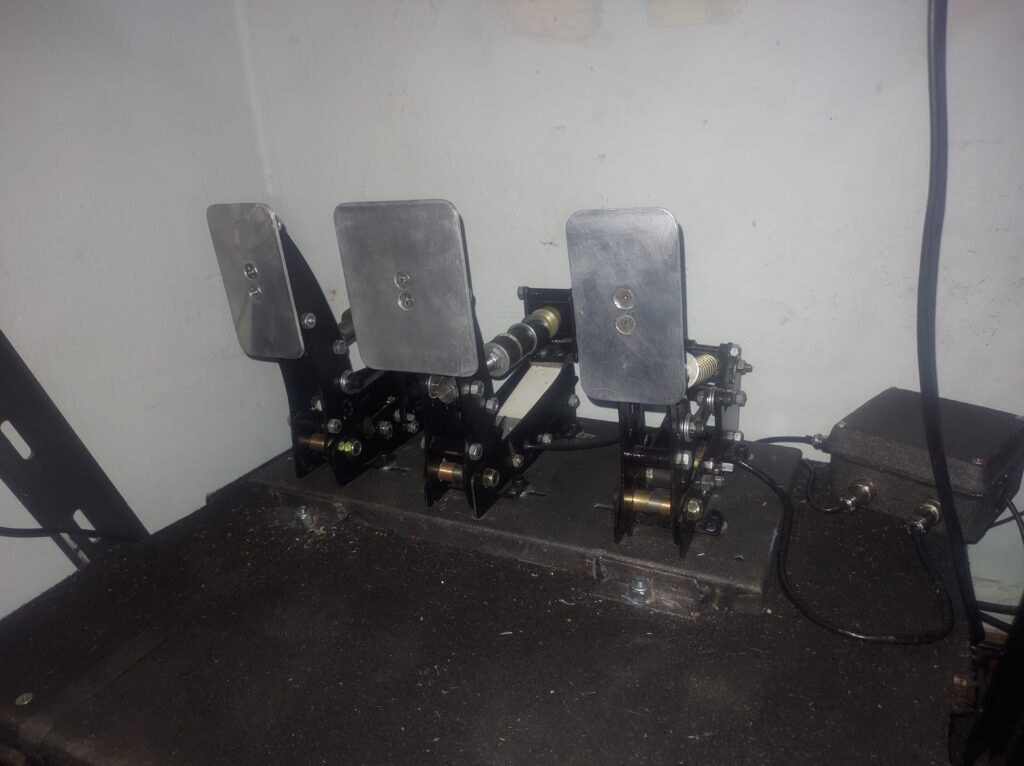
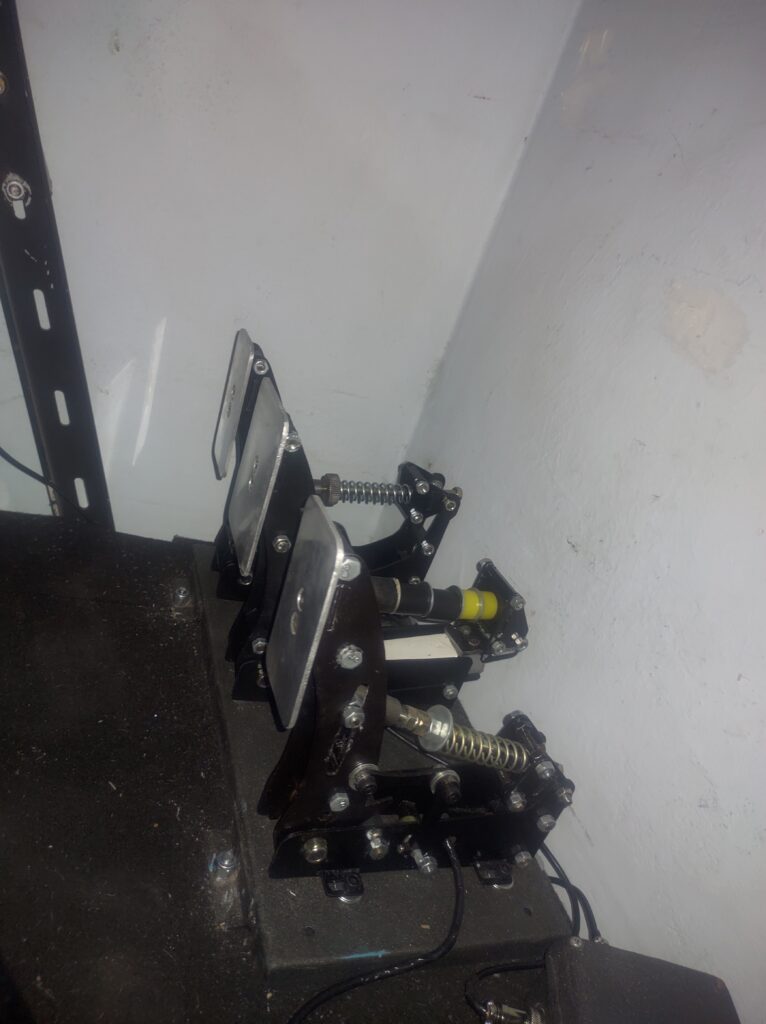
THROTTLE PEDAL

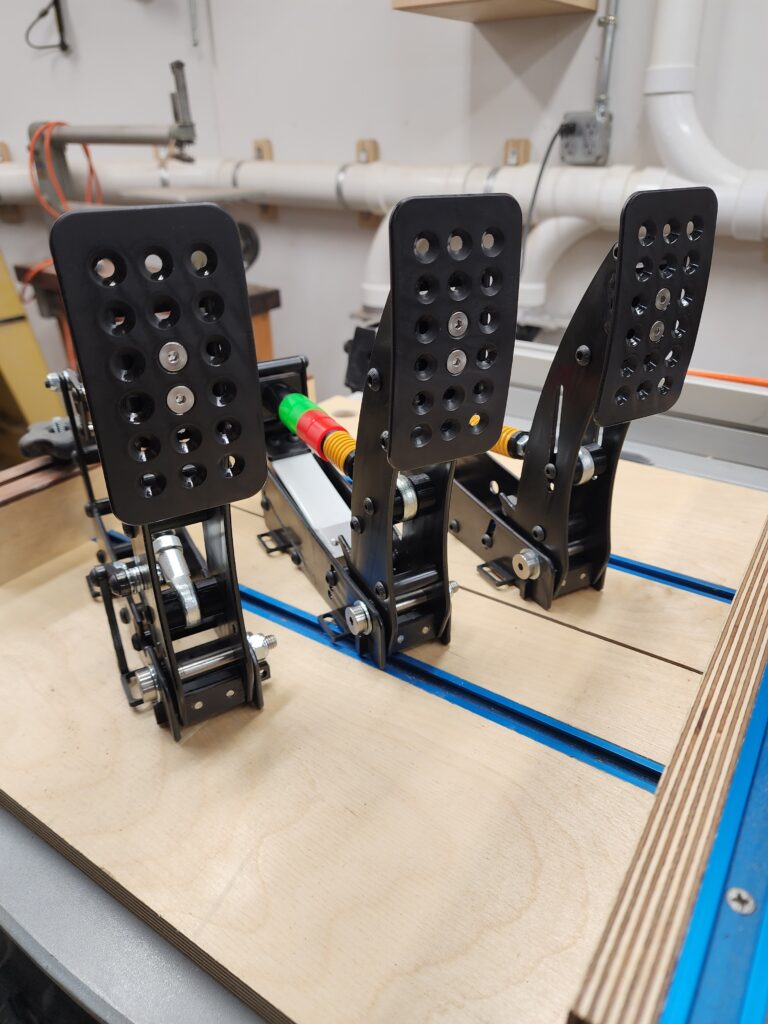
The throttle pedal is linear, you can adjust the hardness, angle, stop and the footrest position.

Concerning electronics, it’s a potentiometer fixed by two levers with a very solid structure.
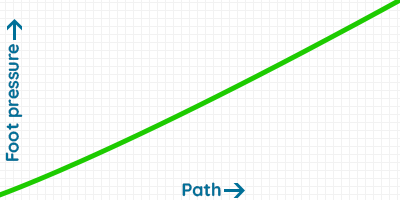
Throttle Sim Pedal

Sim Racing Pedals

BRAKE PEDAL

Load cell pedals provide precise and realistic braking force, improving your control and immersion in the game.

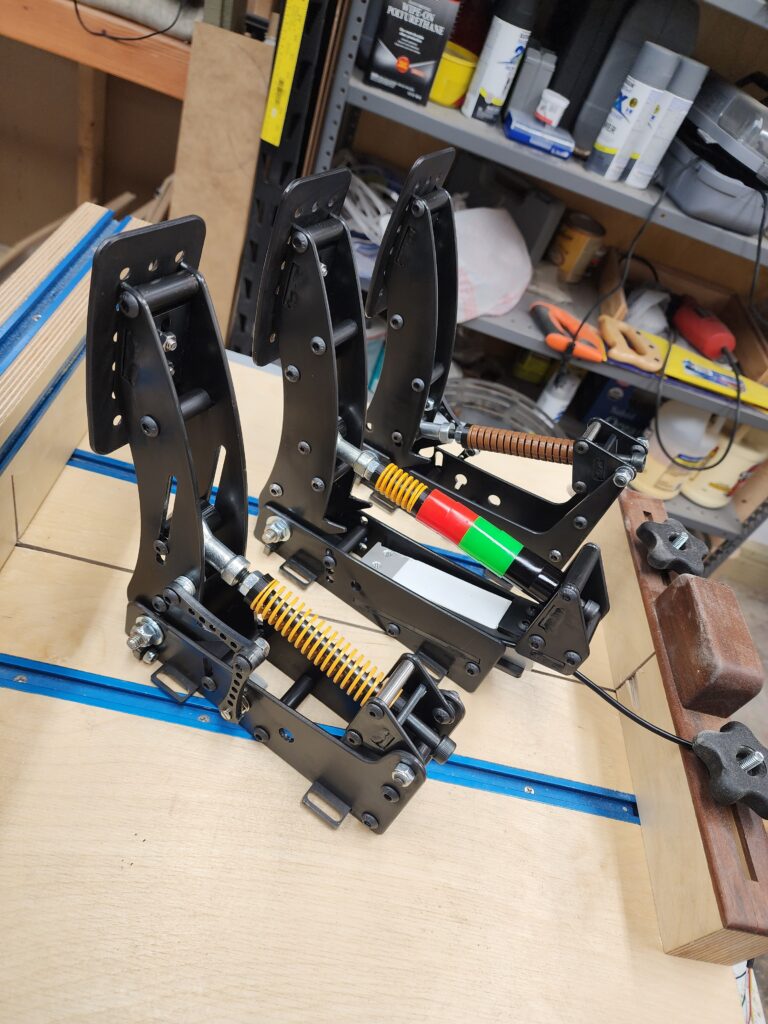
The brake is made up of one spring and many elastomers which enables the two stages of braking: soft then hard. The feeling is adjusted by changing the combination of elastomers and/or by tightening the spring. The technology is similar to the Handbrake Load cell.

The pedal is designed to take more than 100kg of pressure!

Concerning electronics, it will be a 120kg pressure sensor.
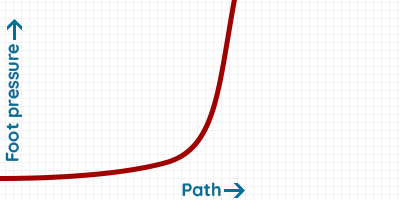
 

Brake Sim Pedal

Sim Racing Pedals

CLUTCH PEDAL

The clutch is almost similar to the throttle, but has a degressive mechanism allowing to simulate the clutch of a real car (only the 3D Printed Edition is linear).

Clutch Sim Pedal

Sim Racing Pedals

REVIEWS OF THE SIM RACING PEDALS

“Considering this pedal set would only be about 300 bucks, I was shocked on track results.” – Shaun Cole (The SimPit)

“In regards to the 3D printed version I will say I try to beat these up so hard, I smashed on them, I really figured they would break they just didn’t in my testing.” – Shaun Cole (The SimPit)

IN-GAME TRIAL

HOW TO MAKE YOUR SIM RACING PEDALS

BUILDING OF THE 3D PRINTED SIM RACING PEDALS

How to make a DIY Load Cell Pedals

Would you like to make your own DIY Sim Racing Pedals for your Sim Racing Setup ? You are in the right place.This tutorial provides step-by-step instructions to help you build high-quality and customizable 3D Printed Sim Racing Pedals.

The building of this pedal is quite easy. If you love crafts and DIY, you will have a great time making it.

→ Read the Tutorial

diy pedals

ADDITIONAL TUTORIALS

Parts buying guide: Springs and Elastomers

Electronics SHOPPING LIST

POTENTIOMETERS AND LOADCELL

USB BOARDS (only one of them is mandatory)

SIM RACING PEDALS WIRING

ALTERNATIVE CASES FOR THE USB BOARD

Tools SHOPPING LIST

MACHINING

3D PRINTER

SANDING AND POLISHING

LOAD CELL PEDALS ASSEMBLY

SIM RACING PEDALS SOLDERING

SIM RACING PEDALS Required Screws

ALIEXPRESS SCREWS:

SIM RACING PEDALS Parts compatibility

You can use other parts to build this load cell pedals (apart from those listed in the required parts section), but you will need to check that they are compatible.

POTENTIOMETERS

  • Ohm: 10k is recommended, but 100k can also work (it depends at the USB Board).
  • Thread: between Ø6mm and Ø9mm
  • Shaft diameter: not to exceed Ø7mm

LOADCELL

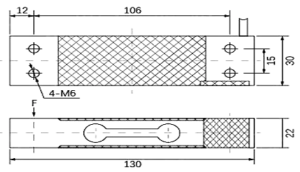
Weight: not below 100kg.
Loadcell dimensions:

Dimension of the Load Cell


ELASTOMERS

  • ØInside diameter: min. 8mm, max. 10mm
  • ØOutside diameter: not to exceed 35mm.

SPRINGS

  • ØInside diameter: not below 8.5mm
  • ØOutside diameter: not to exceed 28mm

If you use springs with different dimensions, I advise you to create the spring centralizer part. You will need to download Freecad (it’s a free software) and read the tutorial that is provided.

Everything is in the Alternative spring centralizer folder.

ALTERNATIVE FOOTREST:

Material of the Sim racing pedals

LASER CUTTING

As for the Sim racing sequential shifter, I recommend stainless steel.

For the few parts that need to be machined, I recommend aluminum because it is softer.

The parts that require machining are the following:

  • Countersinks holes for the Footrests
  • Two holes to drill and tap for the potentiometer levers

All these machining operations can be avoided if you use 3D printing alternatives.

3D PRINTING

I recommend PLA or ABS, the filling will vary according to the pieces, and it will be indicated in the name of the files. Here are recommendations for printing 3D solid parts.

HAND CUTTING AND CNC MACHINING

I recommend aluminum because it is a soft metal that is easy to work with.

How to get the required materials

LASER CUTTING

I advise you to use the 3mm and 5mm “All-in-One” DXF files and request a quote from laser cutting companies near your home. All parts are flat, there are none to bend.

So you can compare prices and choose the most profitable. On average, the asking price for cutting a stainless steel pedal is between €100 and €150 including VAT and shipping. You can save money if you make a combined order.

For France and Europe, I recommend the company ALPM. They provide a very good quality cut for a reasonable price.

3D PRINTING

You can buy a 3d printer or find a 3d printing service like treatstock. Don’t forget the infill percentage if you want a strong product (especially for the brake pedal). The longest part that need to be printed is 220mm.

HAND CUTTING

You need only sheets of papers, printer and Aluminium plates!

CNC MACHINING

I recommend CNC Machining only if you own a CNC Rooter, otherwise it is not economically profitable enough compared to laser cutting.

SCREWS

Bolt depot, Motedis and FixnVis.

Tolerances

  • Laser cutting DXF files and CNC Machining files: 0.2mm
  • 3D Printing: 0.6mm

Informations

  • You are going to buy a file (the CAD models of this pedal), I am not selling a physical product!
  • After your purchase, you will be able to download your file in your member area (Account > Downloads)
  • This product is protected by Licence. You are not authorized to sell or share it.
  • This product was designed to be used on PC, and it is not compatible with consoles (PS4, Xbox, etc).

5 reviews for Sim Racing Pedals

Powered byCusRev
5.0
Based on 5 reviews
5 star
100
100%
4 star
0%
3 star
0%
2 star
0%
1 star
0%

Customer Images

Image #1 from Jeremy Black
Image #2 from Jeremy Black
Image #1 from Steffen Röthling
Image #1 from Julian Zelaya
Image #2 from Julian Zelaya
Image #3 from Julian Zelaya
Image #1 from Jeremy Black

Jeremy Black

Very impressed with these! Thank you so much for putting together all the documentation and files. I was only able to get 7ga steel here in the states so I adjusted the slots for the difference in size. The pedals went together and installed/calibrated with no problems, after a very speedy response on an issue that ended up being my fault. I used plain carbon steel and then used a black oxide finish with a acrylic finish to protect it. The only thing I "added" or "upgraded" was the spacer for arms that connect the potentiometer, I couldn't get the joints tight enough that they wouldn't have any slop but still move freely without sticking. I ended up getting some small M6 thrust bearings off amazon for a few bucks. Now I can tighten the joints snug, and they still are silky smooth. Also make sure to lube the brake M8 bolt where it goes through the elastomer bushings, this pretty much stopped any squeaking from that, and if the throttle or clutch springs squeak, try rotating them a bit to find where they don't. Worked for me. Again thank you very much, looking forward to building the handbrake!!

(2) (0)
Image #2 from Jeremy Black

Jeremy Black

Very impressed with these! Thank you so much for putting together all the documentation and files. I was only able to get 7ga steel here in the states so I adjusted the slots for the difference in size. The pedals went together and installed/calibrated with no problems, after a very speedy response on an issue that ended up being my fault. I used plain carbon steel and then used a black oxide finish with a acrylic finish to protect it. The only thing I "added" or "upgraded" was the spacer for arms that connect the potentiometer, I couldn't get the joints tight enough that they wouldn't have any slop but still move freely without sticking. I ended up getting some small M6 thrust bearings off amazon for a few bucks. Now I can tighten the joints snug, and they still are silky smooth. Also make sure to lube the brake M8 bolt where it goes through the elastomer bushings, this pretty much stopped any squeaking from that, and if the throttle or clutch springs squeak, try rotating them a bit to find where they don't. Worked for me. Again thank you very much, looking forward to building the handbrake!!

(2) (0)
Image #1 from Steffen Röthling

Steffen Röthling

very nice, happy with the pedals. genius Plans, Thank You for your work!

(2) (0)
Image #1 from Julian Zelaya

Julian Zelaya

The pedals design is amazing, they look great. And they work as they look. Keep up the good work

(2) (0)
Image #2 from Julian Zelaya

Julian Zelaya

The pedals design is amazing, they look great. And they work as they look. Keep up the good work

(2) (0)
Image #3 from Julian Zelaya

Julian Zelaya

The pedals design is amazing, they look great. And they work as they look. Keep up the good work

(2) (0)
Image #1 from Jeremy Black
Image #2 from Jeremy Black
Image #1 from Steffen Röthling
Image #1 from Julian Zelaya
Image #2 from Julian Zelaya
Image #3 from Julian Zelaya
1-5 of 5 reviews
  1. This is excellent pedals, very easy to following steps and complete list of parts needed.

    (1) (0)
  2. Very impressed with these! Thank you so much for putting together all the documentation and files. I was only able to get 7ga steel here in the states so I adjusted the slots for the difference in size. The pedals went together and installed/calibrated with no problems, after a very speedy response on an issue that ended up being my fault. I used plain carbon steel and then used a black oxide finish with a acrylic finish to protect it. The only thing I “added” or “upgraded” was the spacer for arms that connect the potentiometer, I couldn’t get the joints tight enough that they wouldn’t have any slop but still move freely without sticking. I ended up getting some small M6 thrust bearings off amazon for a few bucks. Now I can tighten the joints snug, and they still are silky smooth. Also make sure to lube the brake M8 bolt where it goes through the elastomer bushings, this pretty much stopped any squeaking from that, and if the throttle or clutch springs squeak, try rotating them a bit to find where they don’t. Worked for me.
    Again thank you very much, looking forward to building the handbrake!!

    Image #1 from Jeremy Black
    Image #2 from Jeremy Black
    (2) (0)
  3. very nice, happy with the pedals. genius Plans, Thank You for your work!

    Image #1 from Steffen Röthling
    (2) (0)
  4. The pedals design is amazing, they look great. And they work as they look. Keep up the good work

    Image #1 from Julian Zelaya
    Image #2 from Julian Zelaya
    Image #3 from Julian Zelaya
    (2) (0)
  5. Les plans sont au top, je dirai qu’il manque juste a intégré la liste des matériaux (meme si présente sur le site)

    (2) (0)
Add a review
You must be logged in to post a review Log In

Post here your issues or your questions, I will answer you as soon as possible.


Guest
Rabe
2 years 5 months ago

Bonjour,
J’aurai aimé avoir quelques infos avant d’acheter le fichier. La plus grosse pièce fait combien de cm svp? J’ai une delta avec plateau rond de 26cm,pour savoir si ça tient dessus.
Cordialement

Support
2 years 5 months ago

Bonjour,
La pièce la plus longue fait 22cm, donc aucun soucis avec votre imprimante

Bien cordialement

Customer
Julian Zelaya
1 year 7 months ago

Hello! I am struggling to make the code work. I cheked every wire connection just like the picture, but when i put the code into the pro micro board. Just the potenciometers worked, not the loadcell brake. Best regards

Support
1 year 7 months ago

Hi Julian, I send you a solution in your mail. 😉

Customer
John Jose
1 year 7 months ago

Hi same issue as Julina Zelaya load cell is not detected. I dit try with a basic sketch for load cell and it does detect and return values

Support
1 year 7 months ago

Hi John,

I think the issue is from the arrow direction of the load cell fixation in the pedal.

Have you try to change this line :

Brake = scale.get_units(); // If the Brake pedal value is inverted put a – sign in front like -scale.get

Best regards,
DIY SIM STUDIO

Customer
Alex
1 year 6 months ago

Hi, could you clarify from all the available USB board options what the pros and cons of each of them are?
Thanks

Support
1 year 5 months ago

Hi Alex, sorry for the response delay.
It depend to your budget. The cheapest boards are the Arduino Pro Micro and Leonardo, they provide a good quality and accuracy, but you will do more Soldering. The best cards are the Leobodnar LC-USB 16-bit and BU0836-LC, they are plug & play, need less soldering but they are more expensive.

Customer
Jeremy Black
1 year 4 months ago

Hello,
The pedals went together great, however the load cell only reads from 0% to 6% back to 0 when I push the pedal. I’ve verified the correct direction for the load cell by the arrow and the wiring, any ideas what I could be missing? I’m using the LC-USB-16-bit and the 120kg load cell you have linked.

Support
1 year 4 months ago

Hello Jeremy,
Can you switch the green and white wire that are connected to the Leobodnar board ?

Customer
Jeremy Black
1 year 4 months ago

Ah yes! That did the trick, thanks! Now iRacing has an issue that it says configure controls even after I complete the wizard haha, I think I need to delete my controller config file in the ini. But anyway I appreciate the quick response and awesome product!

Support
1 year 4 months ago

You’re welcome Jeremy ^^
Thanks you, don’t hesitate to write a review of your pedal when it’s finished ;).

Customer
Dario Oppitz
1 year 4 months ago

Hi, I’d like to use the optional brass bushings. In order to do that I wanted to change the axis hole size in the DXF file. However, I noticed If I did so, there wouldn’t be much material left between the hole and the closest outer edge. Could I move the edge out by 1mm or would it interfere with any other parts?

Support
1 year 4 months ago

Hello Dario,
The hole of the axis is 10mm diameter, you can find brass bushing with 10mm external diameter in AliExpress (the link is in the page of the pedal). If you change the axis position and diameter it can interfer with the pedal stop, so I don’t recommend to do that.
Here is the link for the self lubricated brass : https://s.click.aliexpress.com/e/_ArKFSI
You must find the one who has 10mm external diameter.

Guest
Langlois
1 year 2 months ago

Bonjour, j’hesite a acheter les plans pour le realiser en feuille aluminium de 3mm, puis-je m’attendre a une bonne finition avec la decoupe au cutter ? La rigidite sera t elle aussi bonne ?
Cela a t’il deja ete realiser en alu?

Cordialement

Support
1 year 2 months ago

Bonjour,
Pour la rigidité, aucun problème avec l’aluminium.
Pour la découpe, il faudrait une scie sauteuse ou une bonne petite scie manuelle avec une lime. Avec un cutter ce n’est pas la peine ça ne marchera pas, surtout qu’il y aussi des pièces avec 5mm d’épaisseur. Il y a une vidéo sur la page qui montre une façon de découper les plaques en aluminium. Réfléchissez bien avant de partir sur ce projet.

Bien cordialement.

Guest
Andreas
1 year 2 months ago

Hey,
im having issues with jumpy potentiometers when my direct drive wheel is on. i used shielded wires and even grounded the pedals, control box and the servo motor. i soldered the shield to ground on both sides. anything i can do to help with my issue?

Support
1 year 2 months ago

Hi Andreas,

What is the model of the potentiometers and the usb board of the pedal?

Bests regards
DIY SIM STUDIO

Guest
Tyler
1 year 1 month ago

Hello, before I purchase i have a question.
Are the plans different between the ways of making it?
If i go 3d printed with a cheap board will I easily be able to swap to steel and higher end parts later of?
Thank you!

Support
1 year 1 month ago

Hello,
You can use the electronics (board, potentiometers and loadcell) and springs/bushing/rodend of the 3D Printed Pedal in the stainless steel pedal without any problems.

Guest
MIka
1 year 1 month ago

Hello, I was wondering wihich USB BOARD do you recomend to use on this project

Support
1 year 1 month ago

Hello Mlka,
It depend to your budget. The cheapest boards are the Arduino Pro Micro and Leonardo, they provide a good quality and accuracy, but you will do more Soldering. The best cards are the Leobodnar LC-USB 16-bit and BU0836-LC, they are plug & play, need less soldering but they are more expensive.

Customer
Lawrence Zapata
1 year 11 days ago

Is there any way for me to get the step file of the project? I just bought the Pedal Kit and i would like to open the model in Solidworks.

Support
1 year 11 days ago

Hello, the step files are included in the CNC folder. But the assembly is not included.

Best regards.

Guest
Floris
1 year 7 days ago

In the material list there is the section “USB BOARDS (only one of them is mandatory”. does this mean that I only can choose between the first and second leobodnar boards and do i need to buy HX711 loadcell amplifier?

Support
1 year 7 days ago

Hello,
If you buy a Leobodnar board, you don’t need Hx711 amplifier. The amplifier is only for Arduino.

You need only one Leobodnar board, the LC-USB 16-bit or the BU0836-LC, they are plug & play, need less soldering but they are more expensive.

Best regards,
DIY SIM STUDIO

Guest
Floris
1 year 7 days ago

That mean that i also dont need to buy | DiyMore Arduino Leonardo board [Quantity: 1] Note: only with HX711 Loadcell Amplifier | Arduino Pro Micro [Quantity: 1] [Option: Mini USB 3-6V] Note: only withHX711 loadcell Amplifier?

Support
1 year 7 days ago

Yes, if you buy an Leobodnar board you don’t need Arduino or Hx711.

Guest
Floris
1 year 7 days ago

Thank you!

Support
1 year 7 days ago

You’re welcome. 👍

Guest
Floris
1 year 6 days ago

Hello, i got two questions. The first one is i want to make only the throttle and break what do i not need from the “all in one” 3mm and 5mm .dxf and do i need to make treads in the aluminum if i print the “recommanded 3d parts? And “mandatory 3d parts”?

Support
1 year 6 days ago

Hello,
The “all in one” files are only for the 3 pedal, if you need only 2 pedal you can use files in the folders.
Only the mandatory 3D parts must be printed, the recommended aren’t mandatory.

Guest
Floris
1 year 6 days ago

Hello, if i make it from aluminum and print the “recommanded and mandatory 3d parts” do i need to tread the aluminum? And i want to make the throttle and brake what do i not need from the “all-in one” 3mm and 5mm .dxf

Support
1 year 6 days ago

Hello,
You can avoid to thread aluminium with the alternative 3D printed parts.
If you want to make only throttle and brake, you can use files in the folders instead all in one file.

Guest
Floris
1 year 6 days ago

Can i send you a message on instagram? To send some photos

Support
1 year 6 days ago

Yes you can.

Guest
Kediz
1 year 4 days ago

My only question is that is the p260 potentiometer an absolute necessary option

Support
1 year 4 days ago

Hello,

The p260 potentiometer is not necessary, you can use the potentiometer of your choice. You can check the compatibility on this page : PARTS COMPATIBILITY > Potentiometers

Best regards,
DIY SIM STUDIO

Guest
Thomas
11 months 16 days ago

Hi,
I have purchased the plans, and have access to Large CNC router to cut aluminium, Would there be any issue cutting it all in 5mm (other than changing the slots from 3mm to 5mm – as I can adjust the file to suit)? I’m trying to make it stiff and durable – but am unable to use stainless. Many thanks.

Support
11 months 16 days ago

Hello Thomas,

You need to respect the 3mm and 5mm thickness, don’t worry the pedal will be very strong with 3mm aluminium plates.

Best regards,
DIY SIM STUDIO

Guest
Garry
10 months 24 days ago

i watched the video and wondering do i need to use the “Leonardo R3 Plus Development Board Pro” from DIYmore or any other arduino board is fine? because i can’t really get the DIYMore one easily.

Support
10 months 24 days ago

Hi Barry,
The link of the Leonardo board is on the description: https://s.click.aliexpress.com/e/_DDY2r8v

Best regards,
DIY SIM STUDIO

Guest
Endika
9 months 25 days ago

Hello! I am thinking of buying to try and do them. However i have a question, in the brake pedal, why is it 100KG? How many KG does the spring support? How could i make it be heavier, what could i improve?

Support
9 months 23 days ago

Hello Endika,

The pressure of 100 kg is the minimum pressure required, but you can without problem use a 150 kg sensor for example. Don’t worry, the brake pedal is very solid regarding pressure. Of course, your sensor must conform to the dimension (see the documentation on loadcell sensor compatibility).

Best regards,
DIY SIM STUDIO

Guest
Ashley
8 months 30 days ago

Hi can i use a arduino nano instead of a pro micro i purchased the wrong board?

Support
8 months 30 days ago

Hello Ashley,

You can’t use Arduino Nano board because it’s not an atmega32u4 microcontroller.

Best regards,
DIY SIM STUDIO

Guest
Ashley
8 months 29 days ago

Thank you for response

Guest
Robert Wilsdorf
5 months 27 days ago

Hi
I built only the brake and throttle pedals. How do I need to change the Arduino code and wiring to make this work? I tried what I think was the most obvious but it’s not working. I am using a Pro Micro and Hx711. DIView shows Rx = flickering Ry = no reading and Rz working with throttle and seems correct.

Guest
Robert Wilsdorf
5 months 26 days ago

Hi
I managed to get it working. I used wrong pin for Rx and Load Cell needs more volts than E+ supply from Hx711. I used a 200kg load cell because of availability and this specific cell operates between 5V and 12V. HX711 only supplies 4.3V. I ordered a 150kg load cell and should get it later this week.

Support
5 months 26 days ago

Hello Robert,

I’m glad you found the solution to your issue. Do not hesitate to come back to me if you have any problems.

Best regards
DIY SIM STUDIO

Customer
RICARDO DE ALMEIDA
5 months 26 days ago

Hello!
Is there a possibility of replacing the potentiometers with a linear hall effect sensor, like the SS49E?

Support
5 months 26 days ago

Hello Ricardo,

The pedal was designed to be used with a potentiometer, not a linear hall sensor, so I can’t confirm if your hall sensor will work.

Best regards,
DIY SIM STUDIO

Guest
Thomas
5 months 20 days ago

Morning, I have setup all 3 pedals but the load cell is not registering any input using a hx711 and CZL-601 120kg loadcell. Any ideas how to fix?
Thanks

Support
5 months 20 days ago

Hi Thomas,

Did you try to make an inverted pressure?

Best regards,
DIY SIM STUDIO

Guest
Thomas
5 months 19 days ago

I’ve done that, it now works. Many thanks

Support
5 months 19 days ago

You’re welcome.

Best regards,
DIY SIM STUDIO

Guest
Thomas
5 months 10 days ago

Hi, I have been using the pedals but the update rate is slow so is quite laggy, using a pro micro. Do you know if there is a possible fix for this? Thanks

Support
5 months 10 days ago

Hi,
It’s only for the brake or the three pedals?
Do you use the spark fun hx711 amplifier ? If you use the default hx711 amplifier, did you tried this tutorial? https://youtu.be/0cxS-a837bY?si=GrvfQJoqAjtT8k-L

Best regards,
DIY SIM STUDIO

Customer
Farhaan Iqbal
5 months 6 days ago

Hello can i use 4mm plates instead of 3mm thats the easiest to source for me

Support
5 months 6 days ago

Hello Farhaan,

The pedal with 4mm thickness plates instead 5mm can work, but the quality of the pedal will be slightly lower, there will be a little play.

Best regards,
DIY SIM STUDIO

Guest
Ricardo
4 months 29 days ago

Hi! Before I get the plans, I was wondering if Assetto Corsa will have any problems “seeing” the pedals (and the H-shifter, Paddle Shifters). I’m all new to sim racing. so I don’t reall know if the game will just be able to see the pedals and shifters and asign them

Support
4 months 29 days ago

Hello Ricardo,

All my products worked very well on Assetto Corsa and others games. However it will not work on consoles (PS 4-5, Xbox, etc.), it’s PC only.

Best regards,
DIY SIM STUDIO

Customer
Ricardo Ribeiro
4 months 29 days ago

Great! Thank you! I’m currently soucing the materials for the pedals, can you tell me the approximate dimensions of the stainless steel sheets I should buy to have enought to build the pedals? How big should the 3 and 5 mm sheets be?

Support
4 months 29 days ago

You’re welcome.

You can find the required plate sheet for 5mm and 3mm thickness in two pictures.

Best regards,
DIY SIM STUDIO

Customer
Tyler Johnson
4 months 9 days ago

Hello, small question, but what are series-Z washers? Can I use normal washers or can you give a link to them?
Thank you

Support
4 months 9 days ago

Hello Tyler,

It’s a type of thin washers that are more recommended for the brake bushing, but you can use all m8 washers if you want. You can find the Z washers here : https://www.fginox.com/fr/rondelle-plate-etroite-decoupee-z-nfe-25513-z-inox.html

Best regards,
DIY SIM STUDIO

Customer
akyomi
4 months 2 days ago

hello
is it possible to make them with wood?
thanks

Support
4 months 1 day ago

Hello,

Yes you can use a solid wood, you will use the CNC files or the hand cutting files.

Best regards,
DIY SIM STUDIO

Guest
Tyler
3 months 25 days ago

I’m a little confused by the self lubricating baring. Do they go in between the Fixed and moving arm? Why recommend only 3 instead of 6? And the bolt recommend is a M6*80 when it looks like a M8*60 would fit the 3d printed edition, but is also different from the metal version

Support
3 months 14 days ago

Hello Tyler,

Sorry the answer delay, I was in holiday.

The self lubricating bearing must be fixed in the axis of the pedal. You need 2 bearings per pedal. The holes diameter of the pedals axis are 10mm, you need bearings with 10mm external diameter to fit them in the holes. And if the internal diameter of the bearings is 6mm, then you need a M6x60 bolt in the axis.

Best regards,
DIY Sim Studio

Customer
Lionel Fialho
1 month 10 days ago

Bonjour, je vien de aller chercher mais piece coupe em laser ( utiliser all in one ) mais je viens de voir pour faire le montagem qu´il manque des pieces.

Chercher dans le fichier mais je ne trouve pas. Il me manque le fichier de la piece ou serre les pedal et la pieces que du spring support celle que doit passer les vise dedans, est aussi la piece ( en L) qui permet bloquer ( Sur le throttle elle est derrier, et sur le brake est devant )?

Pourrais envoyer cest 3 fichier DXF ou STL pour que je puisse terminer sil vout plait

Support
1 month 10 days ago

Bonjour Lionel,

La pièce demandée est dans le fichier “all in one – 5 mm thickness”.

Il faut faire découper les pièces des deux fichiers dxf All one one 3mm et 5mm.

Cordialement,
DIY SIM STUDIO

Guest
Bryan Corbin
1 month 9 days ago

Hi,
Should all of the parts be printed as they are brought into the slicer or do you have recommendations for part orientation?

Support
1 month 9 days ago

Hello Bryan,

I didn’t have recommendations for the part orientation, you can print them as you wish.

But there are here recommendations for printing 3D solid parts : https://markforged.com/resources/learn/design-for-additive-manufacturing-plastics-composites/understanding-3d-printing-strength/3d-printing-settings-impacting-part-strength?__geom=%E2%9C%AA

Best regards,
DIY Sim Studio

Guest
Bryan Corbin
21 days 22 hours ago

Sorry to bother you again but I’m not seeing the Leonardo show up as a game controller, only as a COM Port. How can I troubleshoot?

Support
21 days 10 hours ago

Hello Bryan,

Don’t worry, we’ll find a solution.

– Did you install all library ? (Joystick and Hx711)
– Did you apply the Leonardo sketch as I showed it in my video at 29:14 https://www.youtube.com/watch?v=dn25qfL0sVQ ?
– Did you replace the USB cable of your Pedal (which connects the arduino board of the pedals to the computer) ? I ask because sometimes the problem comes from the USB cable, you have to make sure that it is indeed a DATA cable and that it is connected directly to the computer, without an intermediary.

I’m waiting for your response, and I wish you a nice day!

DIY Sim Studio

Customer
Bryan Corbin
1 day 22 hours ago

Hello, I’ve gone over the video where you are applying the sketch but I get no output from the serial monitor nor the game controller dialog for the brake pedal. If I make no other changes but to apply a different sketch with load cell/HX711 code, I get readings from the pedal. What could I be doing wrong?

Guest
Thierry
24 days 17 hours ago

Bonjour ! J’ai du mal à faire fonctionner le code avec le potentiometre et le load cell. J’ai vérifié chaque connexion comme sur la photo, mais quand j’ai mis le code dans la carte micro-pro. Rien ne fonctionne. Merci de me guider ! Bien Cordialement

Support
24 days 13 hours ago

Bonjour Thierry,

J’ai besoin de plus d’informations pour connaître l’origine du problème.

Ça doit être soit :
– la soudure
– la compatibilité des potentiomètres
– le flashage Arduino pro micro

Vous pouvez m’envoyer une photo du pédalier et de la soudure à cet adresse : diysimstudio@yahoo.com ?

Cordialement,
DIY SIM STUDIO

Guest
Wolfy
24 days 10 hours ago

Hi can I only buy the code ? I’m using arduino micro pro.

Support
24 days 10 hours ago

Hello,

I didn’t sell the arduino code, but if you need it, you can buy the DIY 3D printed pedals which is cheaper (14,99€ instead 29,99€) : https://www.diysimstudio.com/product/diy-sim-racing-pedals/

It contains the same arduino code as the 29,99€ Sim Racing Pedals.

Best regards,
DIY Sim Studio

Guest
Cyd Montelo
16 days 8 hours ago

Bonjour,
J’aimerais savoir si il est possible de remplacer le micro Arduino pro par le STM32?

Support
16 days 6 hours ago

Bonjour,

Je n’ai pas testé cette solution, je ne peux donc pas vous le confirmer. Le pédalier peut fonctionner avec une Arduino Leonardo ou Pro Micro avec amplificateur Hx711.

Cordialement,
DIY Sim Studio


You may also like…