Sale!

DIY SIM RACING PEDALS

(2 customer reviews)

Original price was: 9.99€.Current price is: 7.99€.

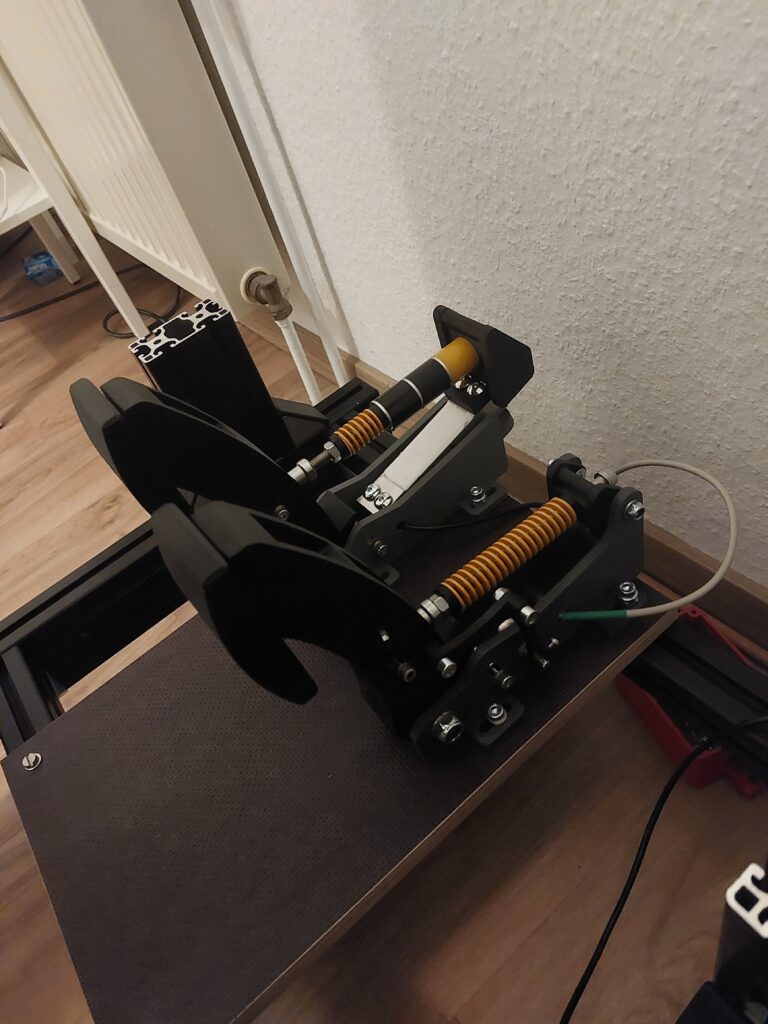
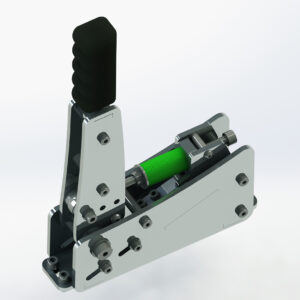
This 3D Printed DIY Sim Racing Pedals is similar to the Sim Racing Pedals but it only includes the 3D printable version for a lower price.

What’s included:

  • CAD Model Files of the 3D Printed DIY Sim Racing Pedals, it include only the .STL files!
  • Arduino Sketch and Wiring diagram for Arduino Pro Micro/Leonardo USB Board
  • Complete tutorial to build the pedal without advanced skills and expensive tools
  • Complete list of all parts you need to build the pedal (screws, electronics…)
  • Free Assistance in the Help and Questions section

Informations:

  • You are going to buy a file (the CAD models), I am not selling a physical product!
  • After your purchase, you will be able to download your file in your member area (Account > Downloads)
  • This product is protected by Licence, you are not authorized to sell or share it.
  • This product was designed to be used on PC, it is not compatible with consoles (PS4, Xbox, etc).

I’m going to list you here 6 good reasons to make your own 3D Printed DIY Sim Racing Pedals. The advantages are the same as for the DIY Sim Racing Pedals.

DIY Sim Racing Pedals: the advantages

CUSTOMIZATION

3D printing allows for personalized designs tailored to individual preferences and ergonomics, ensuring optimal comfort and performance.

COST-EFFECTIVE

Producing pedals via 3D printing can be more affordable than purchasing pre-made ones, especially when considering the customization options.

LIGHTWEIGHT

The 3D printed sim pedals can be designed to be lightweight yet durable, improving the overall feel and response time.

ACCESSIBILITY

With the widespread availability of 3D printers and downloadable designs, anyone can create high-quality racing pedals at home.

MATERIAL VARIETY

Choose from a range of materials to balance strength, flexibility, and cost, tailoring the pedal to specific needs and preferences.

MAINTENANCE

Easy to replace or modify individual parts without needing to replace the entire pedal assembly, reducing long-term costs.

Strength and Durability of your 3D Printed Sim Pedals

MATERIAL SELECTION

The strength and durability of the pedals largely depend on the material used. High-quality filaments such as PLA offer excellent strength and resilience, making the pedals capable of withstanding significant pressure and stress. Here are recommendations for printing 3D solid parts.

DESIGN OPTIMIZATION

3D printing allows for intricate designs with optimized geometry. This means that the 3D printed sim pedals is designed with reinforced structures that provide additional strength without adding excessive weight. The longest part that need to be printed is 220mm.

CUSTOMIZATION AND MAINTENANCE

One advantage of 3D printing is the ease of maintenance and customization. If a part of the pedal wears out or breaks, it can be easily reprinted and replaced. This ensures the overall durability of the pedal system is maintained over time.

SHOPPING LIST FOR YOUR DIY SIM RACING PEDALS

SPRINGS AND ELASTOMERS

POTENTIOMETERS AND LOADCELL

USB BOARDS (only one of them is mandatory)

REVIEWS OF THE DIY SIM PEDALS

“In regards to the 3D printed version I will say I try to beat these up so hard, I smashed on them, I really figured they would break they just didn’t in my testing.” – Shaun Cole (The SimPit)

BUILDING OF THE DIY SIM RACING PEDALS

A second tutorial is available here.

IN-GAME TRIAL

2 reviews for DIY SIM RACING PEDALS

Powered byCusRev
5.0
Based on 2 reviews
5 star
100
100%
4 star
0%
3 star
0%
2 star
0%
1 star
0%

Customer Images

Image #1 from Bartłomiej Wojtaszewski
Image #2 from Bartłomiej Wojtaszewski
Image #1 from Jonas Feder
Image #2 from Jonas Feder
Image #3 from Jonas Feder
Image #4 from Jonas Feder
Image #1 from Bartłomiej Wojtaszewski

Bartłomiej Wojtaszewski

Very good and budget friendly project. Any question was quickly answered by author. I can recommend it to everyone

(2) (0)
Image #2 from Bartłomiej Wojtaszewski

Bartłomiej Wojtaszewski

Very good and budget friendly project. Any question was quickly answered by author. I can recommend it to everyone

(2) (0)
Image #1 from Jonas Feder

Jonas Feder

Great work :) the 3d printed pedals are a solid choice! The build is a two pedal version, without a clutch. My T3pa pedals are like a toy in comparision. The whole project was a great experience and the support from Diysimstudios was more than awesome :)) any question was answered very quickly via Email. Highly recommend to do that diy project. Best regards and have fun ;-) Jonas

(4) (0)
Image #2 from Jonas Feder

Jonas Feder

Great work :) the 3d printed pedals are a solid choice! The build is a two pedal version, without a clutch. My T3pa pedals are like a toy in comparision. The whole project was a great experience and the support from Diysimstudios was more than awesome :)) any question was answered very quickly via Email. Highly recommend to do that diy project. Best regards and have fun ;-) Jonas

(4) (0)
Image #3 from Jonas Feder

Jonas Feder

Great work :) the 3d printed pedals are a solid choice! The build is a two pedal version, without a clutch. My T3pa pedals are like a toy in comparision. The whole project was a great experience and the support from Diysimstudios was more than awesome :)) any question was answered very quickly via Email. Highly recommend to do that diy project. Best regards and have fun ;-) Jonas

(4) (0)
Image #4 from Jonas Feder

Jonas Feder

Great work :) the 3d printed pedals are a solid choice! The build is a two pedal version, without a clutch. My T3pa pedals are like a toy in comparision. The whole project was a great experience and the support from Diysimstudios was more than awesome :)) any question was answered very quickly via Email. Highly recommend to do that diy project. Best regards and have fun ;-) Jonas

(4) (0)
Image #1 from Bartłomiej Wojtaszewski
Image #2 from Bartłomiej Wojtaszewski
Image #3 from Jonas Feder
Image #4 from Jonas Feder
Image #5 from Jonas Feder
Image #6 from Jonas Feder
1-2 of 2 reviews
  1. Very good and budget friendly project. Any question was quickly answered by author. I can recommend it to everyone

    Image #1 from Bartłomiej Wojtaszewski
    Image #2 from Bartłomiej Wojtaszewski
    (2) (0)
  2. Great work 🙂 the 3d printed pedals are a solid choice! The build is a two pedal version, without a clutch. My T3pa pedals are like a toy in comparision. The whole project was a great experience and the support from Diysimstudios was more than awesome :)) any question was answered very quickly via Email. Highly recommend to do that diy project. Best regards and have fun 😉 Jonas

    Image #1 from Jonas Feder
    Image #2 from Jonas Feder
    Image #3 from Jonas Feder
    Image #4 from Jonas Feder
    (4) (0)
Add a review
You must be logged in to post a review Log In

Post here your issues or your questions, I will answer you as soon as possible.


Customer
Jonas Feder
1 year 3 months ago

Hello, is it possible to build the 3d model without the clutch? Best regards, Jonas

Support
1 year 1 month ago

Hi Jonas,
Thanks for your purchase.
You can of course build the pedal without the Clutch.
Have fun ! 😉

Customer
Timm Schipper
1 year 3 months ago

Hello,

I bought the 3d print version and also downloaded the files. Unfortunately I can only find a list of the required screws. But I can’t find what kind of load cell module I need anywhere.

Greetings Timm

Support
1 year 1 month ago

Hi Timm,
Thanks for your purchase.
The loadcell is listed in the “PARTS BUYING GUIDE: ELECTRONICS” section of the pedal description.
Brake Loadcell [Quantity: 1] [Option : 120kg] : https://fr.aliexpress.com/item/32832590009.html?spm=a2g0s.9042311.0.0.27426c37Jh5N91
Have fun ! 😉

Customer
JV
1 year 1 month ago

Hello,
I just bought the 3d print version as well and I do no see the “PARTS BUYING GUIDE: ELECTRONICS” section of the pedal description” anywhere in the contents of files downloaded or the website.

Support
1 year 1 month ago

Hello,
Thanks for your purchase.

The list is here : https://www.diysimstudio.com/produit/diy-sim-racing-pedal/

Best regards,
DIY SIM STUDIO

Customer
Victor Oliveira
8 months 4 days ago

Hello,
Should I print same orientation as the files shows?

Support
8 months 3 days ago

Hello,

You must use the 3D printing software to simulate your 3D printing, the software will give you the best parameter for print the parts.

Best regards,
DIY SIM STUDIO

Customer
Victor Oliveira
8 months 3 days ago

wat orientation or rotation did you use to print the mobile parts? did you print the mobile parts standing or layed flat? im struggling to add supports to it

Support
7 months 21 days ago

For the mobile parts, I recommend you to print them in the flat side orientation.

Best regards,
DIY SIM STUDIO

Customer
Brayton Thompson
3 months 15 days ago

Hello i was wondering if you had any tips for the 3d printed version. I get a lot of side to side motion from the pedal. It looks like the M10 bolt that acts as the rotation axis doesn’t fit the hole well and there is some (especially over the threaded section where the pedal arm can move up and down on the bolt. I also get a lot of groaning when applying pressure to the pedal. Like something is binding? Perhaps the m10 bolt again?

Support
3 months 12 days ago

Hello,
If you can’t put your M10 bolt in the hole, you need to make a 10mm hole diameter with a electric drill. I designed the 3D Mobile part with a 10.6mm hole to avoid this issue.

Guest
Naren
23 days 19 hours ago

Hello, I’m having the same issue as Brayton, I think what they were trying to say was that the M10 hole was too big, not too small. Because of this, the pedals shift left and right and it makes the whole thing very unstable. Is there any way to fix this?

Support
23 days 4 hours ago

Hello Naren,

The hole is 10mm with 0.6mm of tolerance.

If you have lateral instability for the mobile part, you need a M10 LOCK NUT to tighten the M10 axis bolt.

You will need to tighten enough to avoid lateral instability, but not too much.

Best regards,
DIY SIM STUDIO

Customer
Facundo Matias Beron
3 months 13 days ago

I would like to know in the 3D version what the recommended orientation is for each piece.
It is not a minor fact since they are mechanical parts and the software does not do it correctly automatically.
Could you share the position in which you print each of the main parts? Thank you in advance!

Support
3 months 12 days ago

Hello,
For the mobile and fixed parts, you need to print them in the side face. You will have to manage the support in your software. More informations here : https://www.tomshardware.com/how-to/choose-3d-printing-supports

Customer
Frederick Blake
2 months 20 hours ago

Hi, I am currently building your 3d pedals, and trying to upload the sketch to the arduino, however it is not able, as the IDE cannot find “pluggableUSB.h”
I was wondering if you could advise?
Regards,
Fred

Support
2 months 3 hours ago

Hi Frederick,

Did you try to delete and install Arduino? Have installed Hx711 and Joystick library?

Best regards,
DIY SIM STUDIO

Customer
Frederick Blake
1 month 16 days ago

ME again, previous issue has been fixed, had been using a fried board, replaced with a leonardo, however when checking on diview im not getting any readings from the board?

Support
1 month 16 days ago

Hello Frederick,

Did you use an DATA usb cable ?

The Arduino compilation was successful?

Did you try the Windows Joystick Controller?

Best regards,
DIY SIM STUDIO

Customer
Frederick Blake
1 month 16 days ago

in answer, yes, yes and yes. the pots are wired in 5v ground and signal with each signal wire going to A0 and A1 respectively, yet no signal seems to be getting to either diview or windows joystick controller. The board is working fine, as when testing the pots in the serial monitor with a basic print serial sketch it works fine.

Support
1 month 15 days ago

Can you send me photos of your soldering? The mail : diysimstudio@yahoo.com

Best regards,
DIY SIM STUDIO

Guest
Sarthak
9 days 22 hours ago

Hello how much 3d printing is in kills total? Without base and clutch

Support
9 days 22 hours ago

Hello,

If you buy a 3D Printer (in treatstock for exemple), the cost is about 50-70€.

If you print the parts yourself with your own 3D printer, the cost will be much cheaper (you will just have to count the price of your filament).

Best regards,
DIY Sim Studio

Guest
Sarthak
9 days 21 hours ago

I mean kilos sorry I’m getting it 3d printed from someone to wanted to know the cost before buying it thank you!

Support
9 days 20 hours ago

This will depend on the printing parameters (filling, finishing, etc.). But you need to count between approximately 1000g and 1500g.

Best regards,
DIY Sim Studio