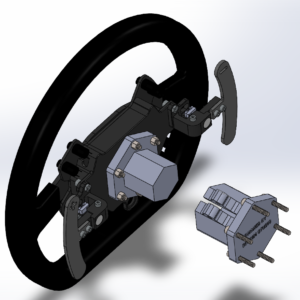
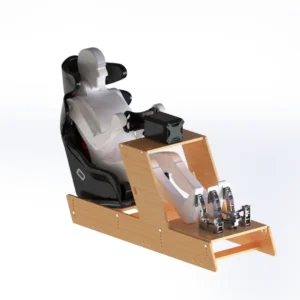
In this tutorial, I will explain step by step how to make a replica of the DIY AMG Steering Wheel Replica using the plans from DIY Sim Studio.
We will begin by manufacturing the parts, then assembling them step by step:
- Carbon covering
- Leather grip covering
- Paddle shifters
- Electronics
- Assembly on the G29 and initial tests
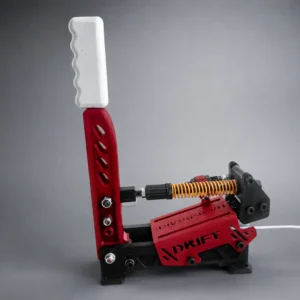
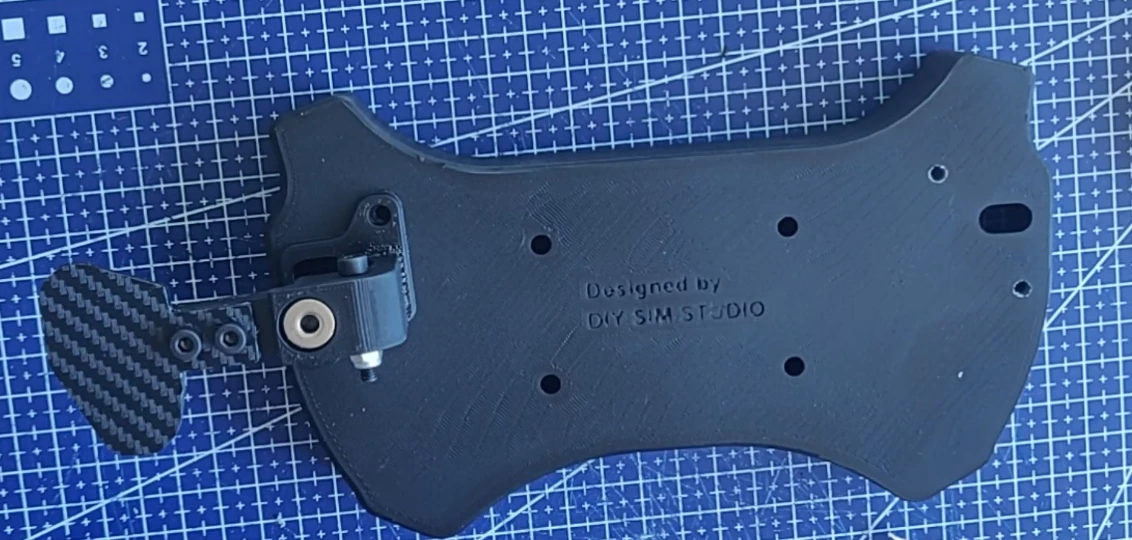
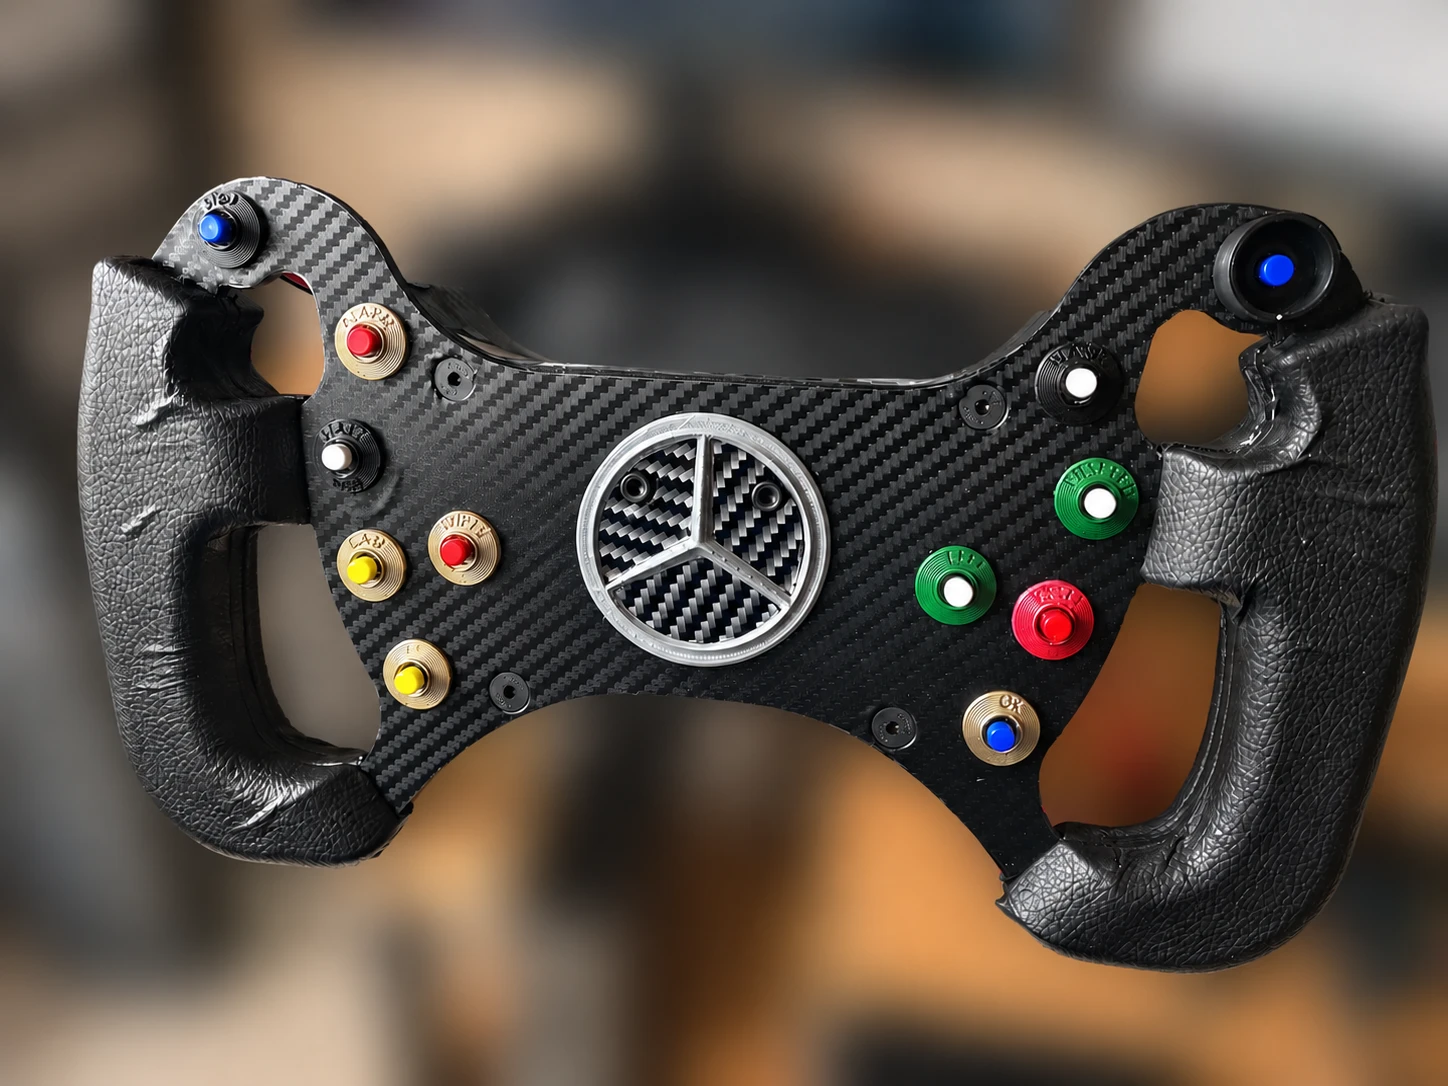
At the end of this tutorial, you should be able to make this steering wheel:
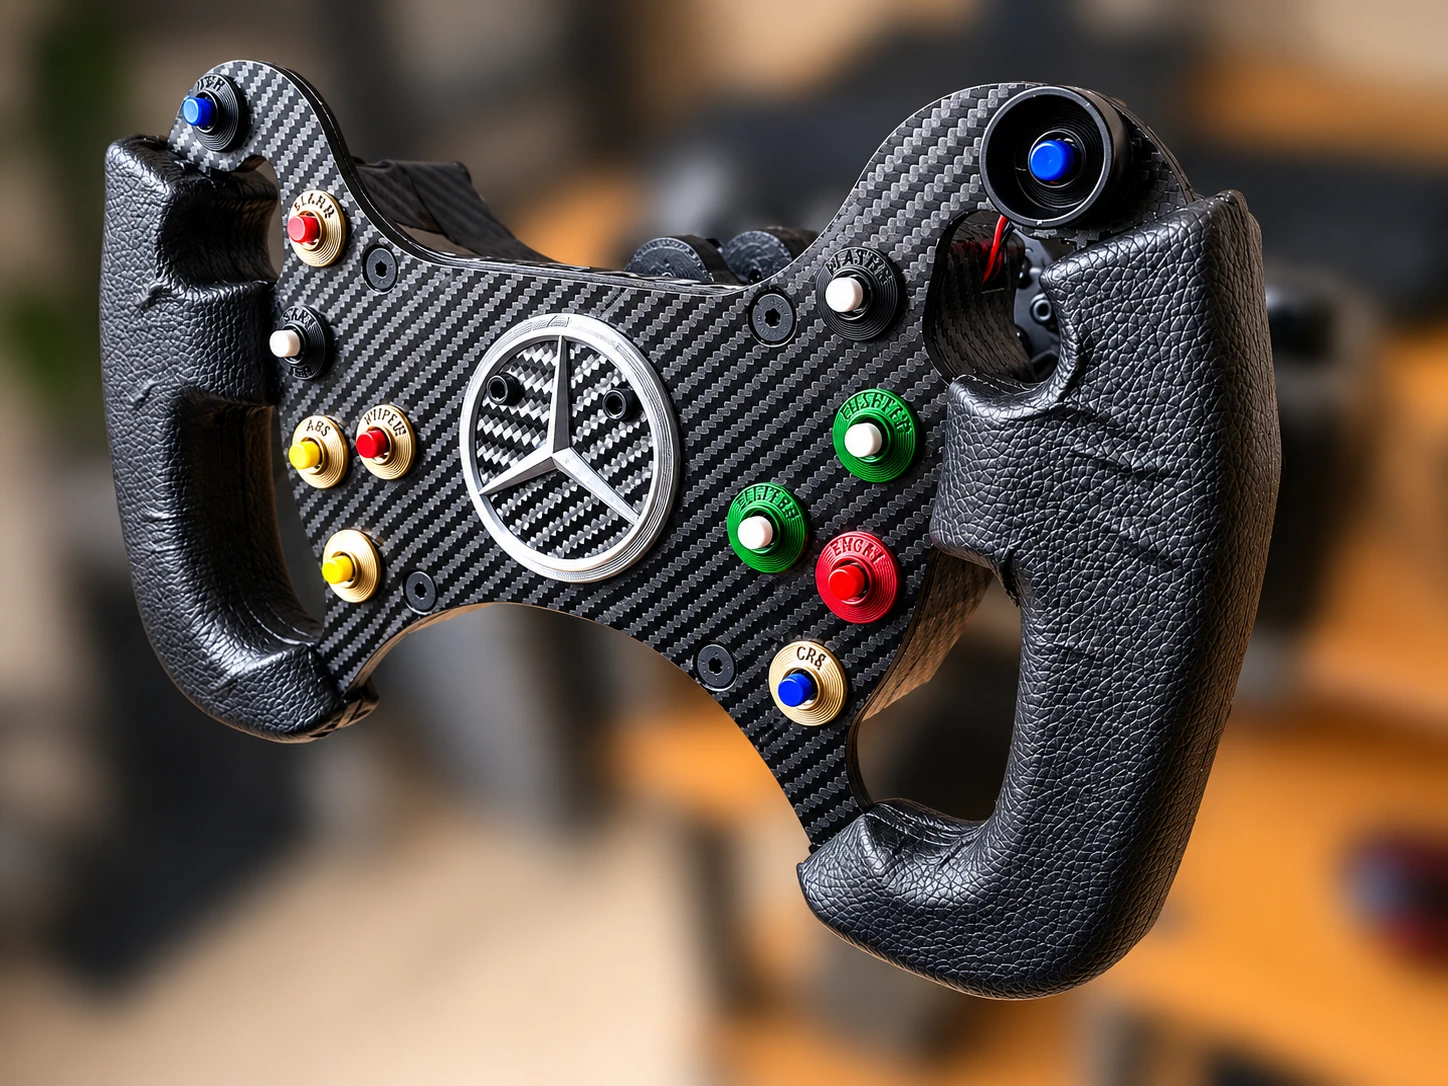
Let’s go!
Manufacturing method: 3D printing, CNC machining and laser cutting
To begin, you need to know what materials you will use to make your steering wheel. This will depend on the materials you have and your budget.
The plans are available in STL format for 3D printing, and also in STEP format if you wish to have them machined with a CNC machine (preferably for aluminum).
The DXF format is also available for certain parts, such as the steering wheel main plate and the paddle shifters. There are also some PDF sheets available for printing and manual cutting with a jigsaw.
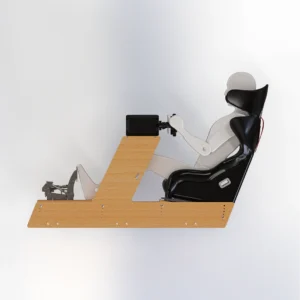
You’ll decide whether this steering wheel is entry-level or high-end. For example, if you own a Logitech G29, you can opt for the 100% 3D-printed version: it offers the best value for money, and most importantly, the wheel won’t be too heavy for your Logitech.
But if you have a direct drive base, and a higher budget, you can opt for a high-end solution: main plate + shifters plates cutted from carbon, casing (rear box) machined from black anodized 7075 aluminum, electronics with an Arduino board and SimHub and a Bluetooth module, 3D printed grips in TPU, molded in PU, or machined from wood and covered with quality Alcantara/Leather.
You can also mix and match these options, or for example, start with the 3D-printed version and then upgrade it gradually, depending on the evolution of your setup and your budget. The parts are all identical regardless of size, so they can be easily replaced.
In this tutorial, we will show you the 100% 3D printed solution.
DIY AMG Steering Wheel Replica Required Parts (Bill Of Material)
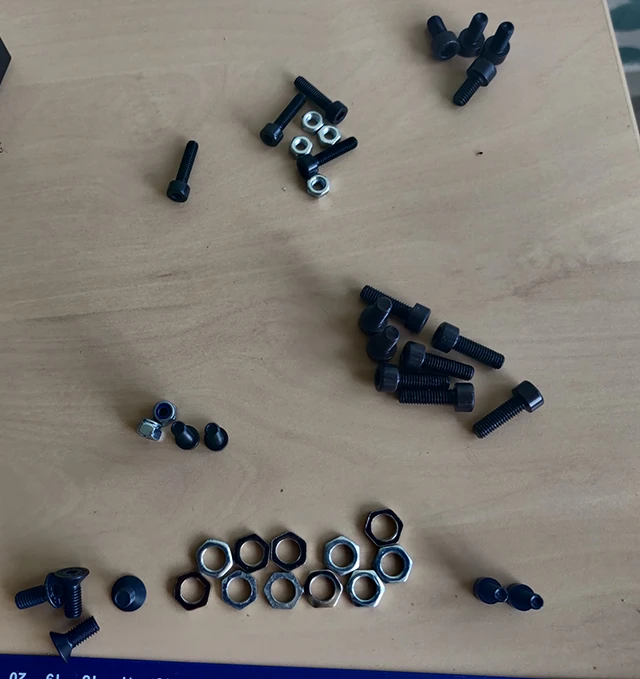
List of required screws:
- 30mm Steering Wheel Plate Mounting: M5x25 Countersunk Bolt (Quantity: 4)
- 40mm Steering Wheel Plate Mounting: M5x35 Countersunk Bolt (Quantity: 4)
Handles assembly: M5x16 Bolt (Quantity: 8)
Mercedes Logo Fixing:
- M4x10 Countersunk Bolt (Quantity: 2)
- M4 Nuts (Quantity: 2)
Magnetic Paddle Shifter:
- M4x25 Bolt (Quantity: 2)
- M4 Lock Nut (Quantity: 2)
- M4x16 Bolt (Quantity: 4)
- M4 Nut (Quantity: 4)
- M5x10 Bolt (Quantity: 4)
The BOM is available in the “Bill of Materials” section of the product page.
Step 1: Carbon Fiber Covering
We’ll start with the covering.
I used this film, easily found on Aliexpress: 2D, 3D, 4D, 5D, and 6D carbon fiber vinyl. I chose the 3D carbon black option; it’s not too shiny, it’s classy and discreet.
A scalpel and a scraper will suffice as tools. We’ll start by covering the main steering wheel plate.
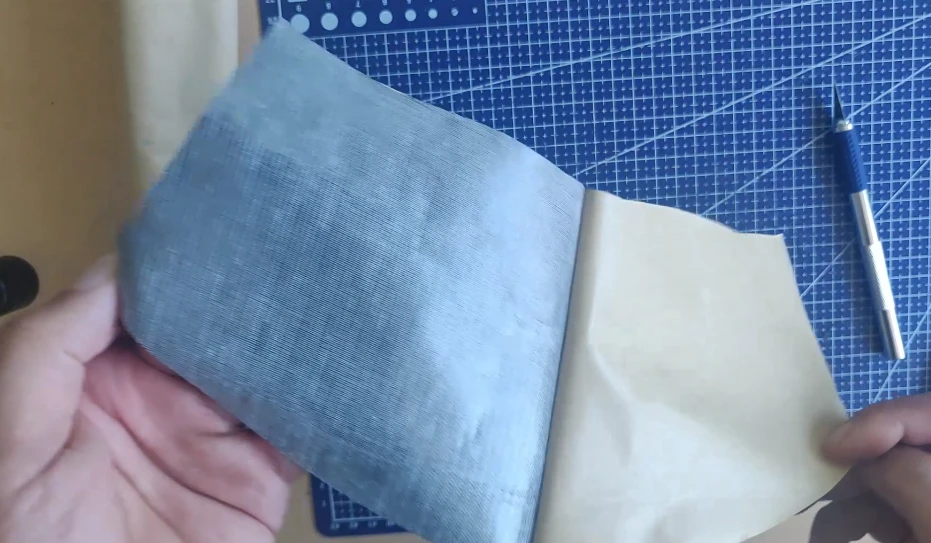
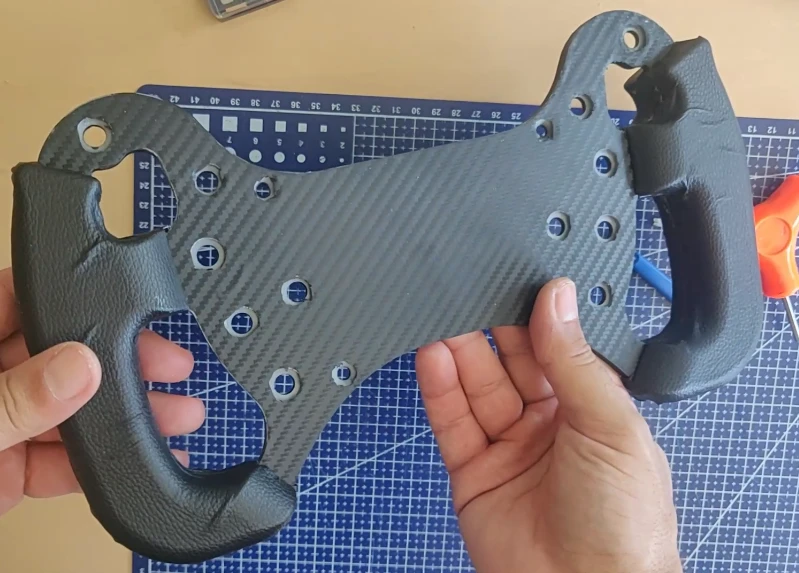
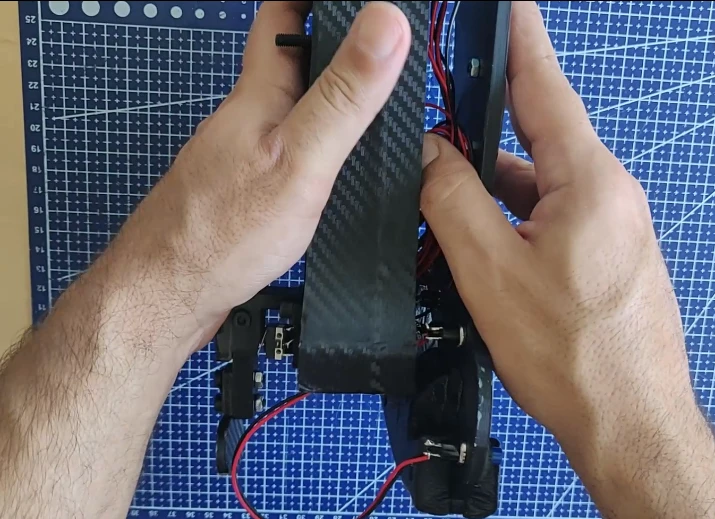
Steering wheel main plate cover
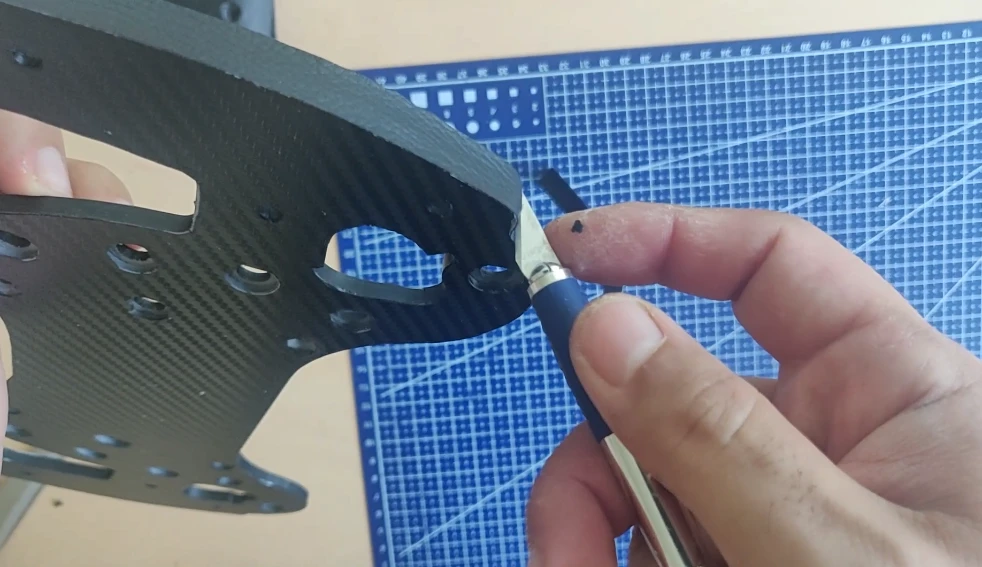
Place the plate on the back side of the carbon film (the cutting area), and trace the outline of the plate with a scalpel. Start with a simple square that encompasses the plate, and then begin tracing the outline of the wheel.
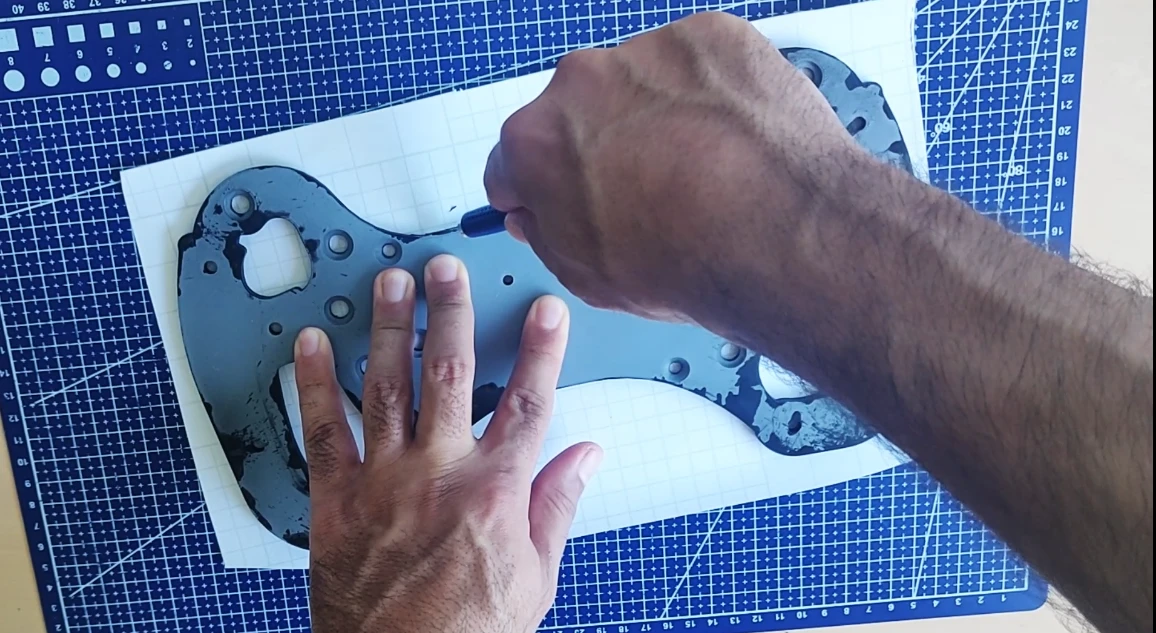

Now you need to place the piece you cut out onto your steering wheel. Go very slowly, and carefully check the top, bottom, left, and right edges. If it sticks out, don’t worry, you can adjust it with the scalpel.
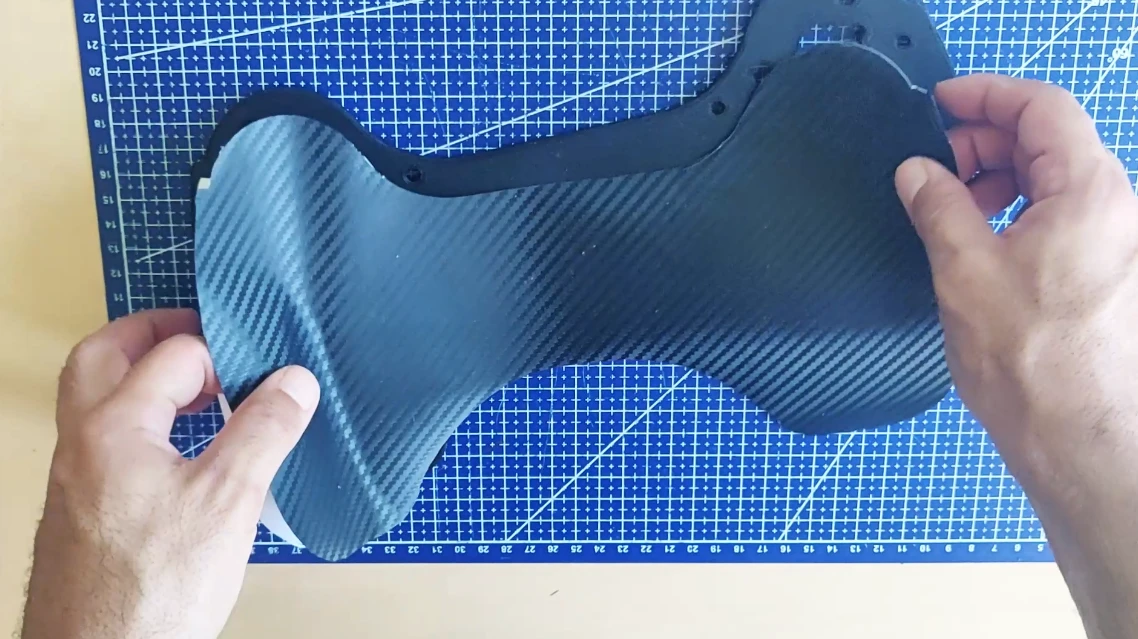
Once your carbon fiber is in place, you need to smooth it with a squeegee to ensure it adheres properly. You can also heat it with a hairdryer or a heat gun.

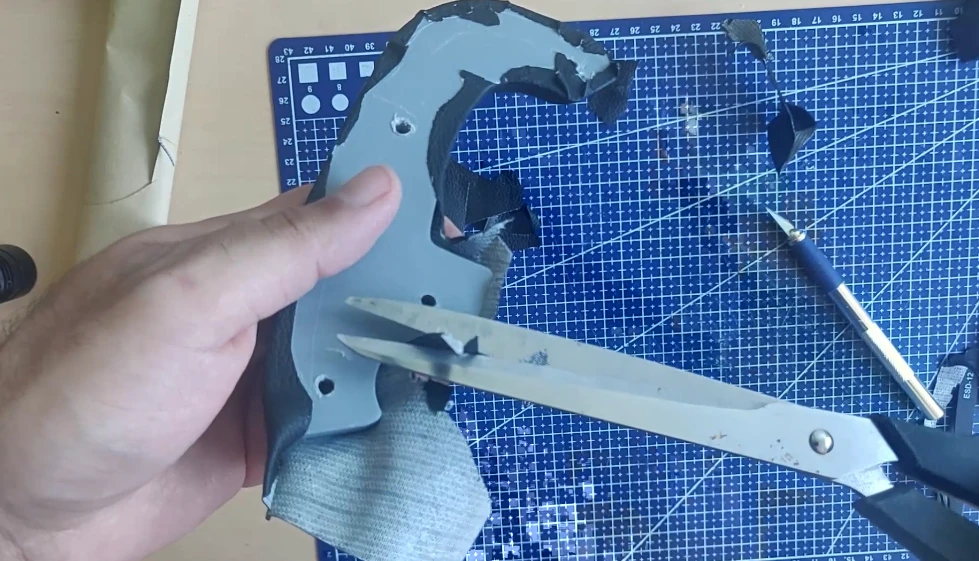
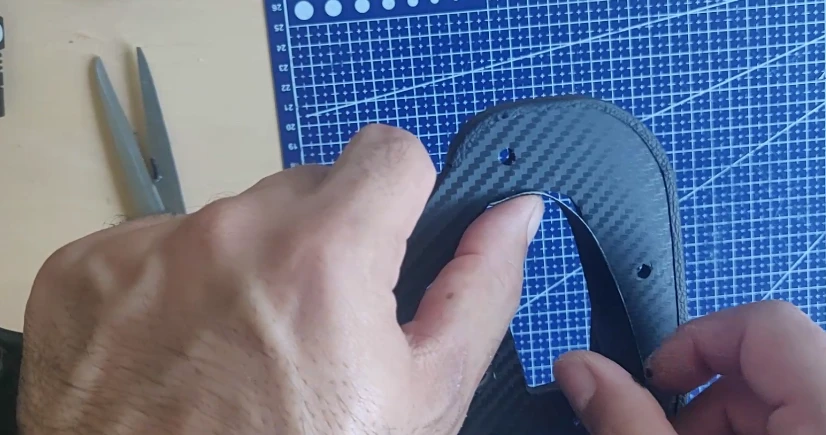
Next, remove the excess contours with the scalpel.
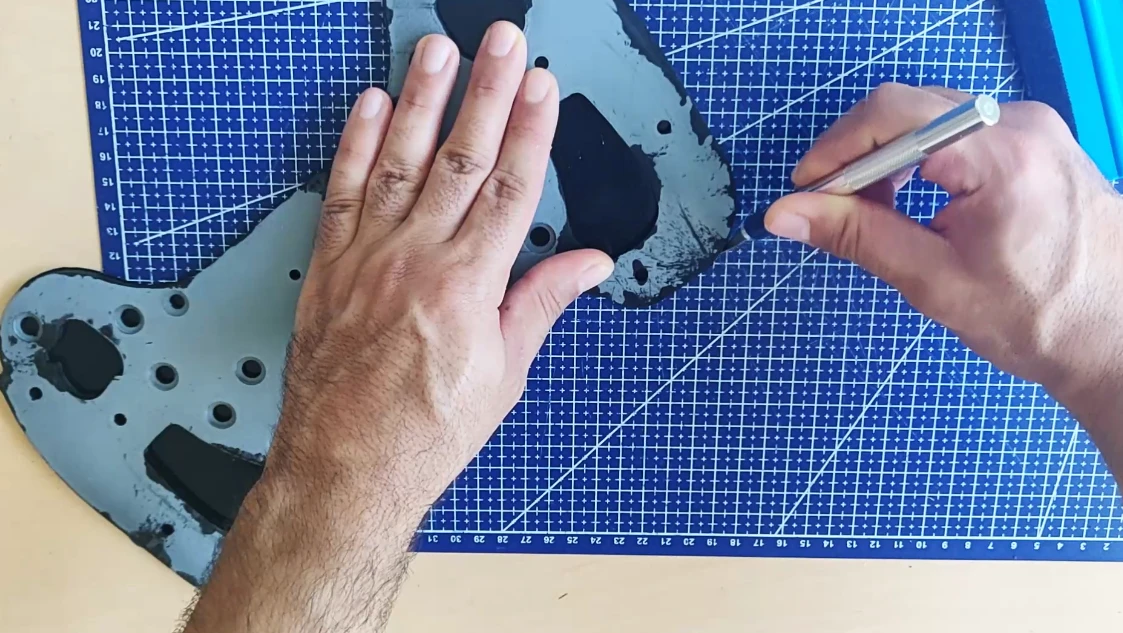
Finally, the excess carbon film inside the handles needs to be removed.
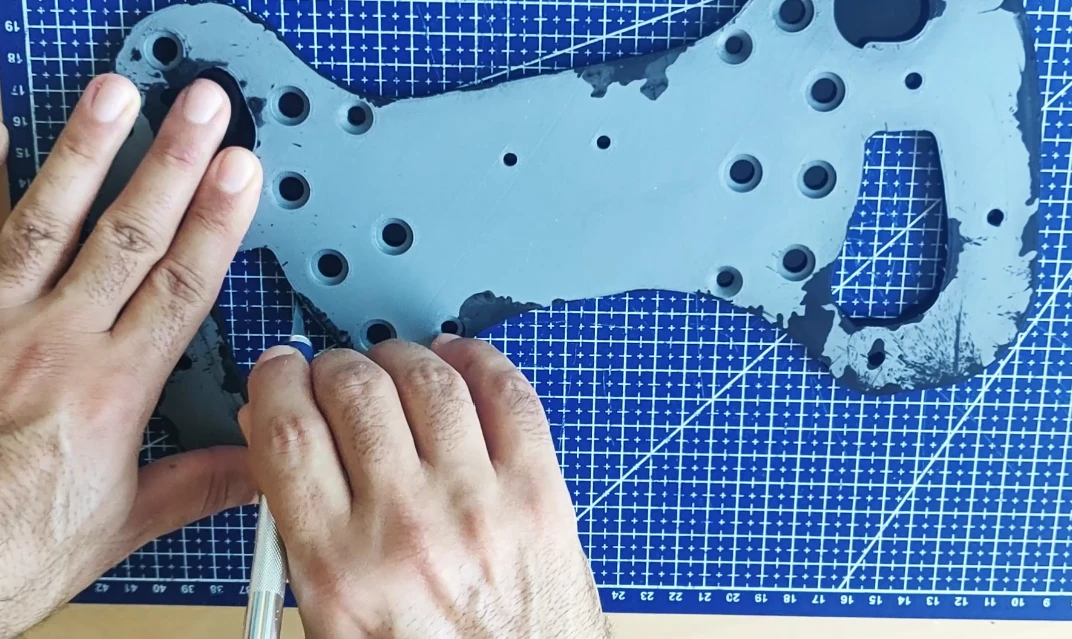
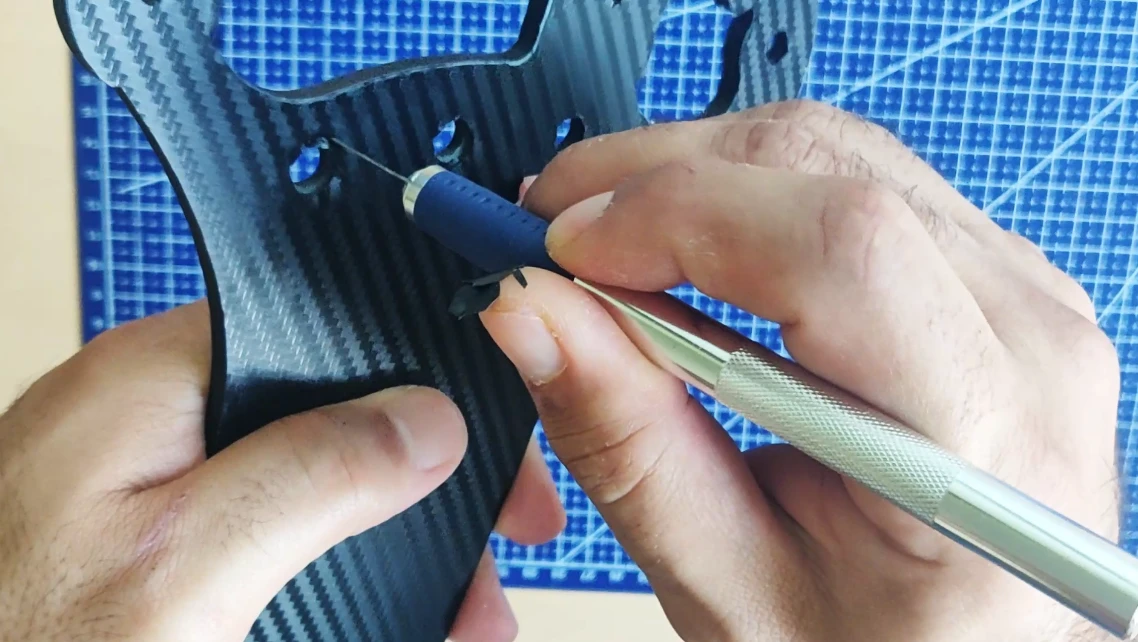
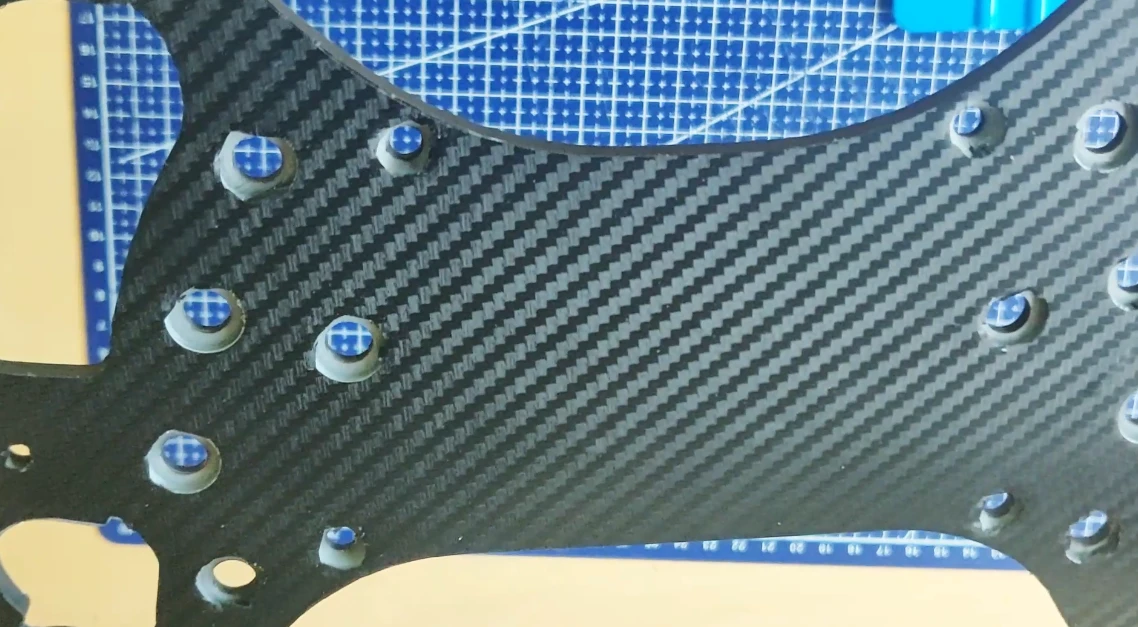
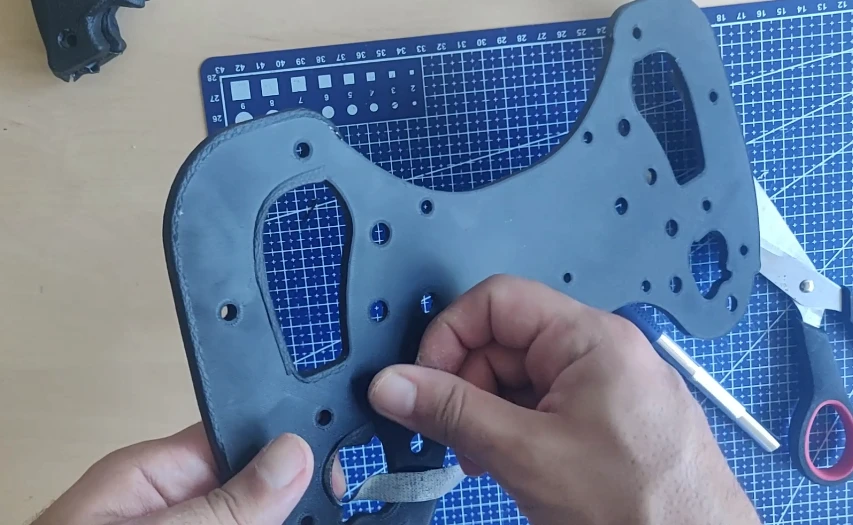
Now, drill holes in the buttons, following their outlines. Make sure to draw a complete circle, especially for the holes where the countersunk screws will be attached; this will prevent the carbon fiber from being pulled inwards (and therefore deformed) when you tighten the buttons and screws.

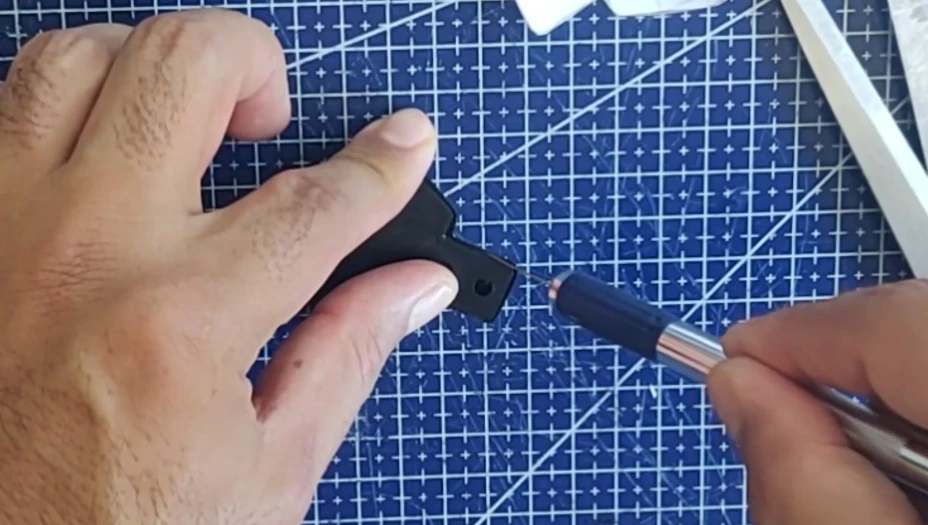
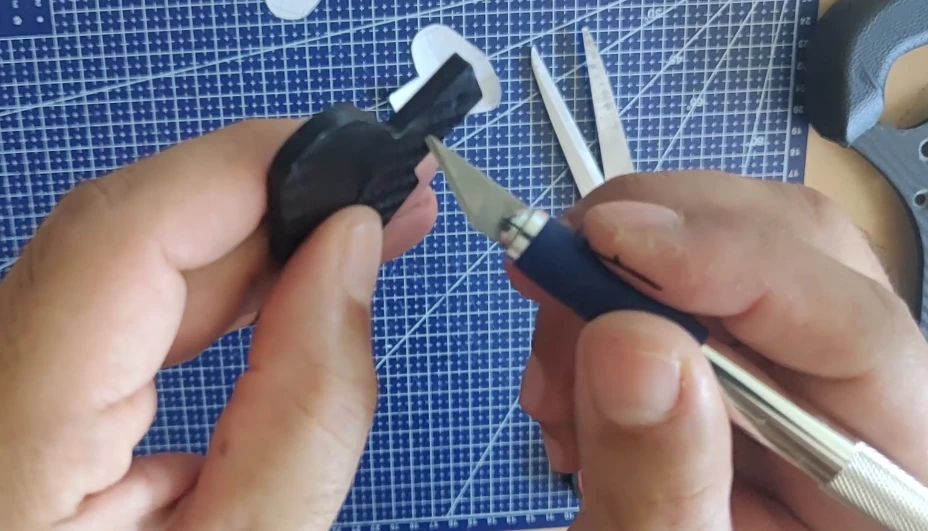
Covering the Paddles Shifter
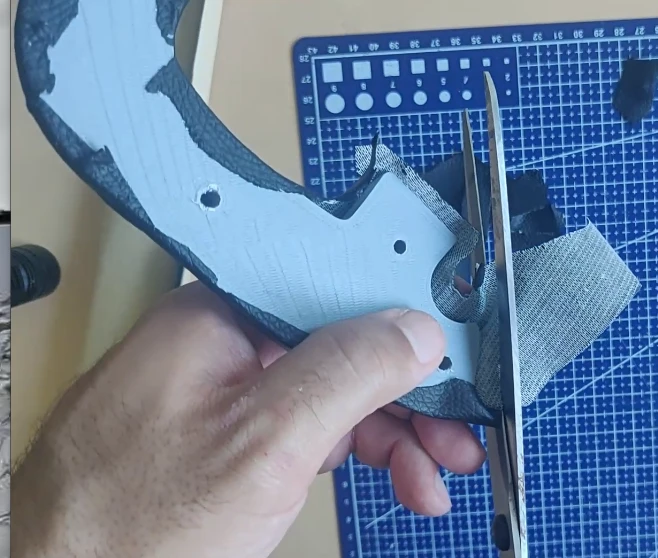
We will now cover the speed paddles. The process is almost identical to that used for the plate.
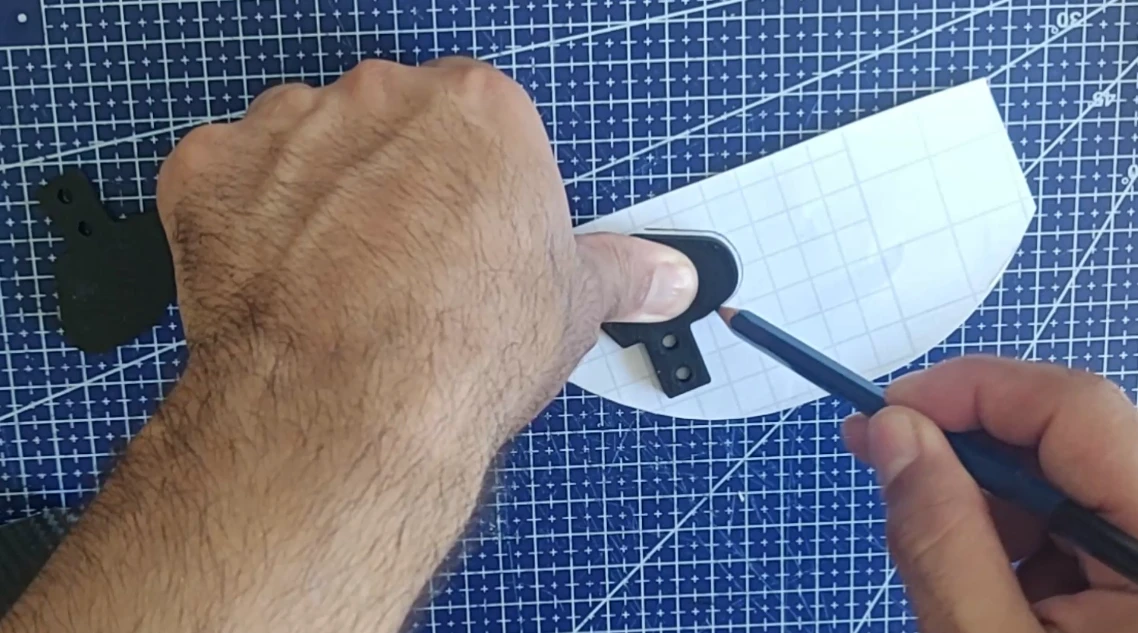
- The outline of the palette is drawn with a pencil.
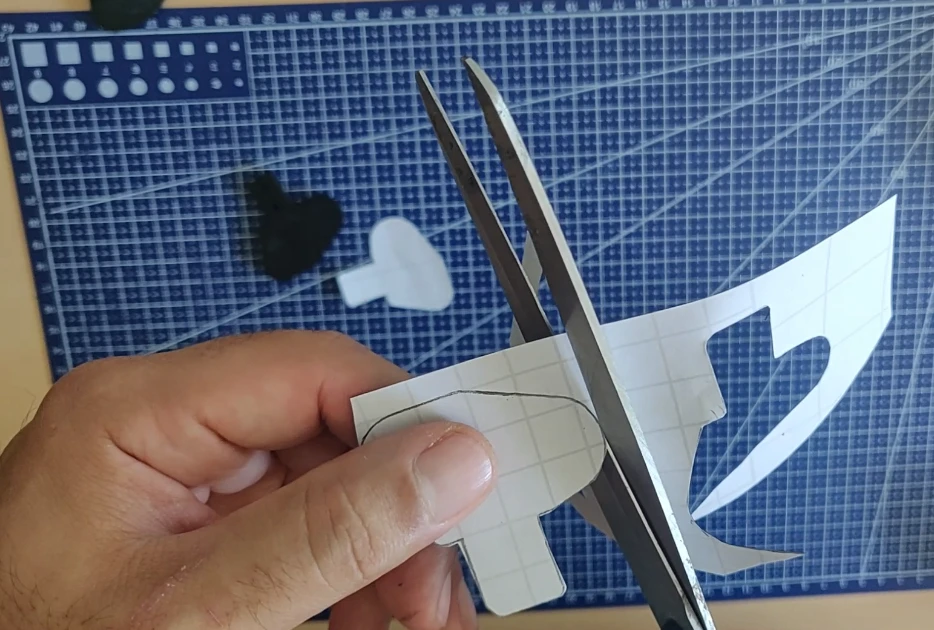
- We cut with scissors
- We cover the shifter plate
- The excess material is cut off along the edges.
- We trace the outlines of the two holes to prevent deformation after tightening the screws
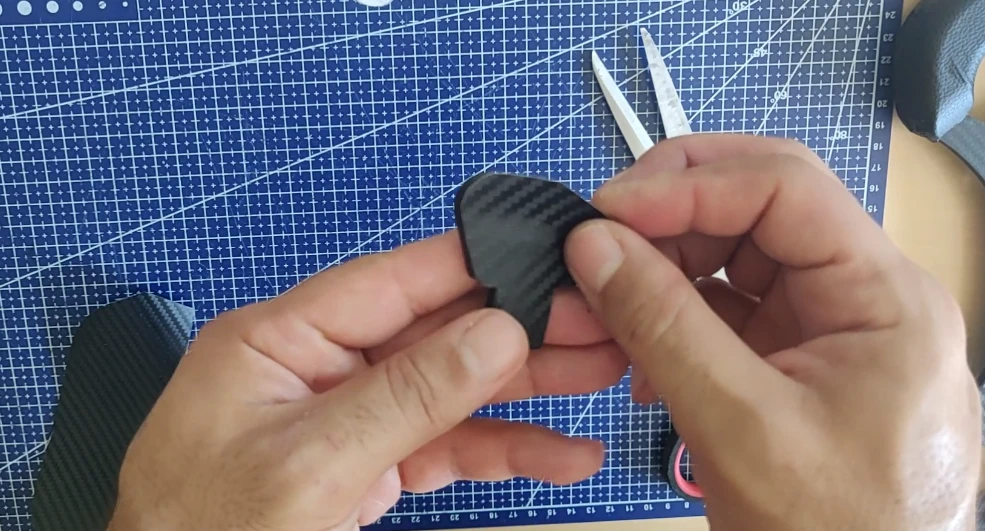
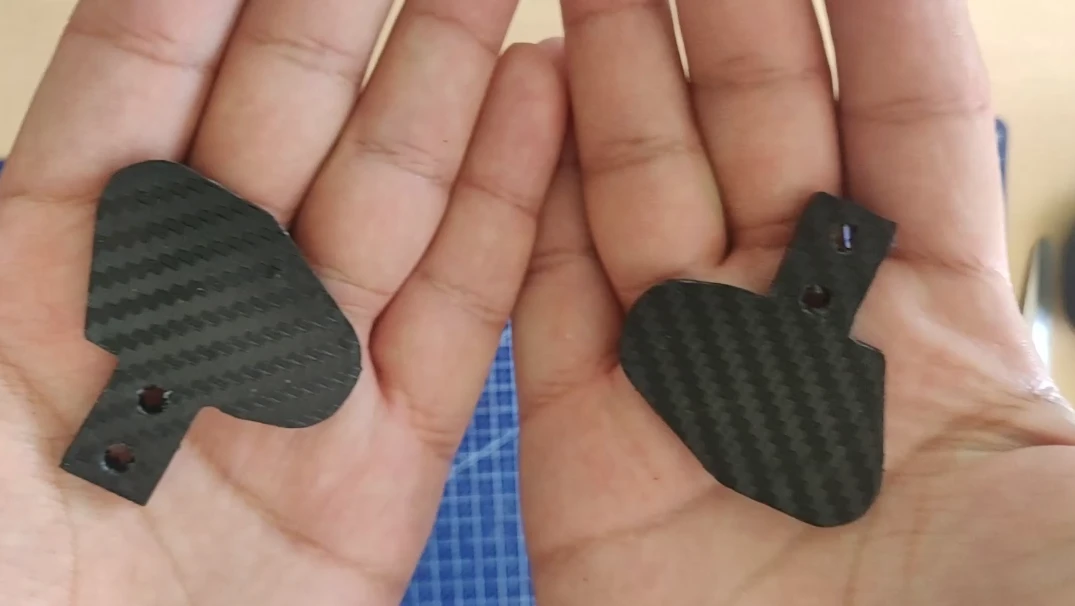
The result:
Mercedes logo covering
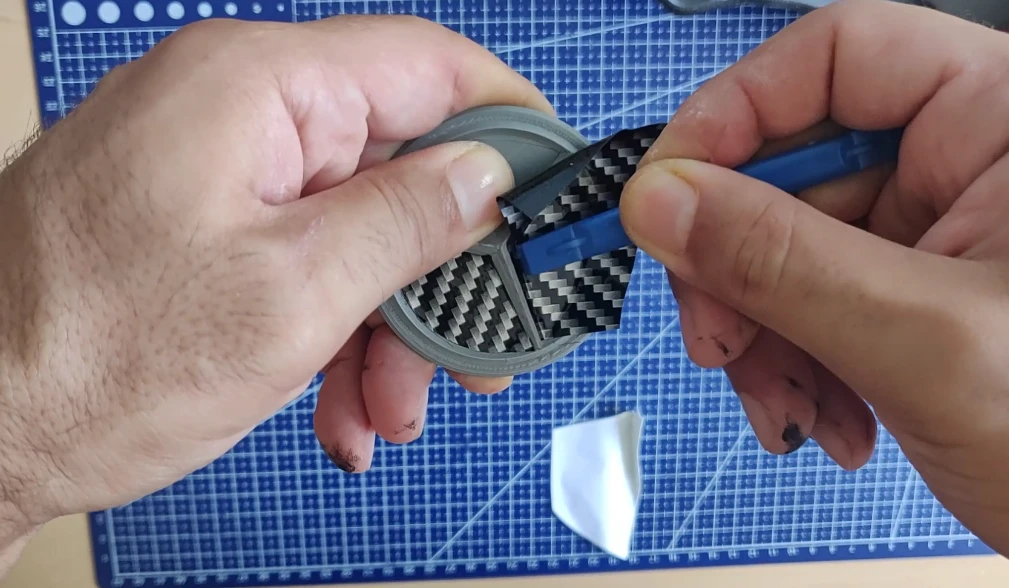
Now we’re going to cover the Mercedes logo.
This time I used an old piece of carbon, a little lighter in color, to differentiate it from the default carbon of the steering wheel.
Simply cut the carbon fiber piece into three parts and stick them into each section of the logo. Then use a wrapping tool (blue in the photo) to completely fill the corners and eliminate any air pockets.
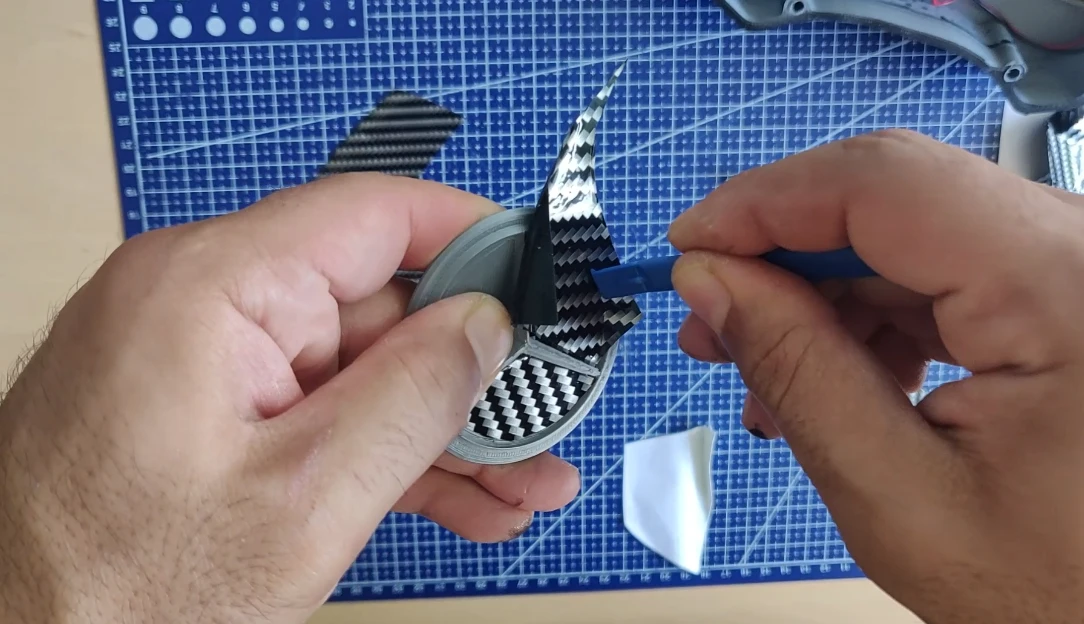
Next, the excess material must be removed with the scalpel:
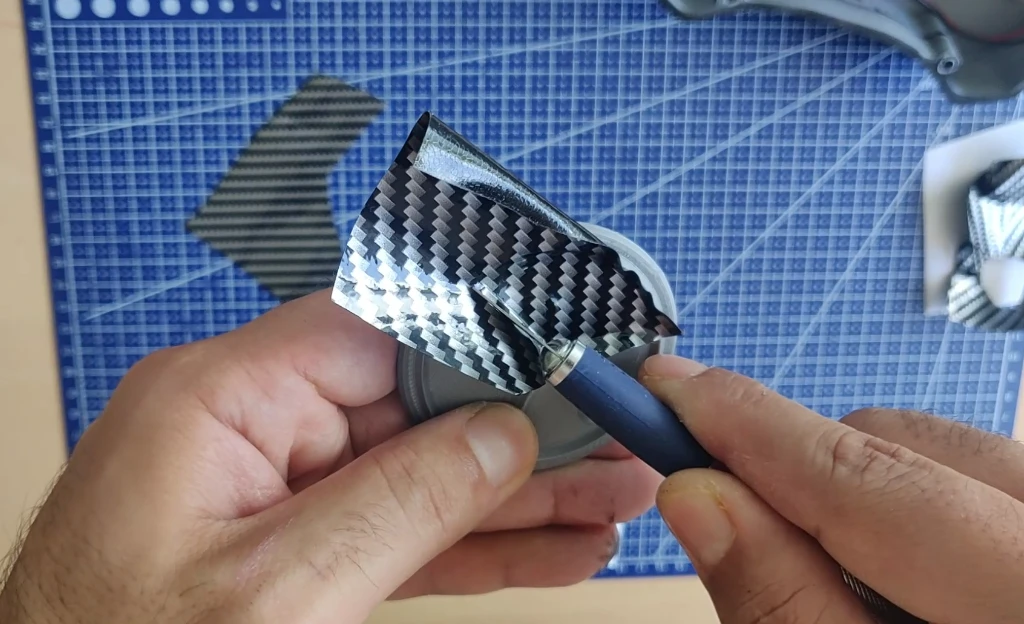
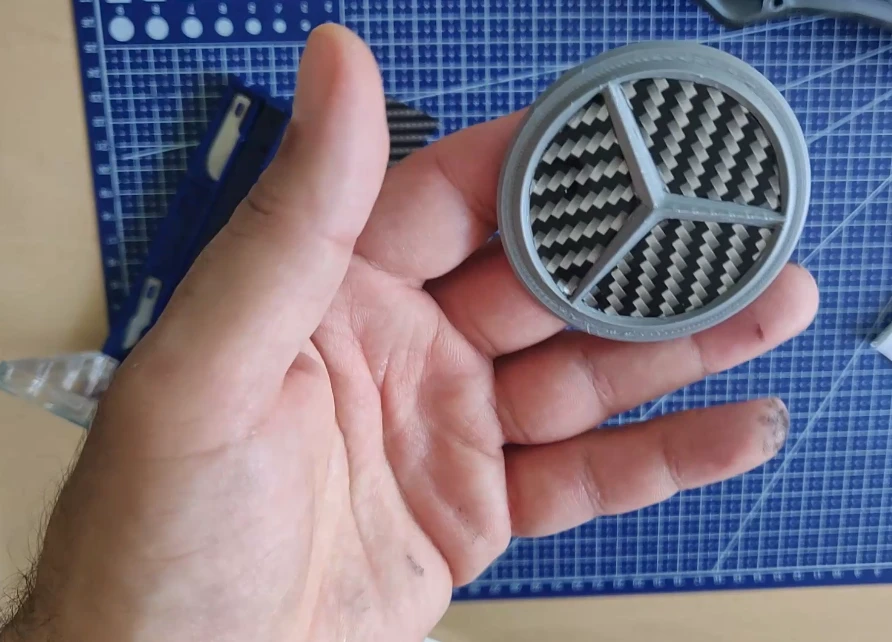
The result:
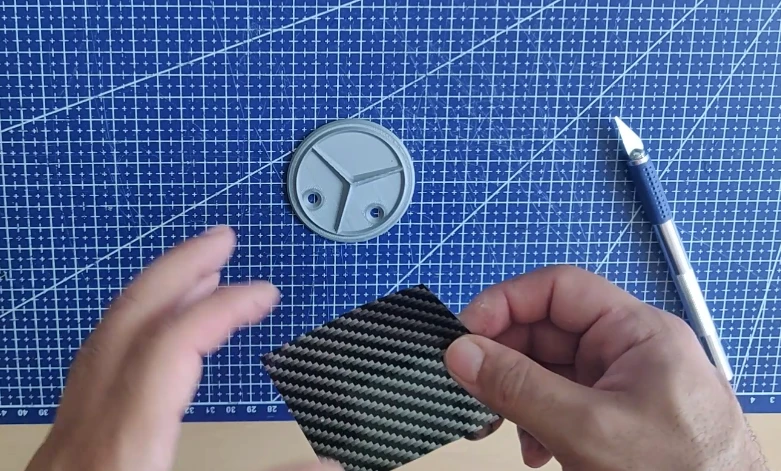
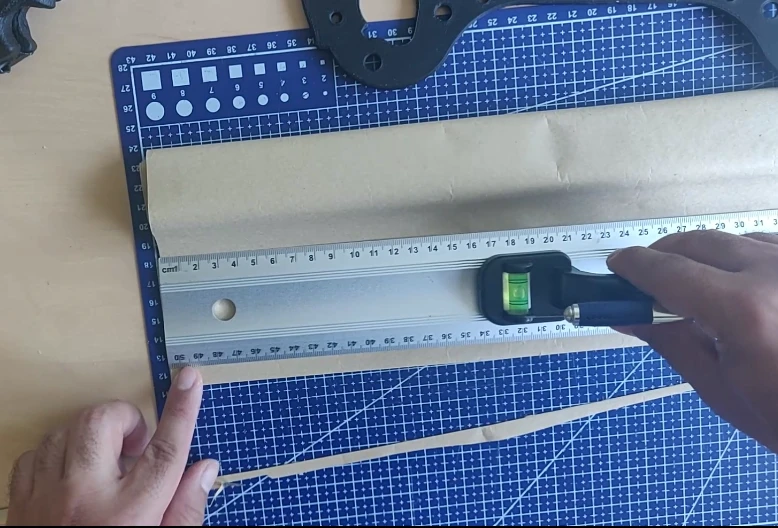
Finally, the sides of the rear case need to be covered (don’t rely on the gear shifters, the assembly is explained in chapter 3):
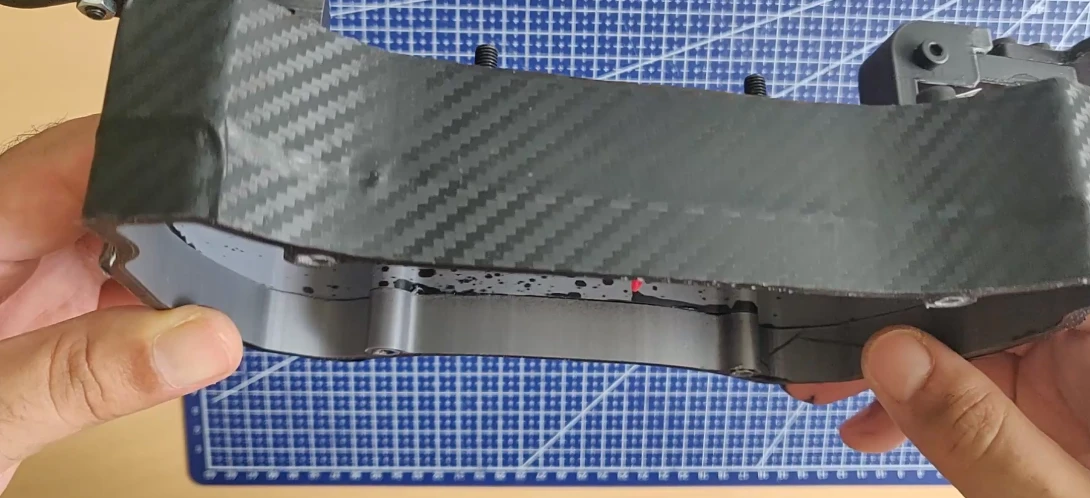
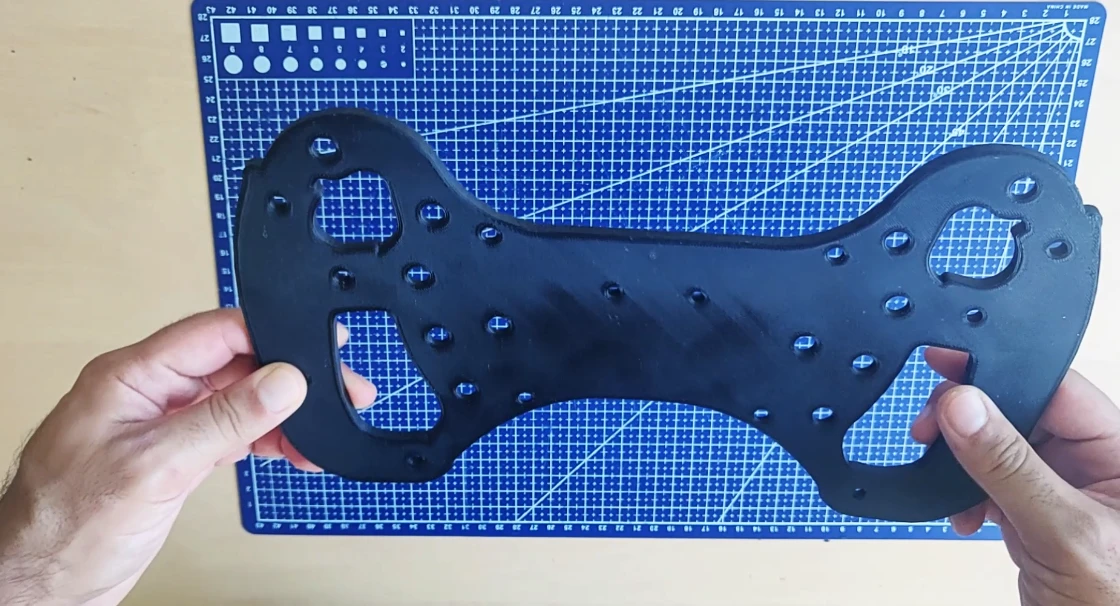
Two casing thicknesses are available, 30mm and 40mm. This tutorial uses the 40mm version, which is more comfortable for internal cables.
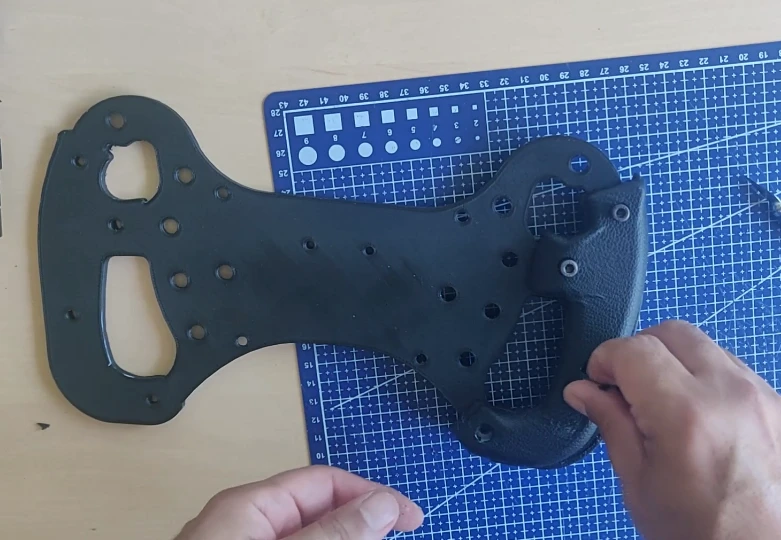
The carbon covering is now finished, we’re going to move on to the leather covering of the handles, and that requires patience.
Step 2: Leather covering on the handles
This is the tricky part where your patience will be tested. Take your time, because if this step is botched, it will greatly affect the feel of the steering wheel.
I used this leather, but you can also use Alcantara if you wish.
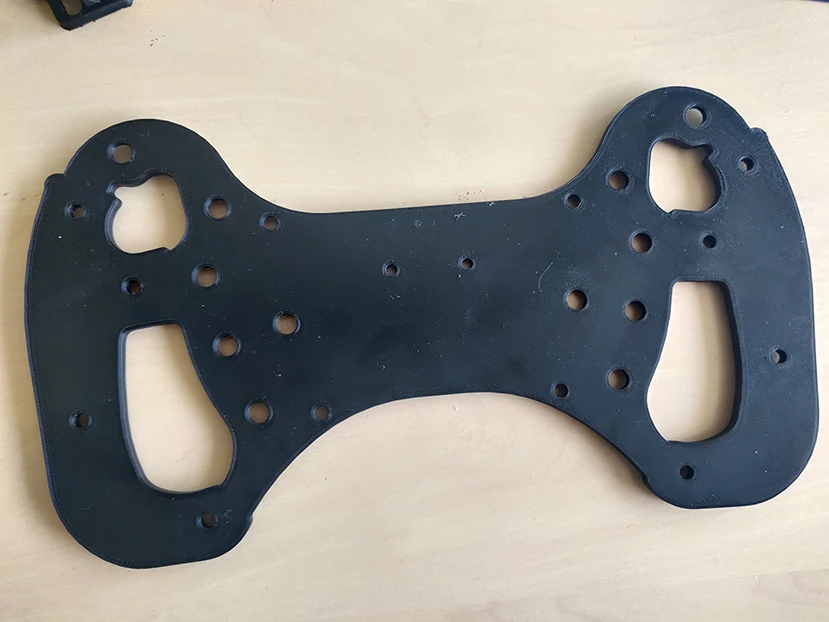
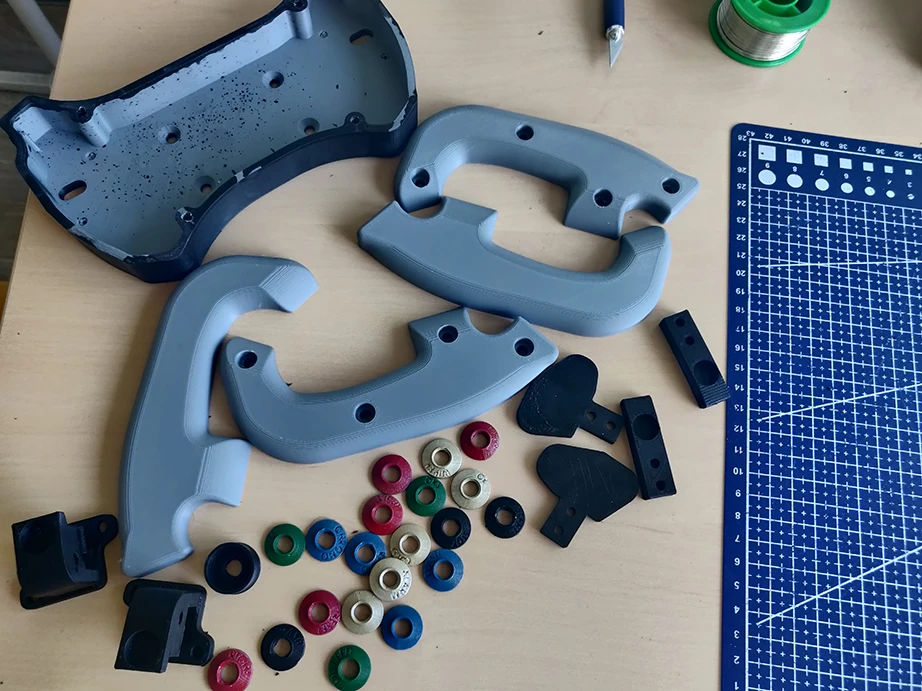
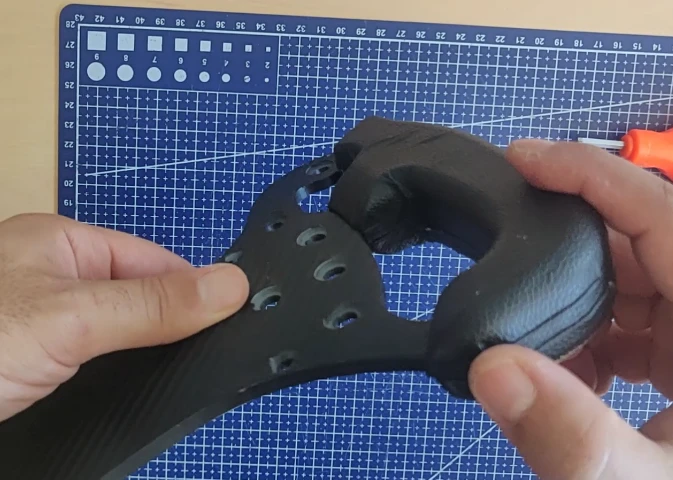
How are the handles designed? They consist of 4 pieces fixed together via threaded holes, with the steering wheel plate between them.
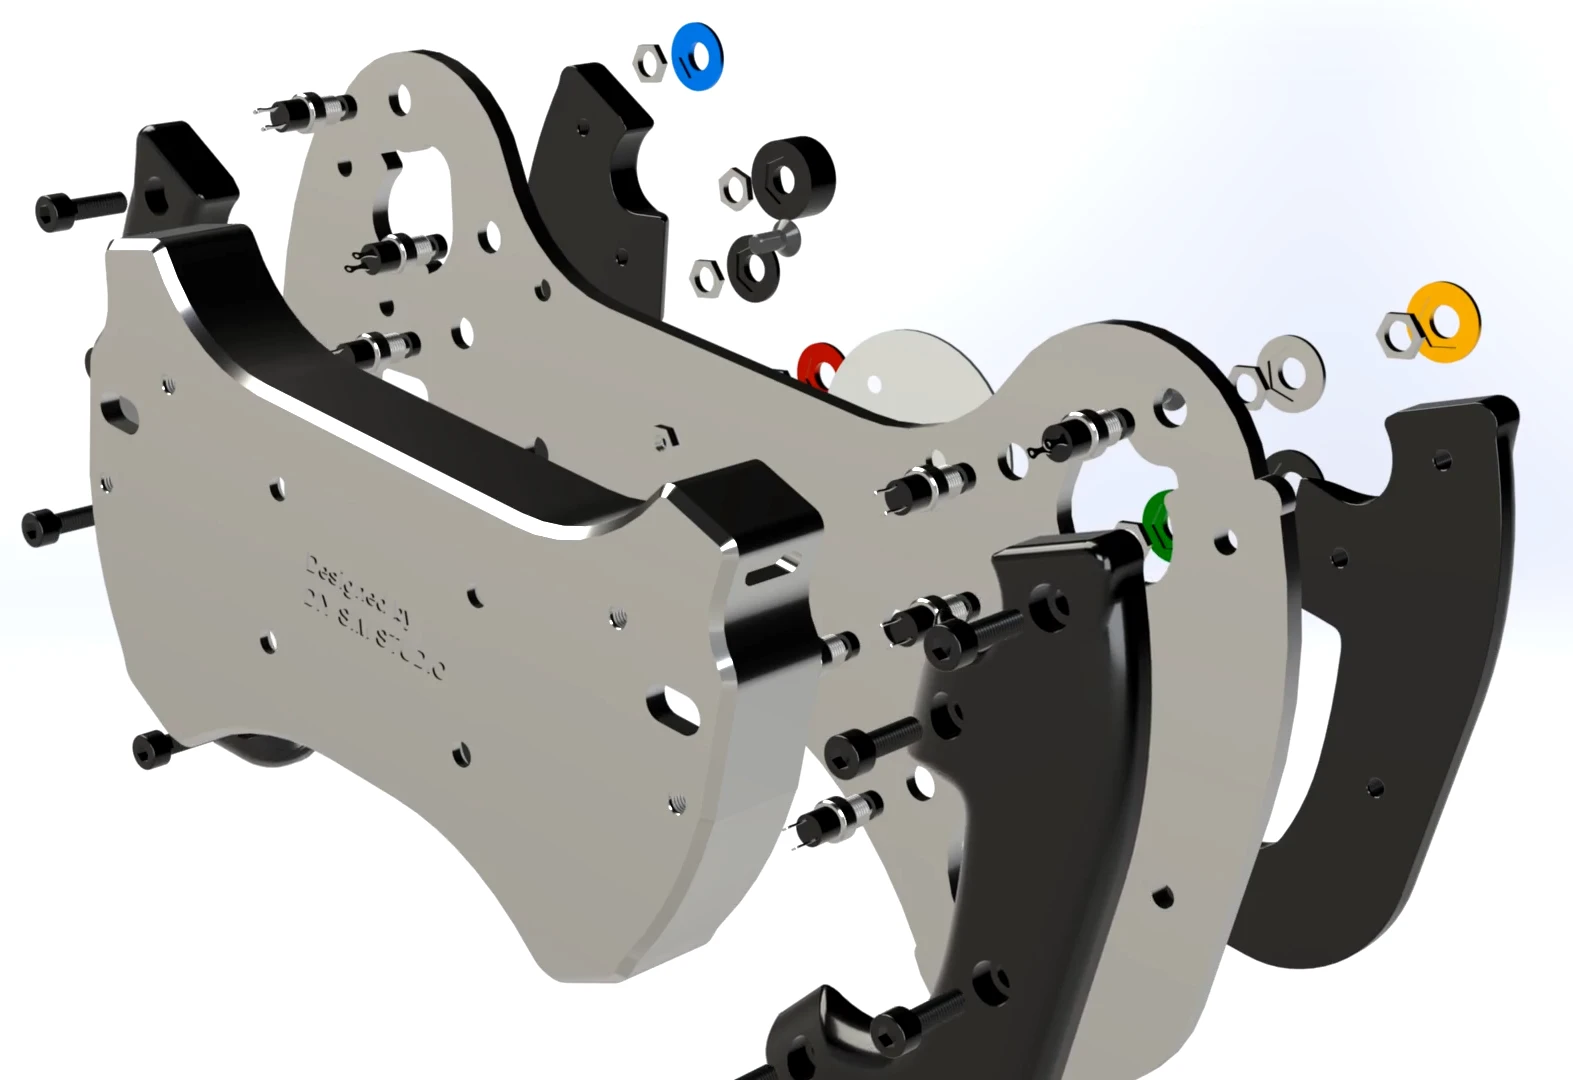
A spacer is provided if you wish to increase the thickness of the grip; simply place it between the steering wheel plate and the grip, on the front or rear side:
To begin, draw a square outline around your handle, leaving enough space.
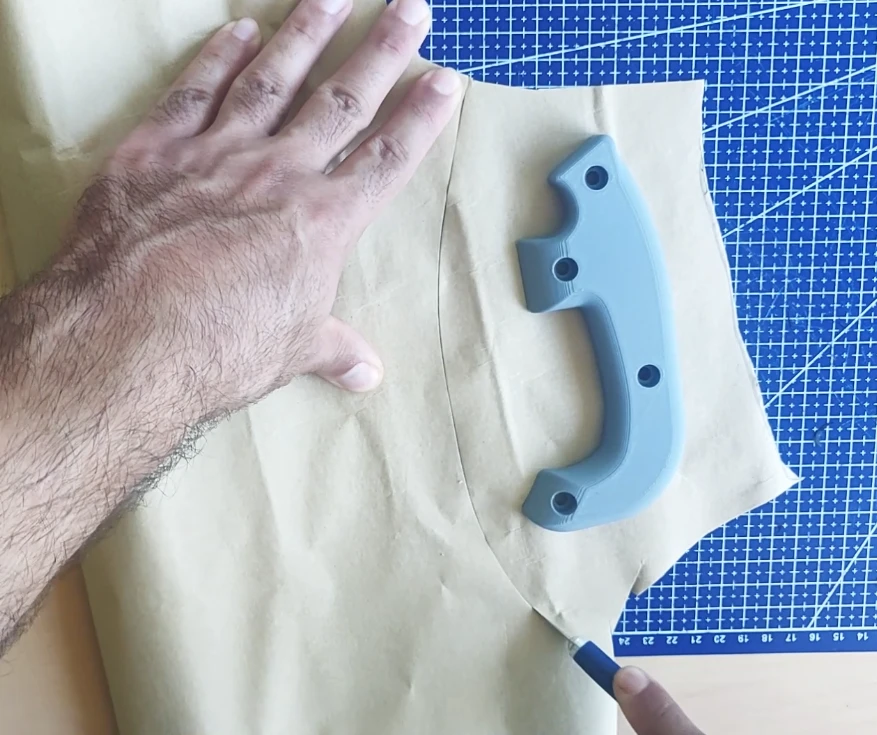
Take the leather:
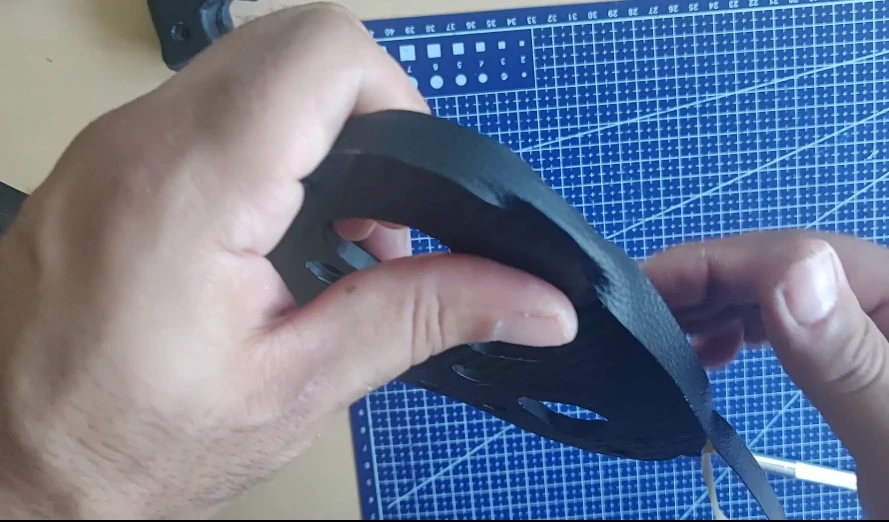
Now you need to start placing the leather on the handle, but be careful, start with the tightest corners of the handle, before finishing with the most open parts.
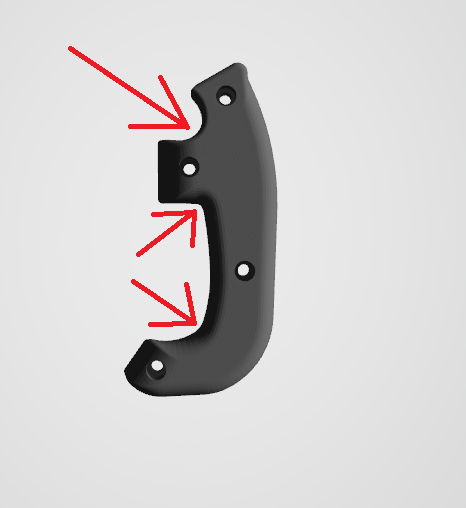
Start by covering the areas where there are red arrows.
Subsequently, it will be necessary to make incisions with a scalpel to facilitate the placement.
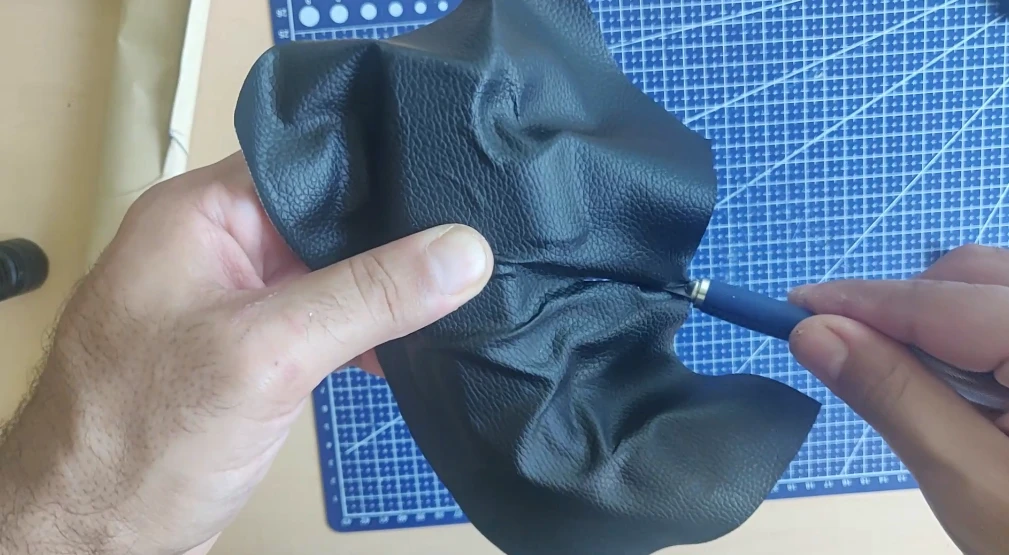
Above all, avoid cutting too deeply to prevent creating an opening on the visible part of the handle. The cuts must be made only on the hidden part of the handle.
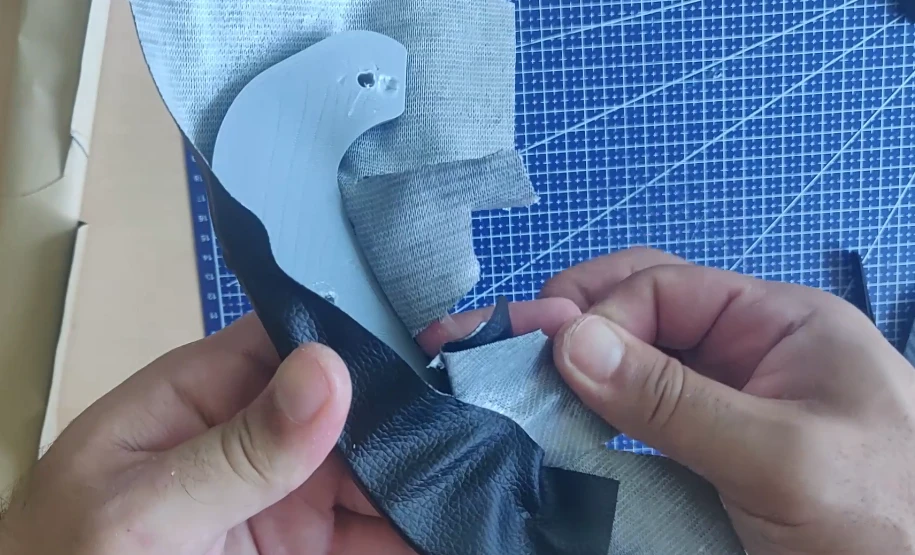
Finally, the excess material must be removed with scissors and a scalpel.
You need to cover all 4 handles using this method.
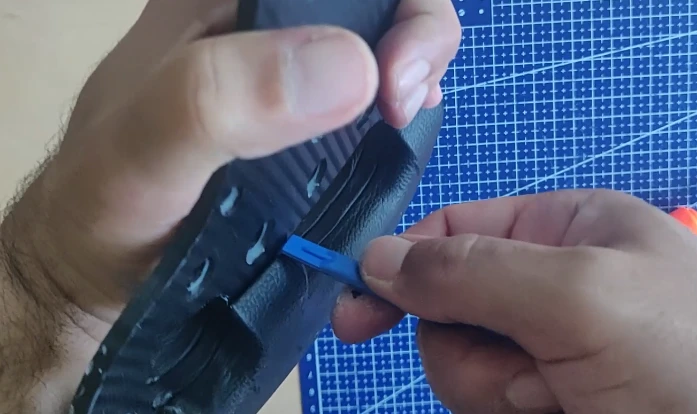
Now, cut small strips, one centimeter wide, to cover the inner and outer sides of the grips. This will improve the comfort of the grips and prevent your hands from coming into contact with the steering wheel plate.
Trim off any excess with a scalpel or scissors.
You can now do the interior.
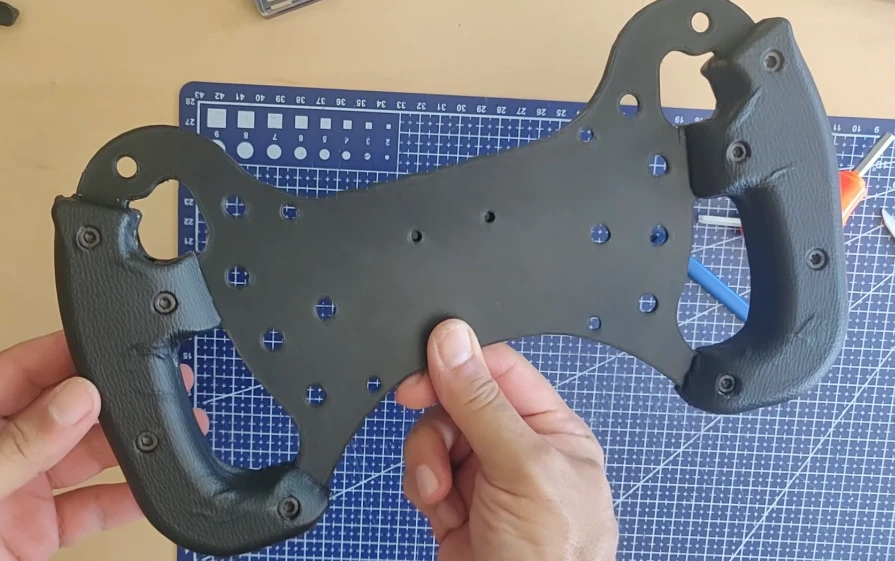
This is what the covering should look like before the handles are attached. The red areas indicate the interior/exterior zones that have been covered with the 1-centimeter strip.
We can now begin screwing on the handles. This needs to be done in three steps:
Step 1: Attach the handles without screwing them in all the way, leave a 2mm gap. There are threaded holes on the front handles.
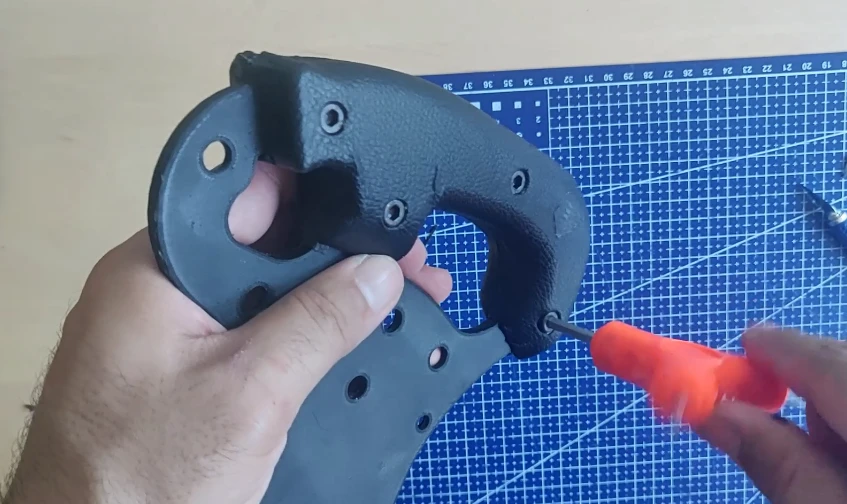
Step 2: Fold the leather inside the handle using the small covering tool (blue in the photo). This will correct any minor imperfections and give you the cleanest possible finish.

Step 3: Tighten and permanently secure the handle. Be careful not to overtighten, as this could damage the front handle.

The result is not 100% perfect, but it’s already acceptable.
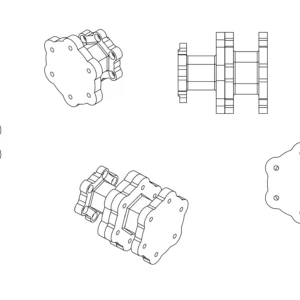
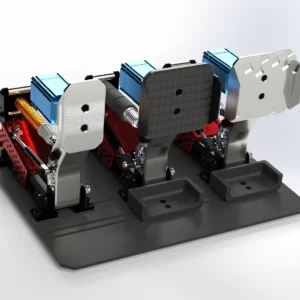
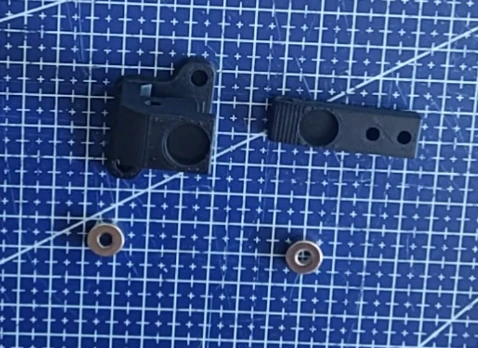
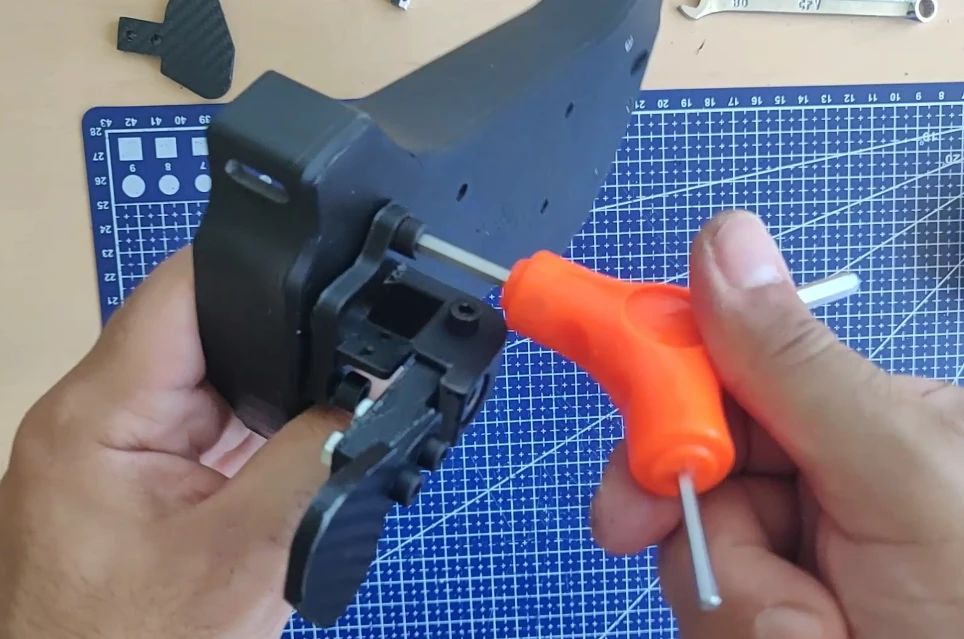
Step 3: Install the paddles shifters
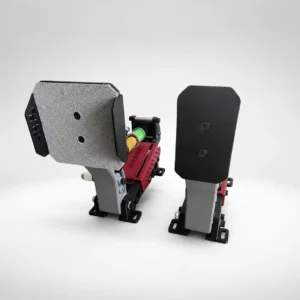
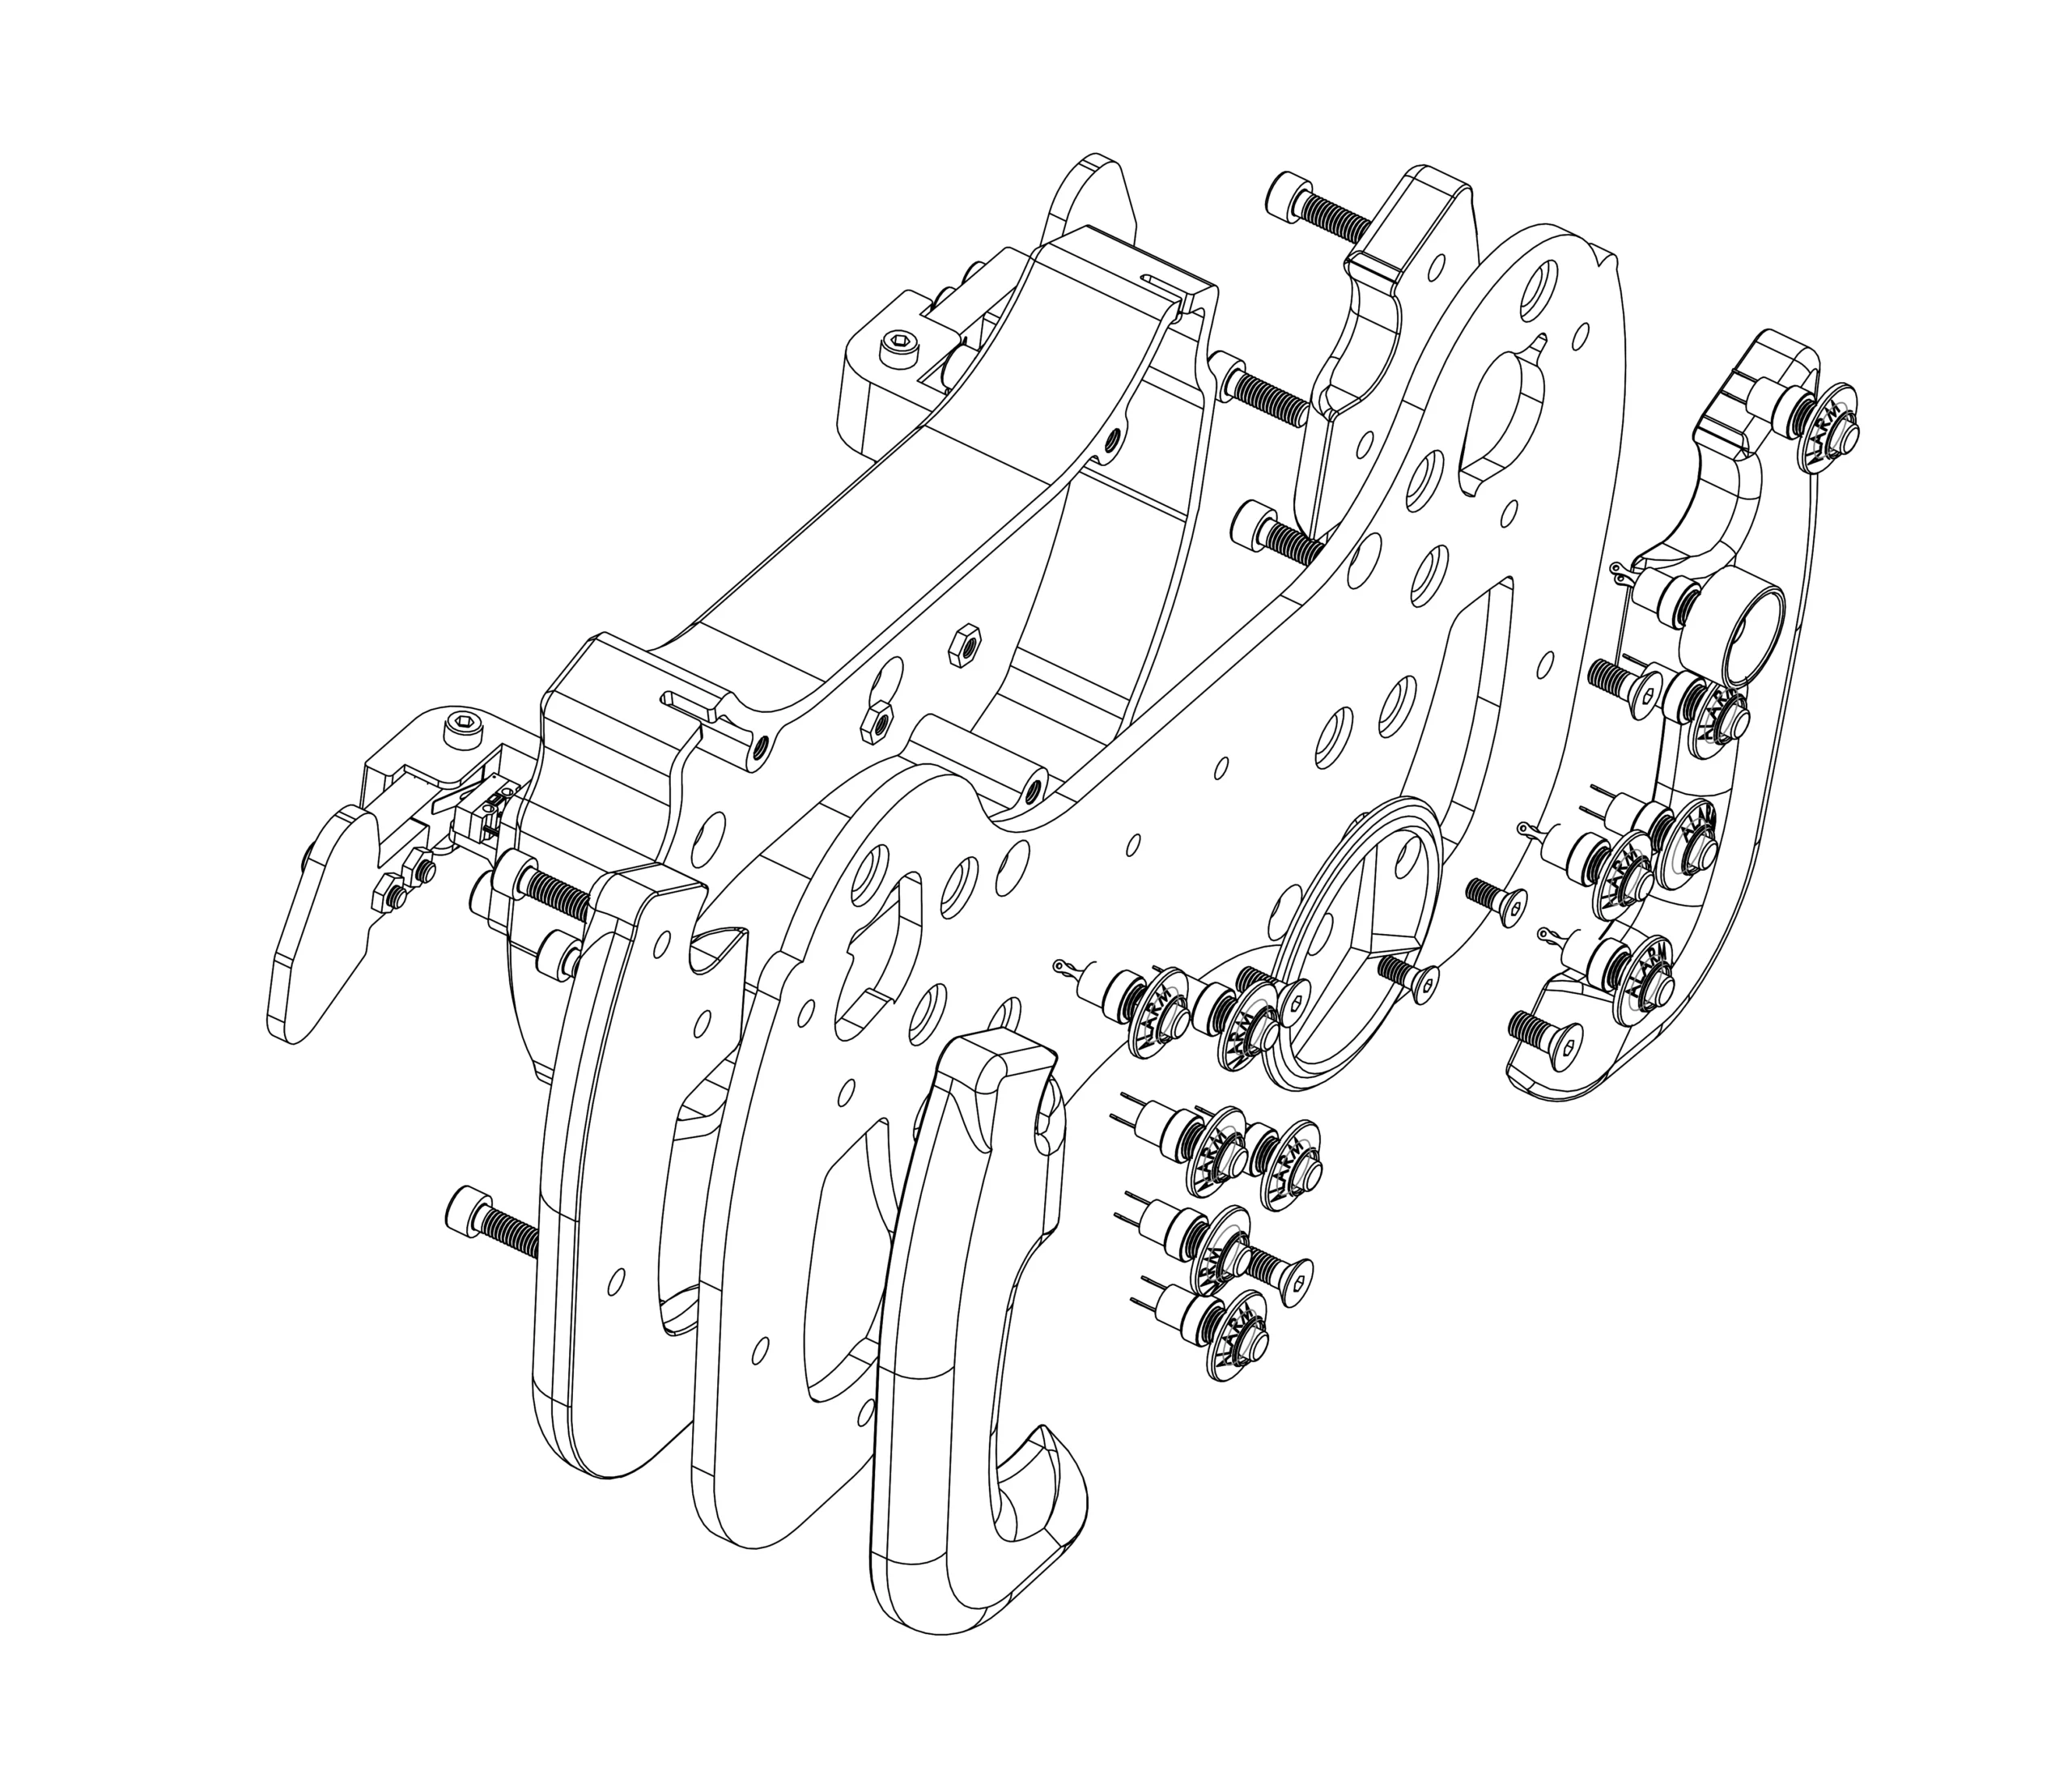
The paddle shifter assembly is quite simple; here’s a small exploded view of the shifter:
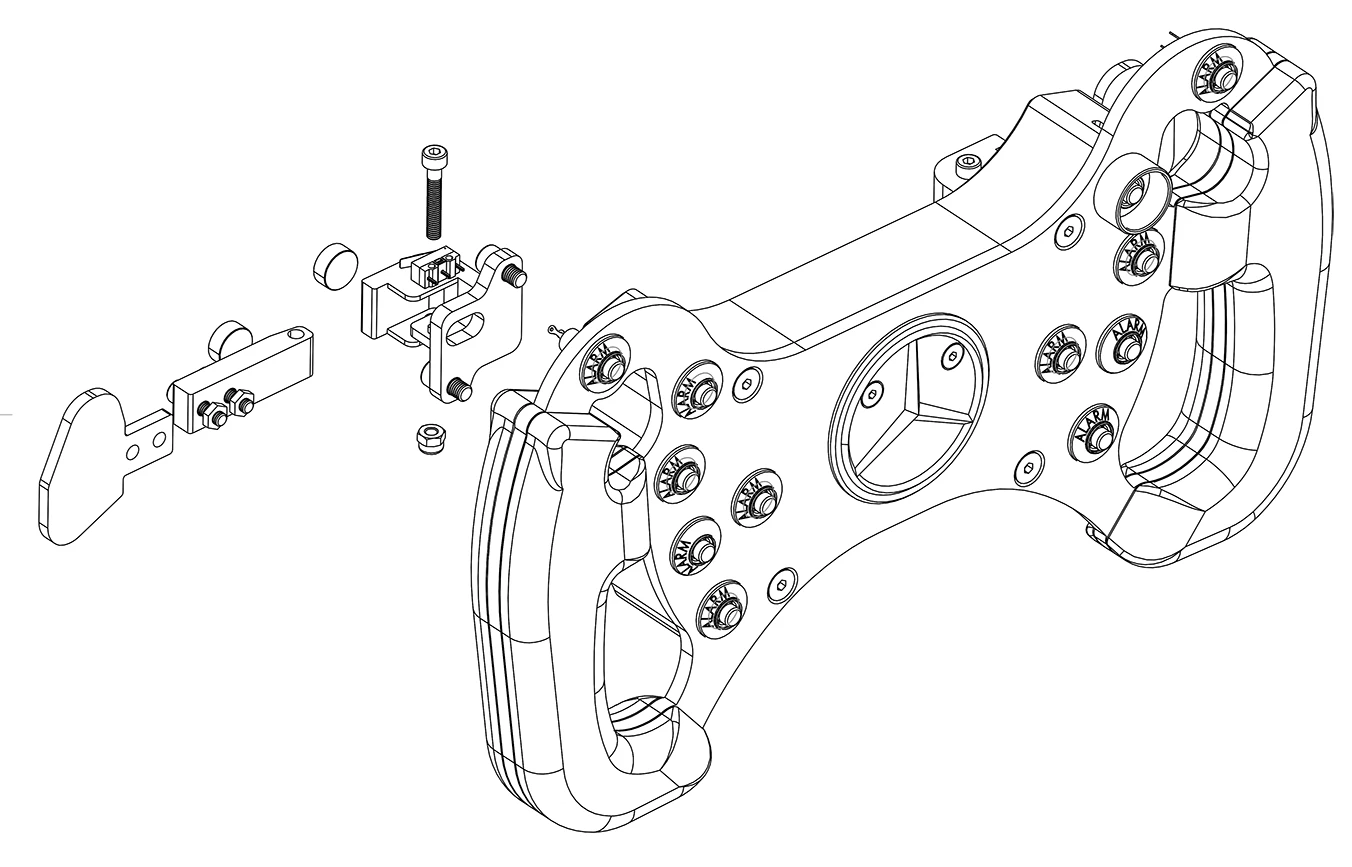
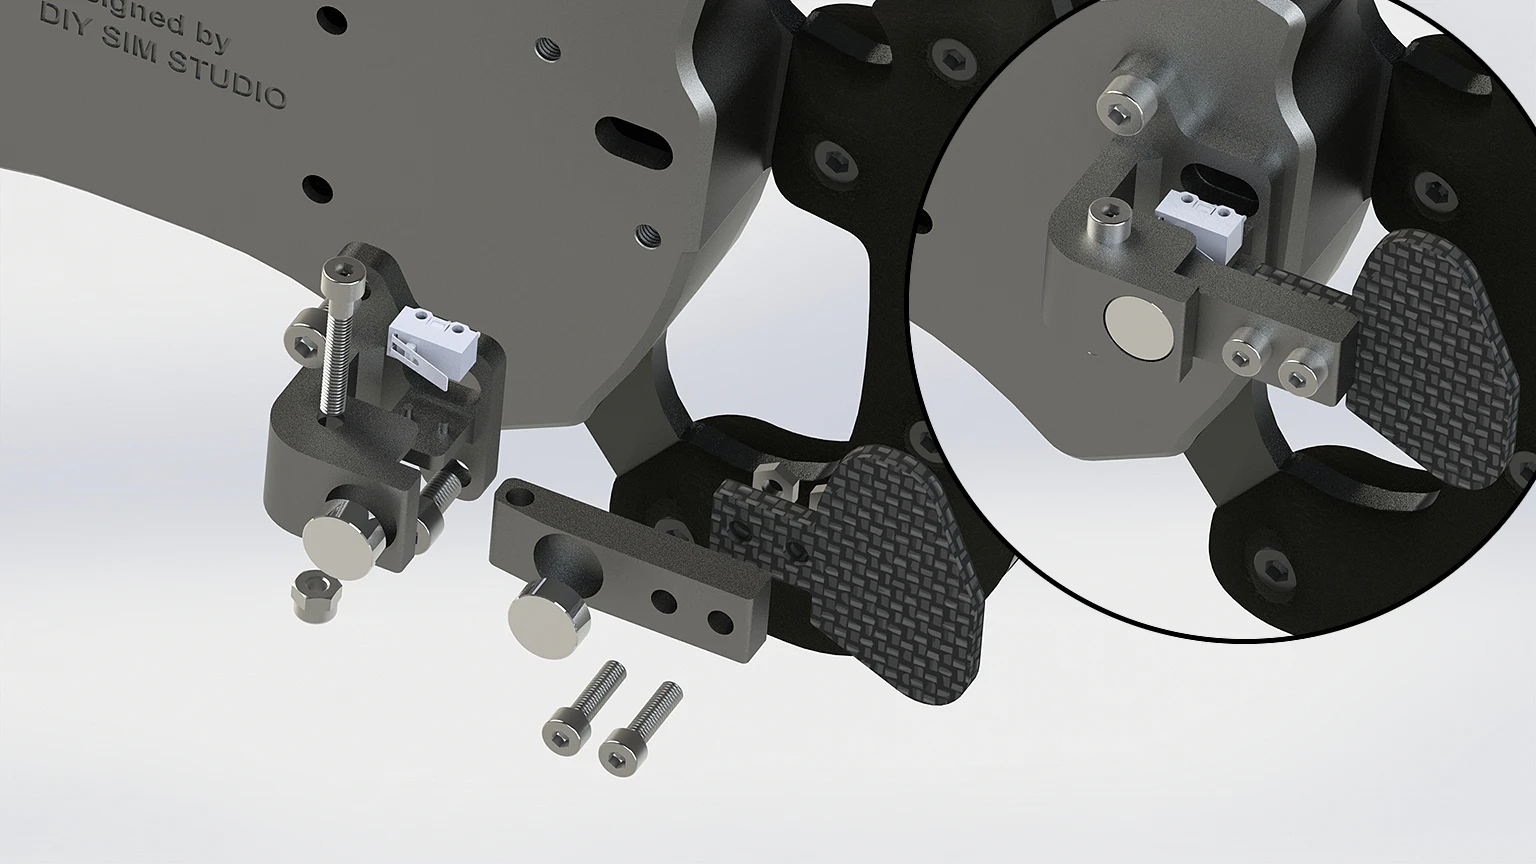
There are two main parts: the mobile and the fixed.
First, you need to attach the magnets with glue. I recommend using N52 neodymium magnets; the compatible size is 12×5mm (diameter Ø12mm, thickness 5mm).
Be careful before placing your magnets: they must be positioned correctly so that the two magnets attract each other instead of repelling each other. Once the magnet is glued in place, it will be difficult to change its orientation.
Wait for it to dry and place the moving part in line with the fixed part.
You can screw in the M4x25 Bolt screw and its self-locking nut.
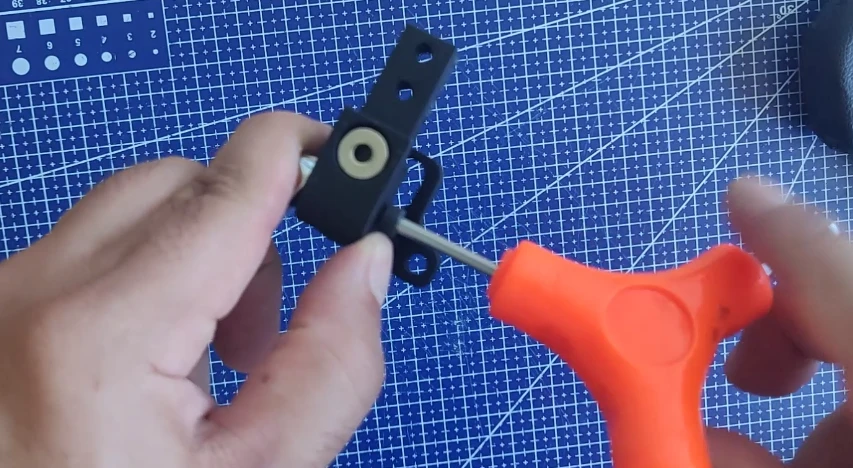
The M4 self-locking nut allows you to adjust the tightening force: it should be tight enough to eliminate play and ensure good stability, but not so tight that the paddle gets stuck. Consider adding a small amount of WD40 grease to the shaft to improve gear shifting smoothness.
Now all that’s left is to attach the Paddle Plate to the moving part. Be careful not to tighten it too much to avoid pulling the carbon film and ruining the wrap.
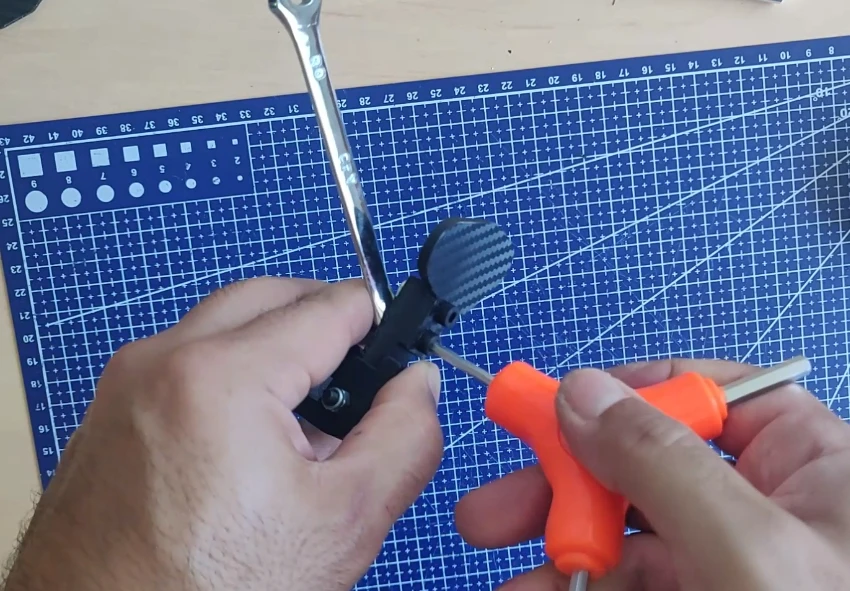
Minor adjustments are possible to ensure a perfect fit for your fingers: for example, you can attach the paddle to the front or back of the moving part, moving it closer to or further from the steering wheel. Small spacers are also included.
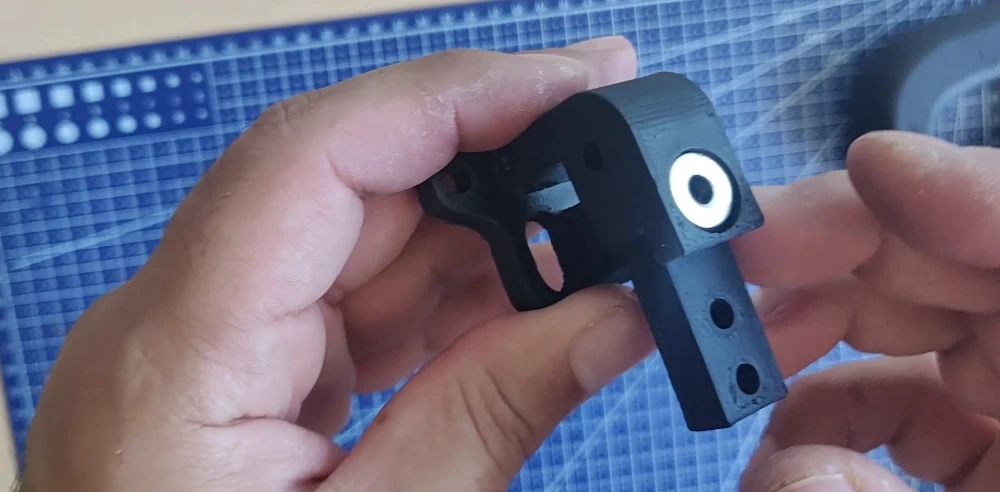
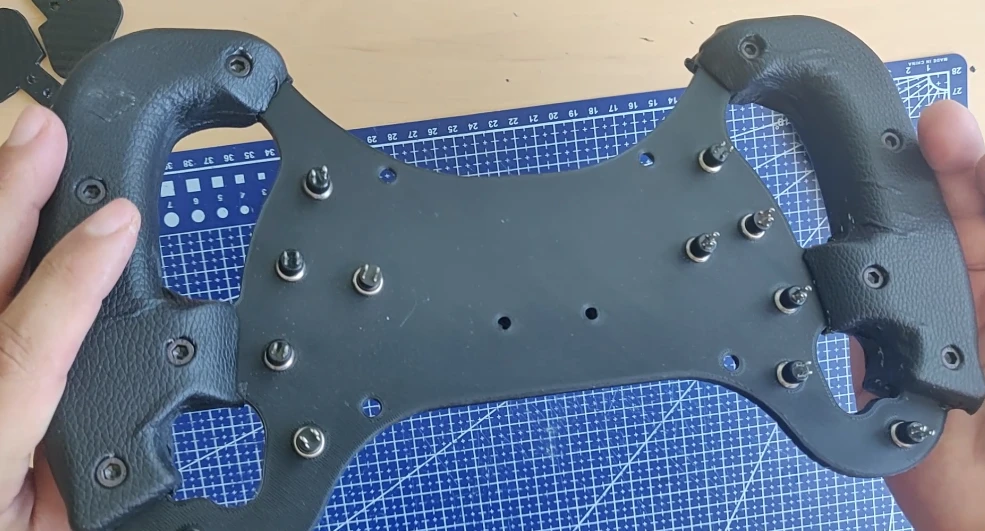
Now, the shifter needs to be fixed to the steering wheel rear case with the 4 * M5x10 screws.
Attach the second shifter:
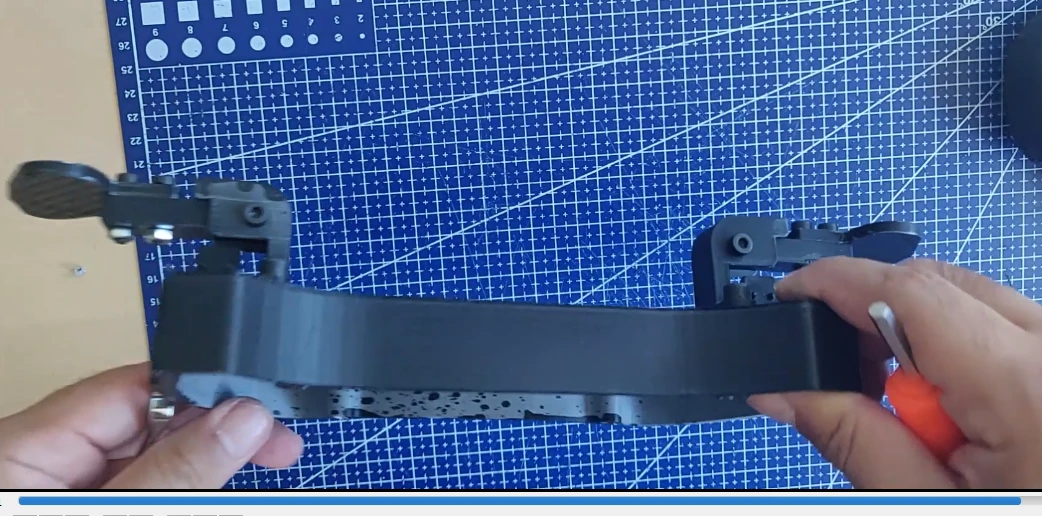
The shifters are installed, now we’ll move on to the electronics.
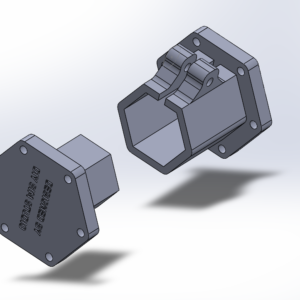
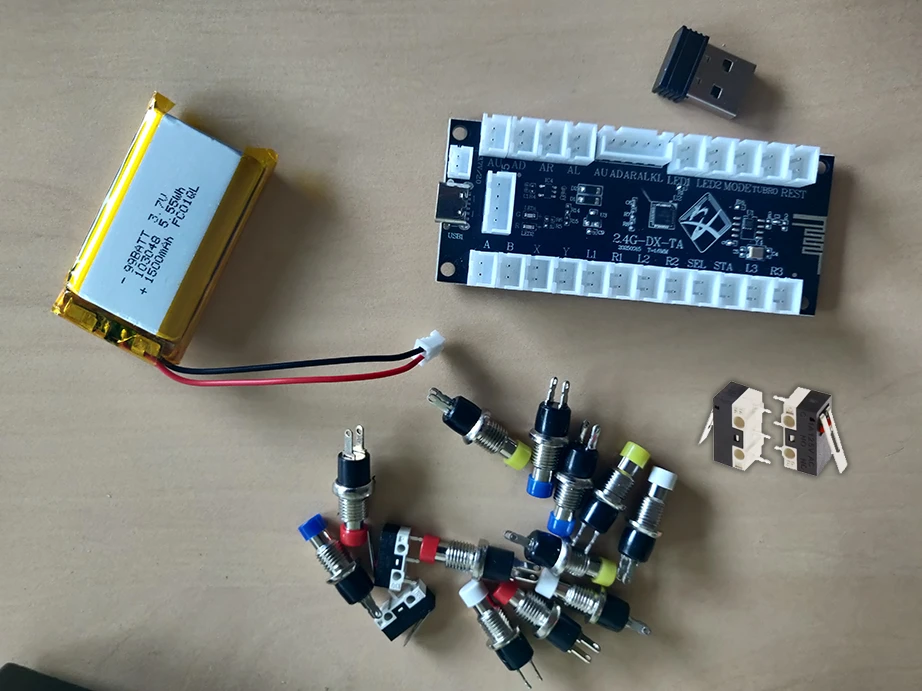
Step 4: Electronics of the DIY AMG Steering Wheel Replica
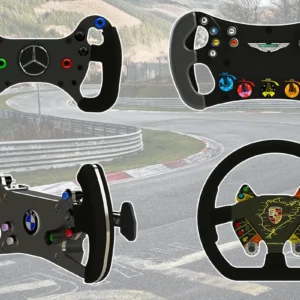
Which electronic board should I choose?
For the electronics, several solutions are available: Arduino, SimHub, SMT32 and the open-source OpenSourceSimWheelESP32 library.
For the electronics, several solutions are available: Arduino, SimHub, SMT32 and the open-source SimWheelESP32 library, etc.
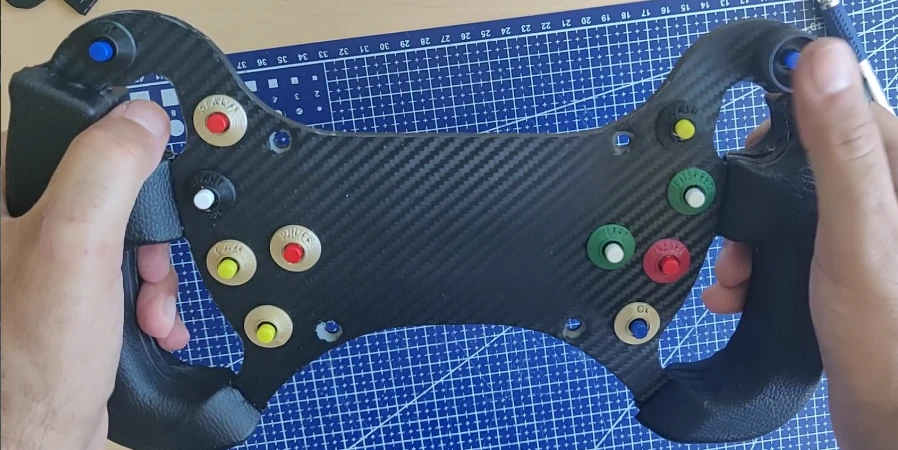
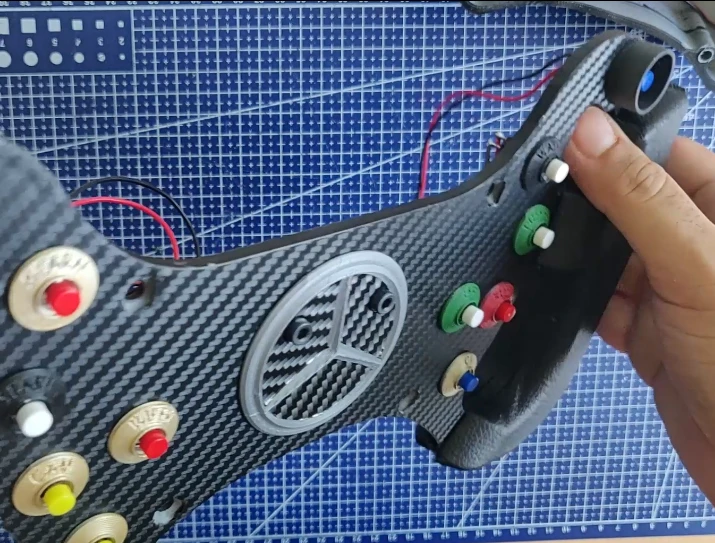
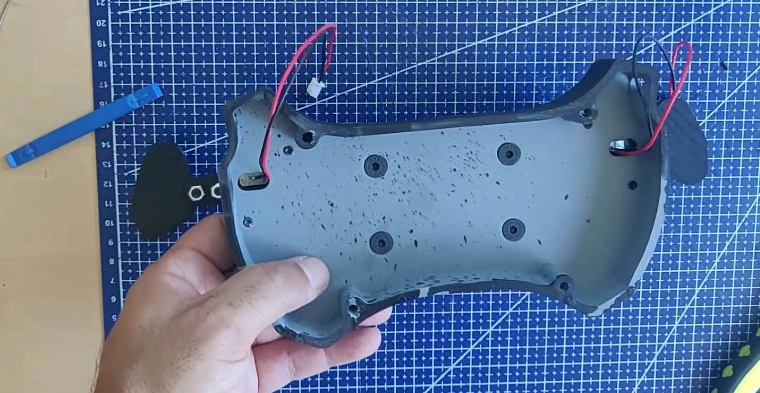
For our steering wheel, there are currently 12 buttons in front, 2 microswitches at the back.
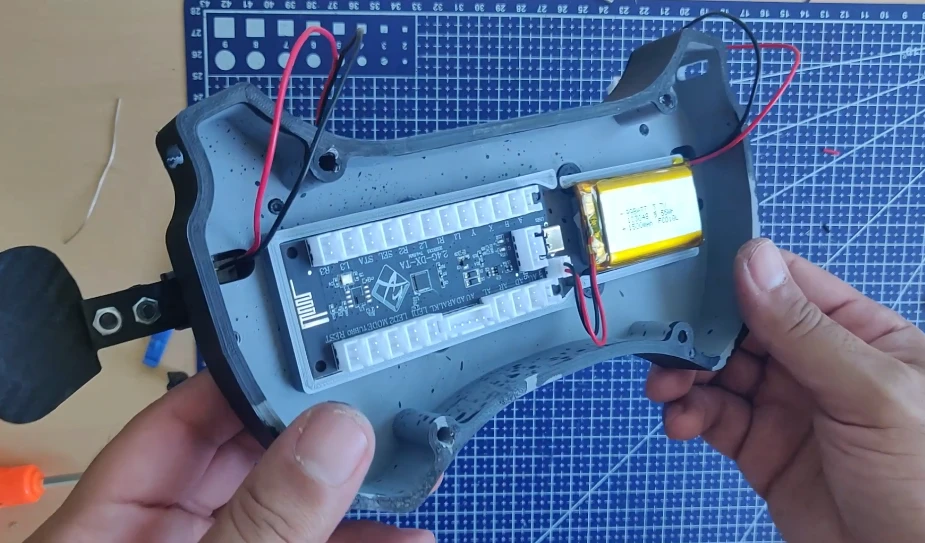
I chose the simplest, cheapest option, and most importantly, the one that allows for a wireless steering wheel. It’s the Zero Delay Arcade Wireless Wifi board.
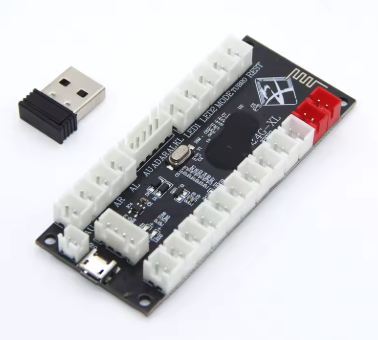
You can get them on Aliexpress for about $7 for two cards, connected by a single Wi-Fi dongle. For example, you can connect two wireless steering wheels with the same USB dongle.
Advantages of this board:
- Very cheap (approximately $3.50/card)
- Wireless technology with Wi-Fi: perfect for a steering wheel
- Plug & play: no configuration required, recognized directly in your game
- Very simple and quick welding
Inconvenience:
- There are only 12 buttons to connect, and no rotary encoder.
- PC compatible only
- Requires a rechargeable 3.7v battery
Here is the link for the battery that needs to be connected to this board: 3.7V, 1500mAh Lithium Polymer Battery
Preparing the 7mm buttons
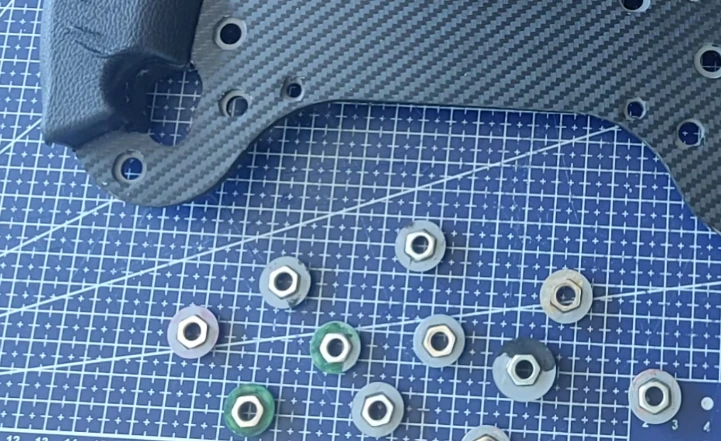
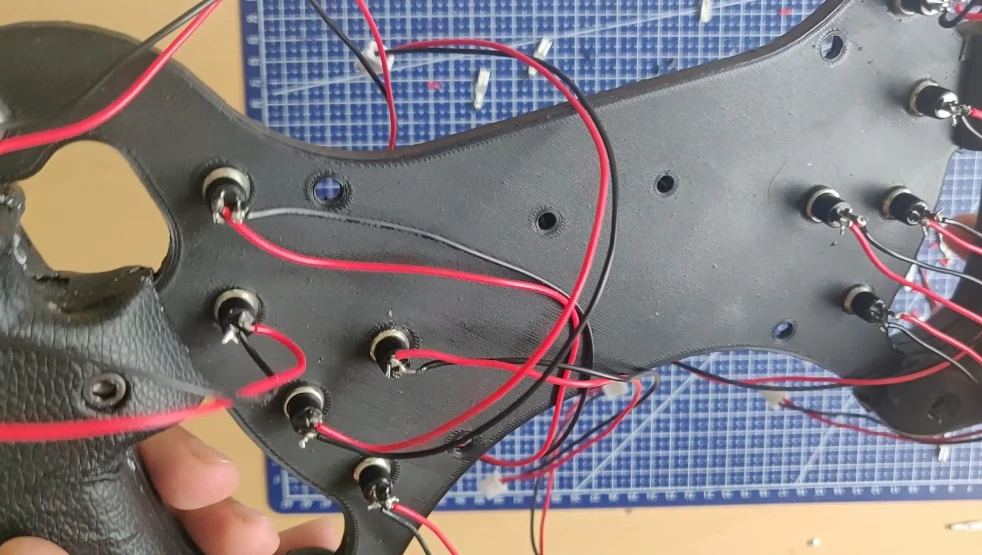
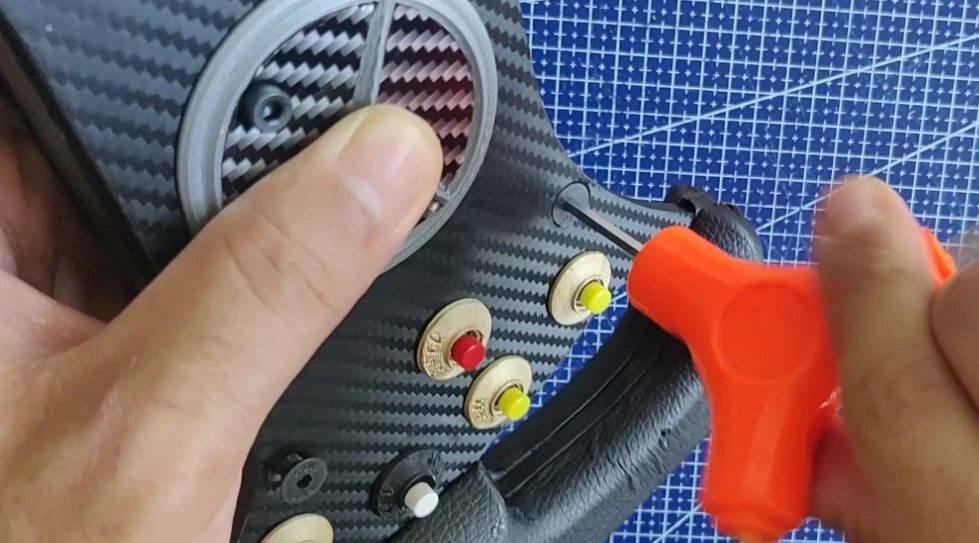
To begin, we will attach the 7mm buttons with their supports to the steering wheel plate.
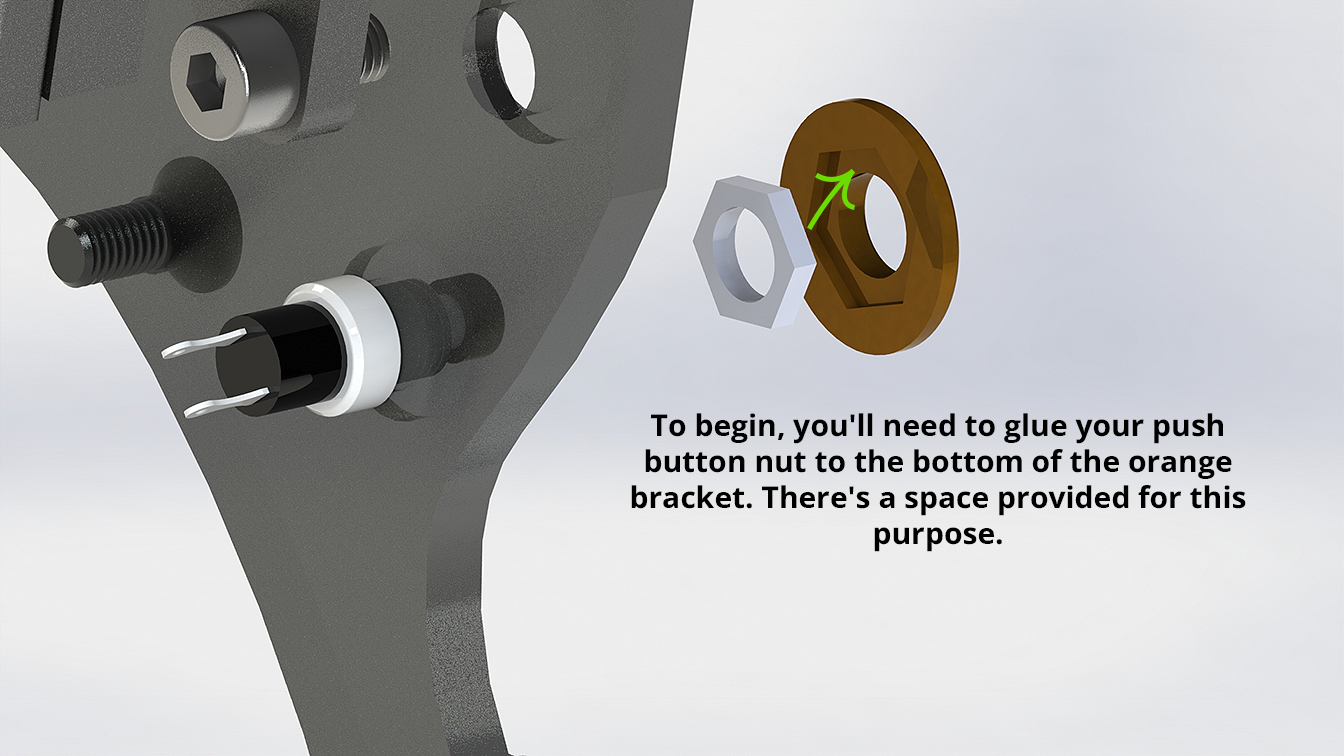
Simply glue the button nuts onto the bracket, and then screw the bracket directly onto the button threads.

Don’t use the wrong buttons, I used 7mm push buttons which can be purchased here.
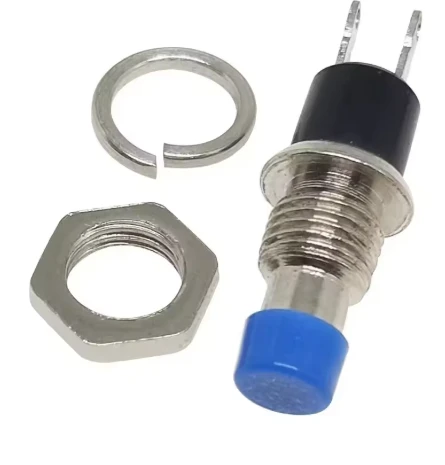
But you are free to use the buttons of your choice available in the BOM.
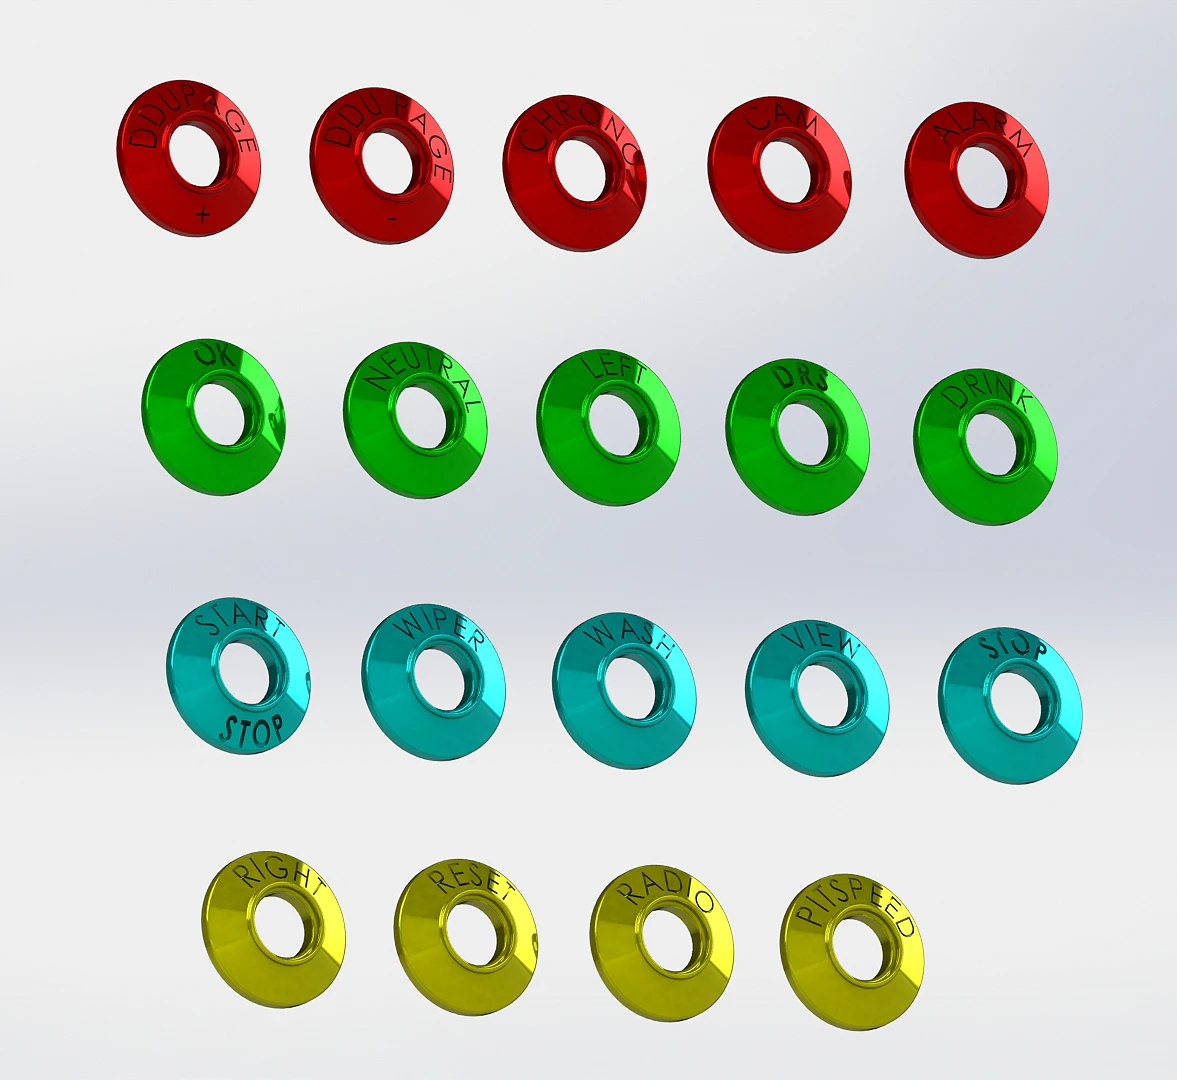
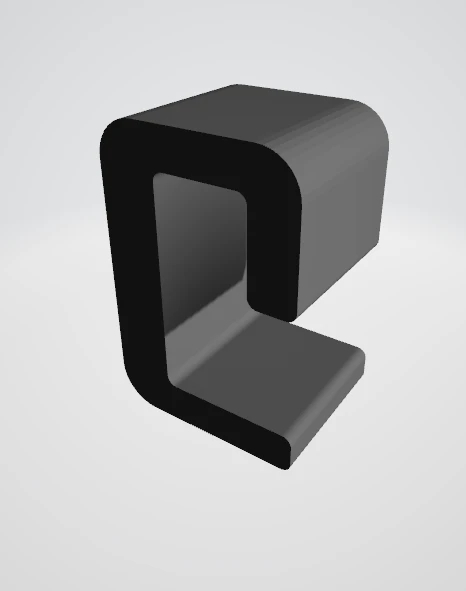
A list of 23 supports is available in STL and STEP format:
Secure the glue:
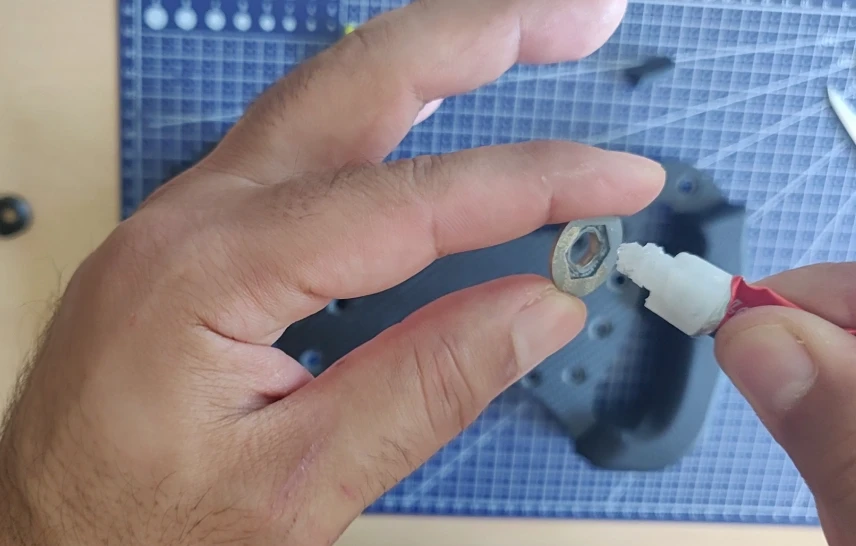
Let it dry:
Attach your button brackets to the 7mm button threads:
The buttons are now ready for soldering.
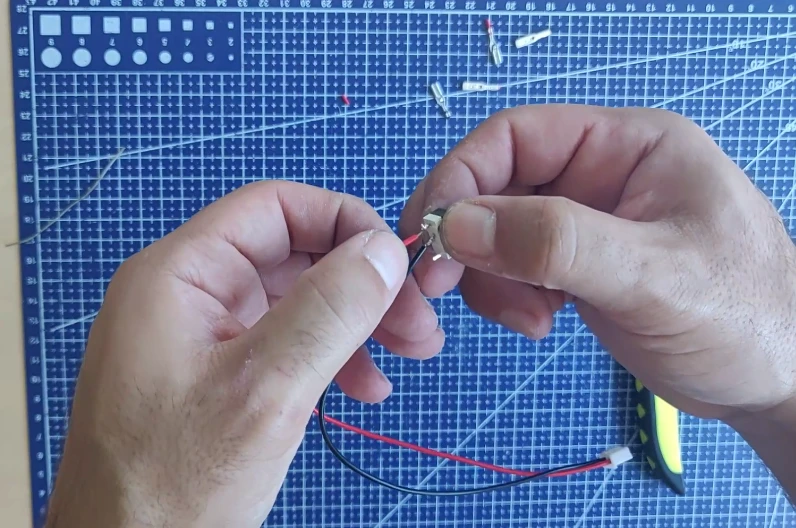
Soldering of the 7mm Buttons
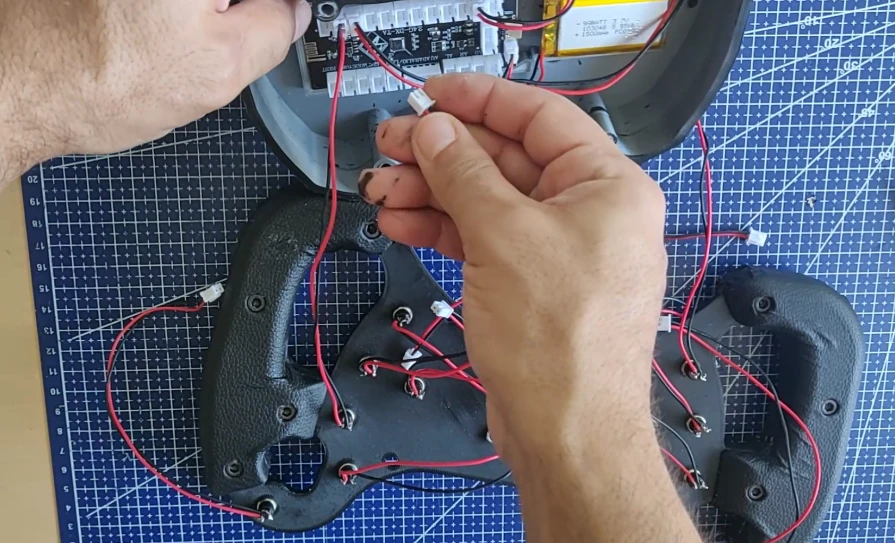
We will begin soldering the buttons with the 2-pin wires supplied with the board.
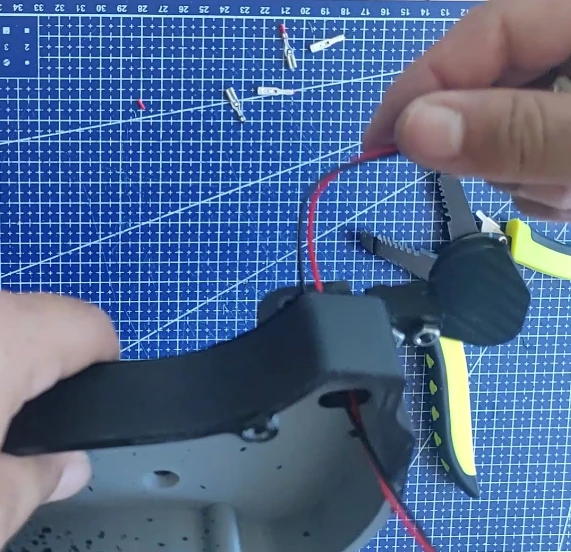
You must start by stripping the wires of the cable with a crimping tool.
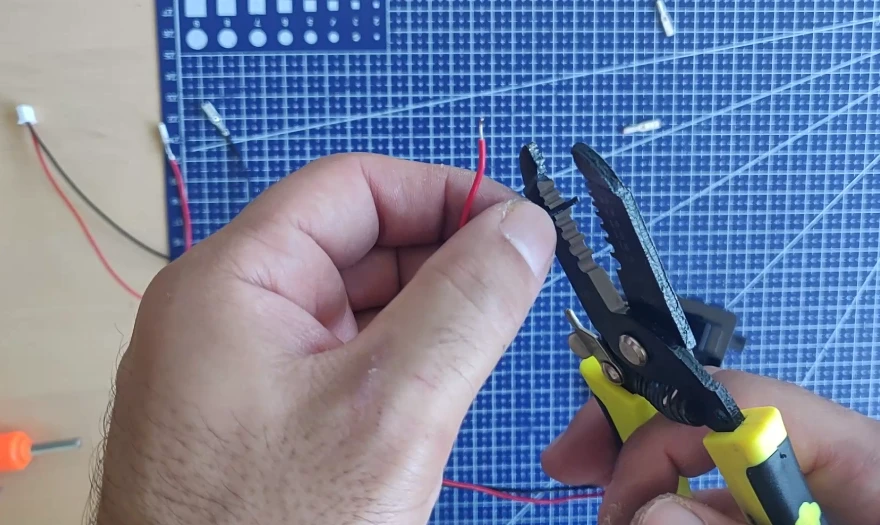
Simply pass the two wires through the two holes in the buttons, and solder them with tin.
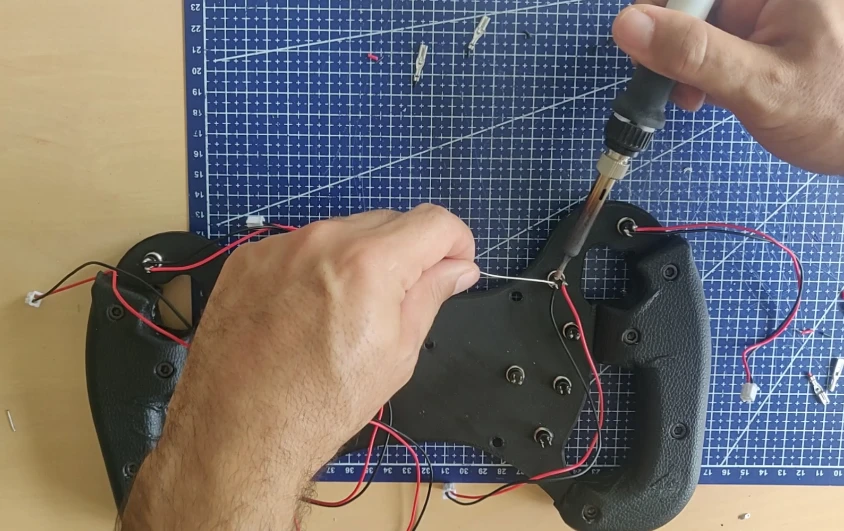
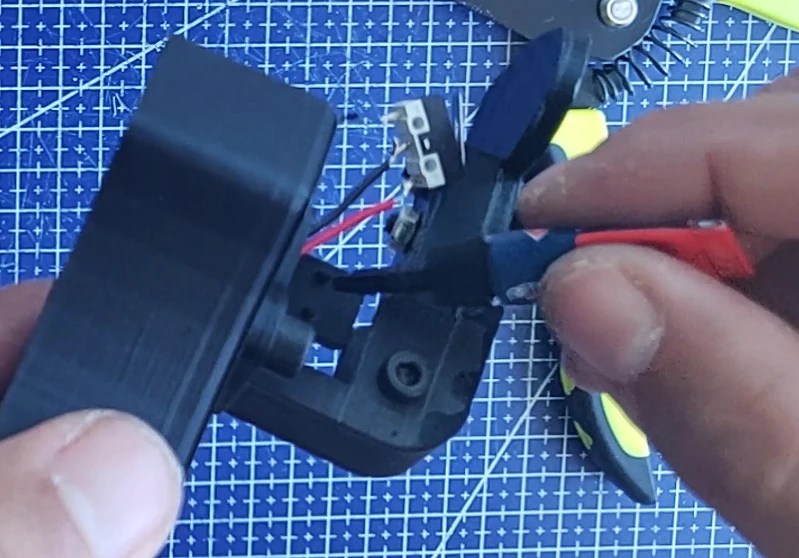
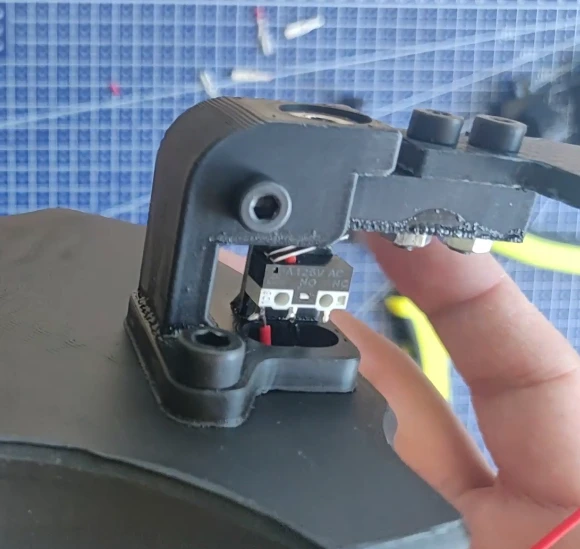
Soldering of the Microswitches
Then, do the same for both microswitches.
Route the microswitch wires inside the rear case through the cable entry holes provided for this purpose:
You can now attach the microswitch directly to its mounting bracket using glue. Two small tabs are there to guide you. Be careful not to insert it the wrong way.
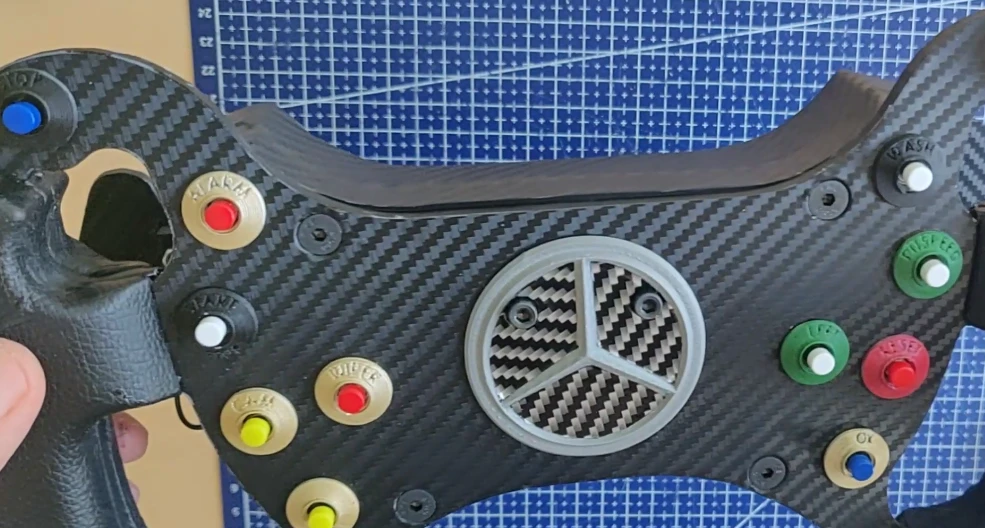
Don’t forget, beforehand, to fix the Mercedes logo to the plate with the two M4x10 Countersunk Bolts and the M4 nuts.
In the photos, the screws are not countersunk because that’s a small mistake.

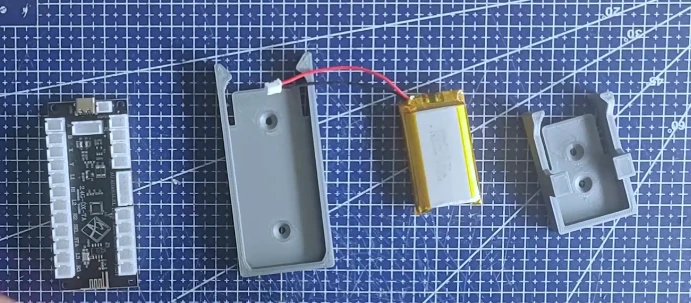
Assembly of the USB Board and Battery
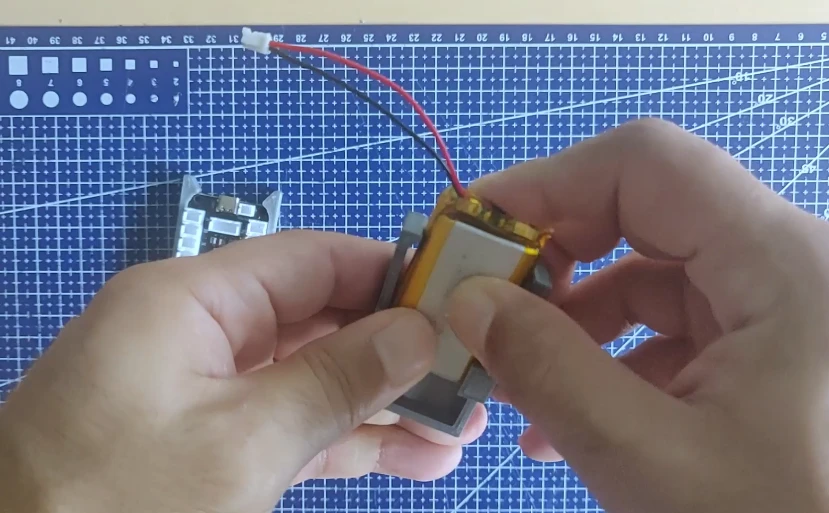
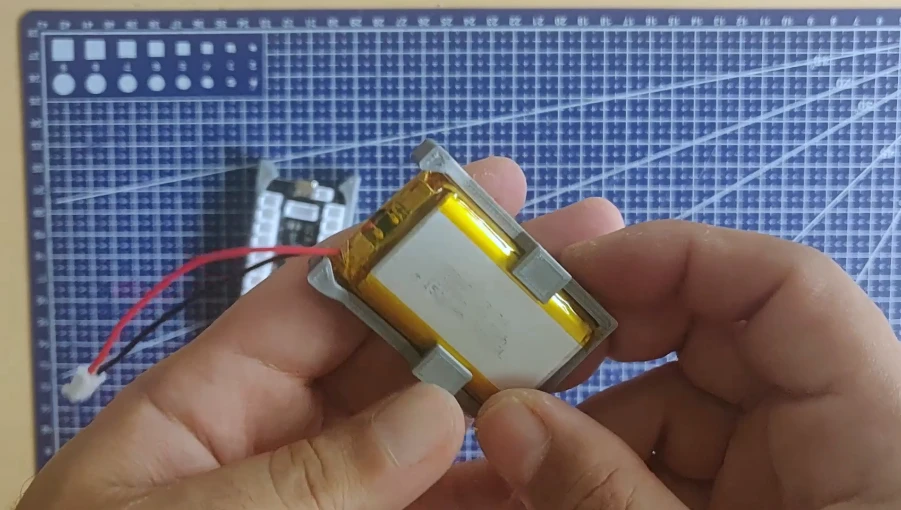
The board and battery now need to be attached to the casing.
Two custom-designed enclosures are provided in STL format, one for the board and the other for the battery. They feature a clip-on mounting system, allowing for easy attachment and removal. There are also pre-drilled holes on the back for additional mounting options.
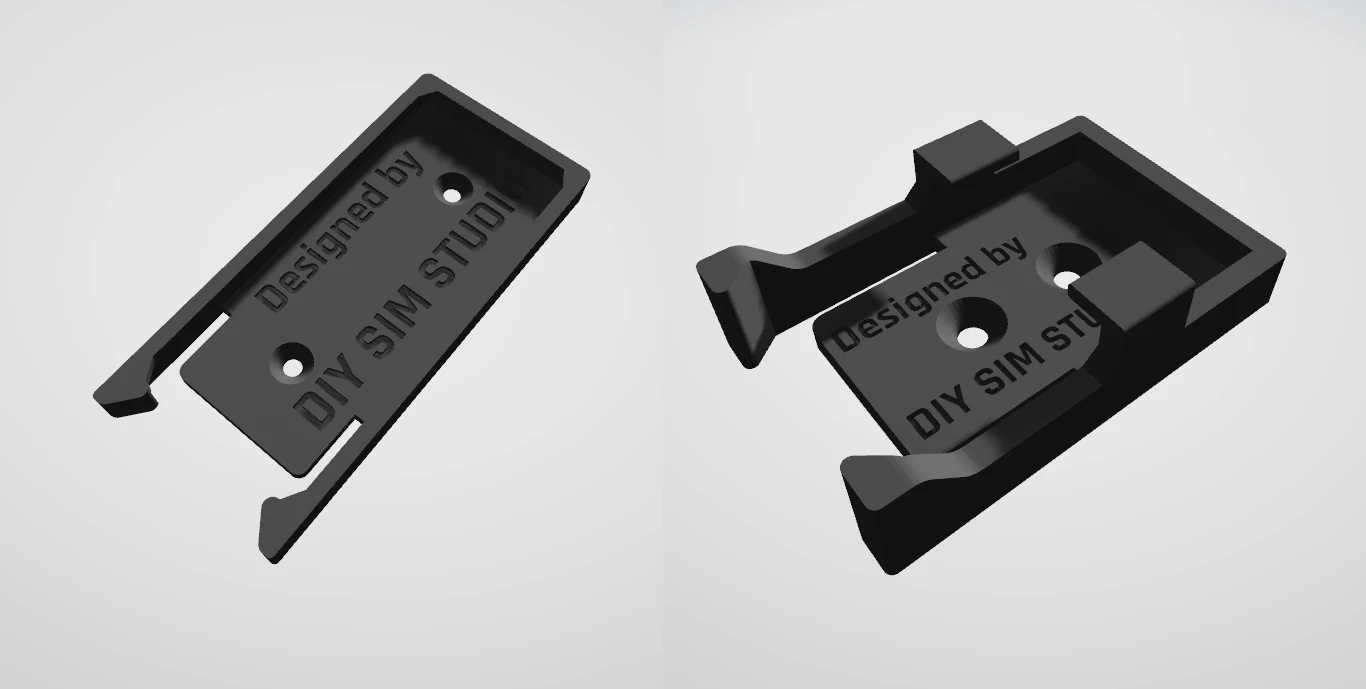

Once clipped in, the part won’t move, even after intense gaming sessions. You can always detach it by unclipping it.
Do the same for the battery and its holder:
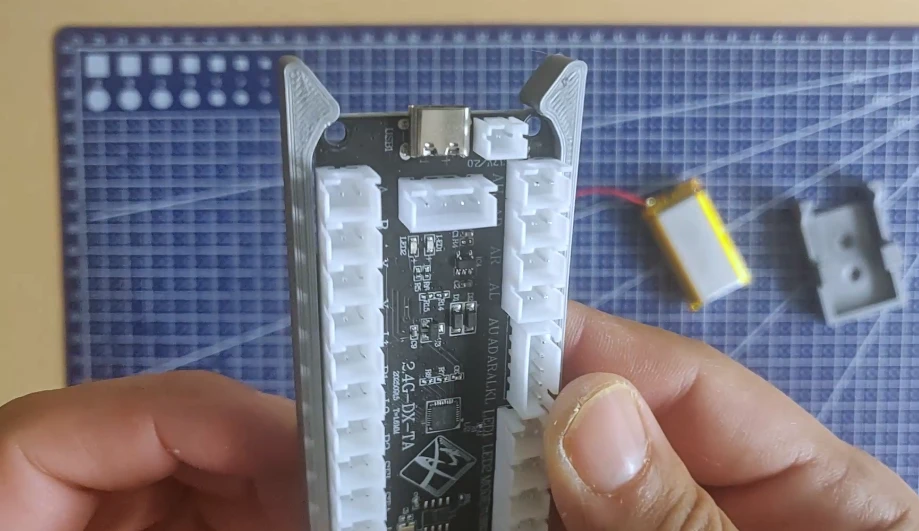
Now, you need to attach the two cards to the case. You can use the countersunk holes in the cases. Personally, I decided to glue the two cases directly to the case after installing the four M4 screws for the 70mm PCD.
You don’t have to follow my method; you’re free to attach the cards however you like.


All that’s left is to attach the battery and connect it to the Arcade USB board.
Now you need to connect all the buttons/microswitches and attach the board to the case with the four M5 screws. Remember that with the Zero Delay board you are only allowed 10 front panel buttons plus 2 microswitches.
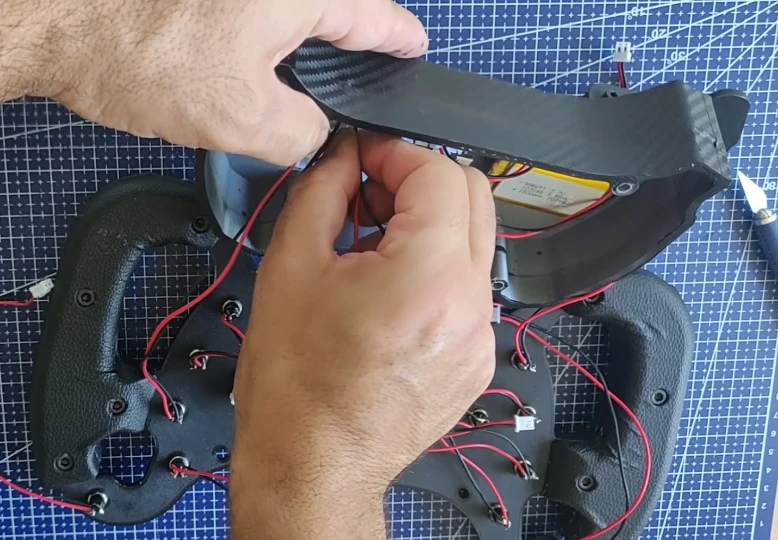
To help you close the case properly, and prevent wires from sticking out, you can print parts made for cable management.
If everything is okay, you can close the steering wheel. Above all, be careful that no wires come loose, otherwise you’ll crush them. Refer to the 2mm Cable Hook.STL and 6mm Cable Hook.STL files for guidance.
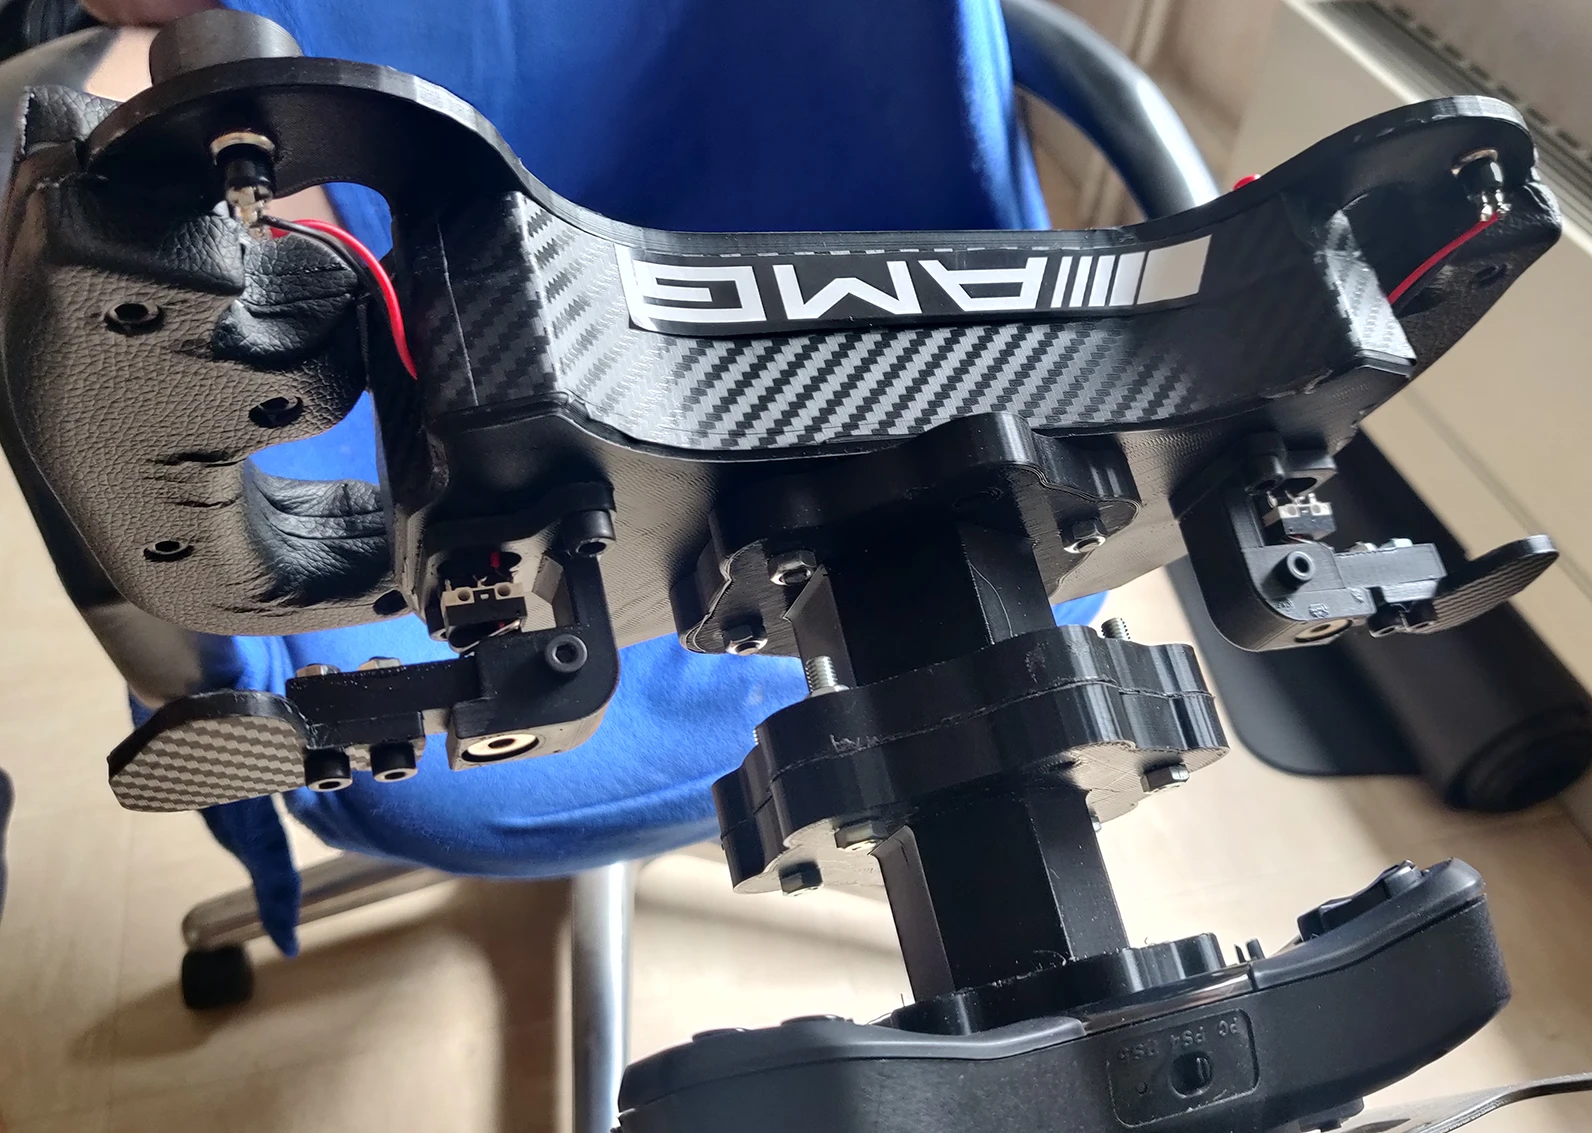
The steering wheel is almost finished.
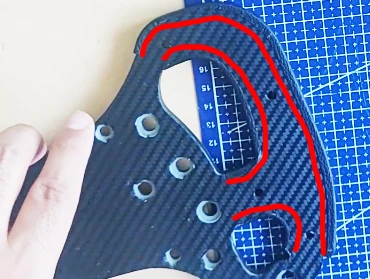
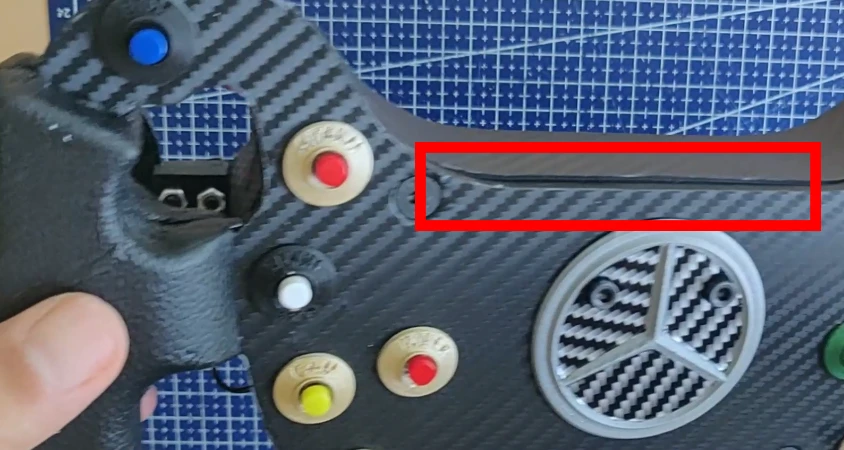
Don’t worry about this small discrepancy (in the red box), it has already been corrected in the plans.
Once the soldering is complete, all that’s left is to attach the steering wheel to a base (Logitech or other) and start playing. In this tutorial, I’ll explain how I did it for my Logitech G29.
Step 5: Securing the steering wheel and initial testing
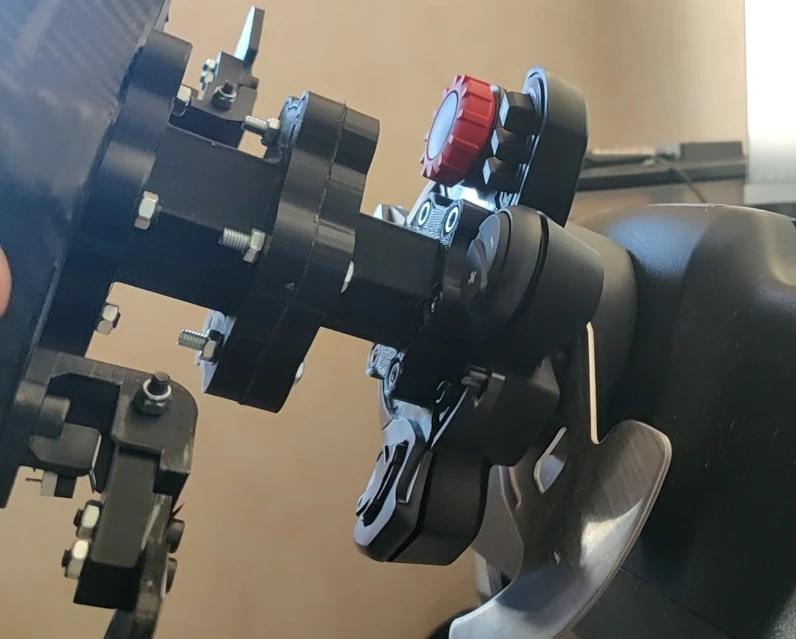
I designed a 70mm PCD > 70mm PCD spacer, as well as a 70mm PCD > Logitech G29 connector.
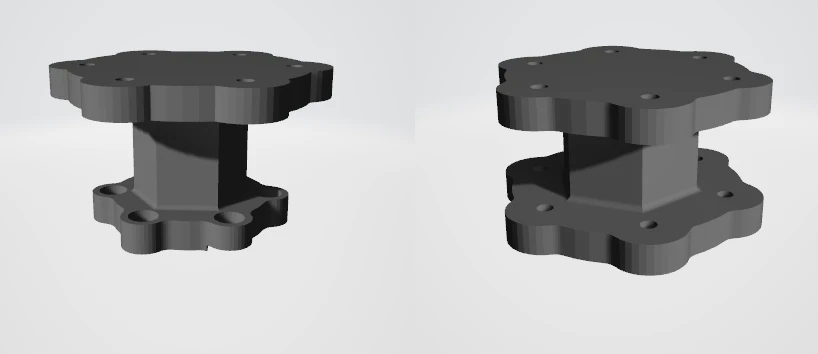
I started by fixing the 70mm PCD > 70mm PCD spacer onto the AMG steering wheel with 4 screws (more than enough):
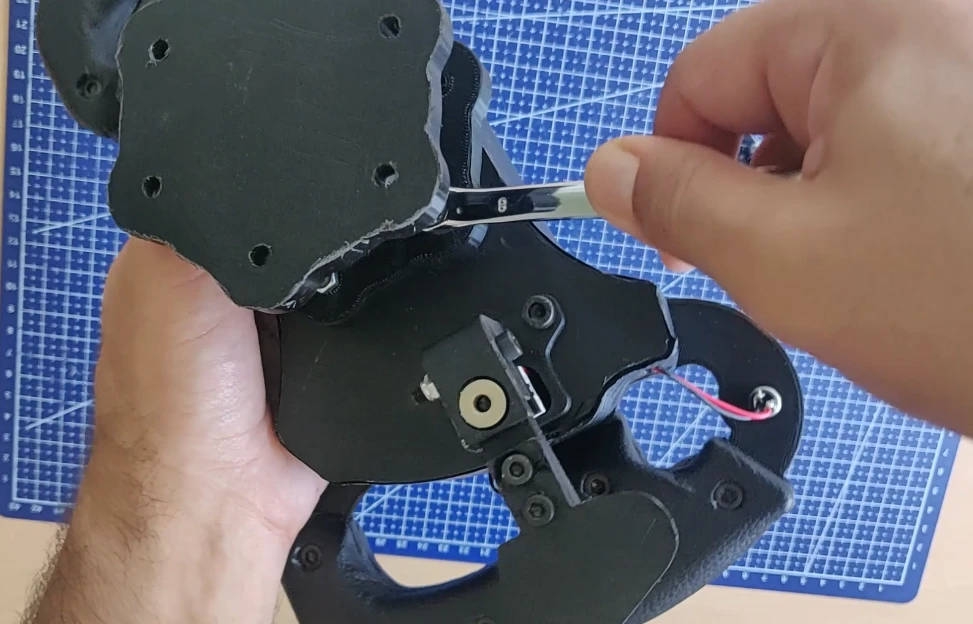
I installed the 70mm PCD > Logitech G29 connector on the Logitech base:
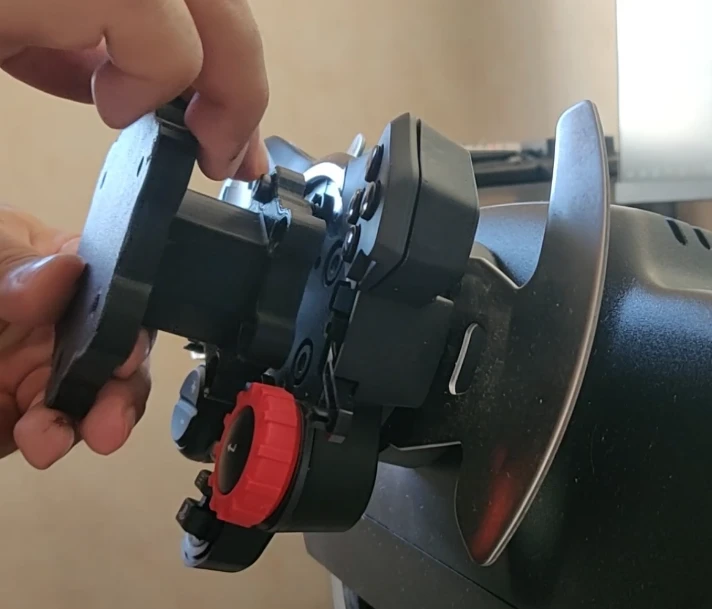
All that remains is to connect the steering wheel to the support.
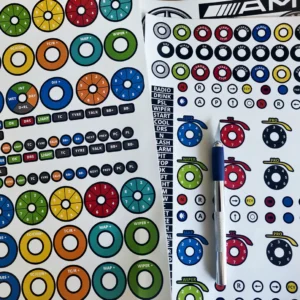
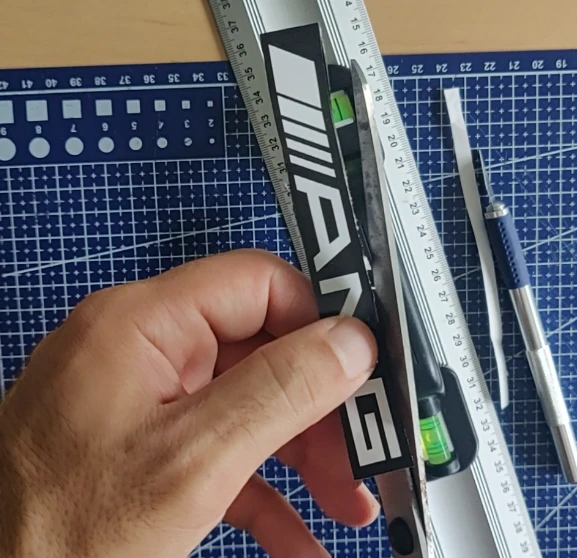
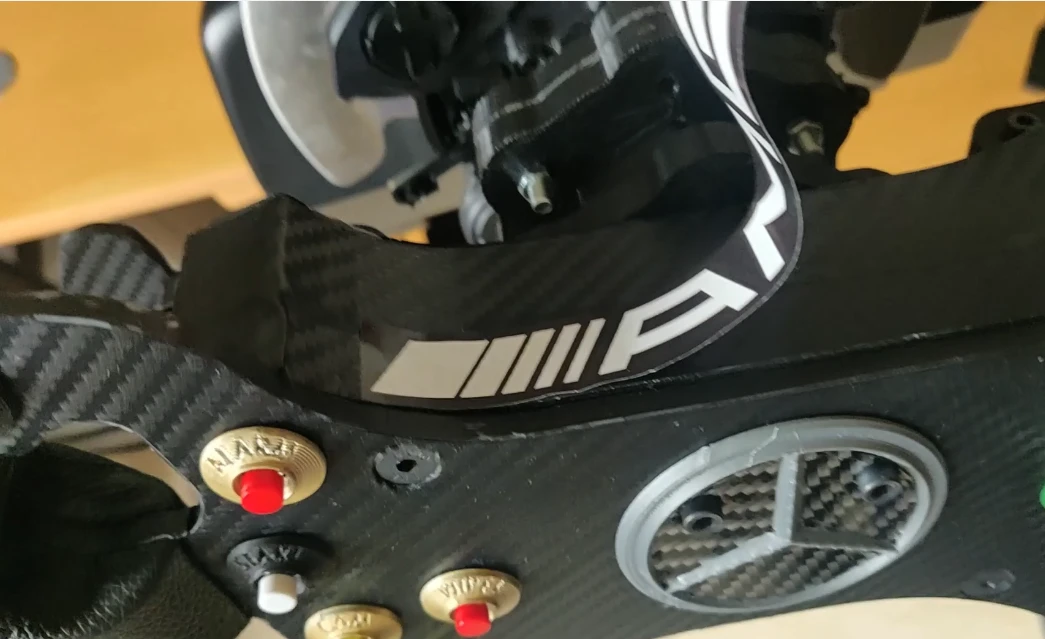
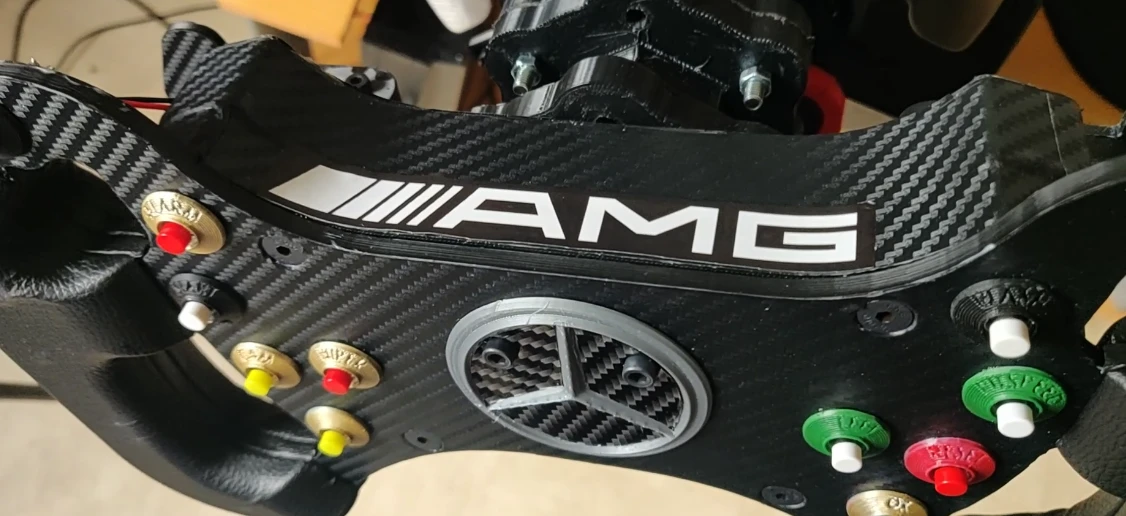
Finally, I’ll show you how I applied the AMG sticker. Printable A4 stickers are included in the file.
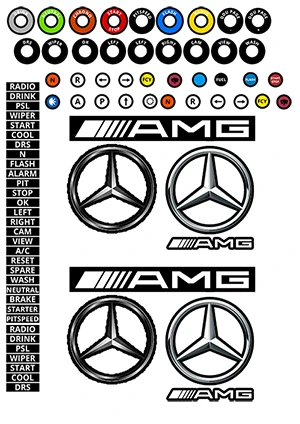
Simply print this sheet on A4 vinyl paper (preferably transparent), and cut out the stickers yourself using scissors or a scalpel.
I cut out and stuck the “AMG” on the top of the steering wheel.
DIY AMG Steering Wheel Replica: Final result and first gameplay
There you go, your steering wheel is finished!
Build cost of the DIY AMG Steering Wheel Replica
What is the cost of this steering wheel? As mentioned in the introduction, it will depend on the material used. In this tutorial, we have a steering wheel that is 100% 3D printed; the total cost is estimated at around $30, including the 3D printing (I own a 3D printer).
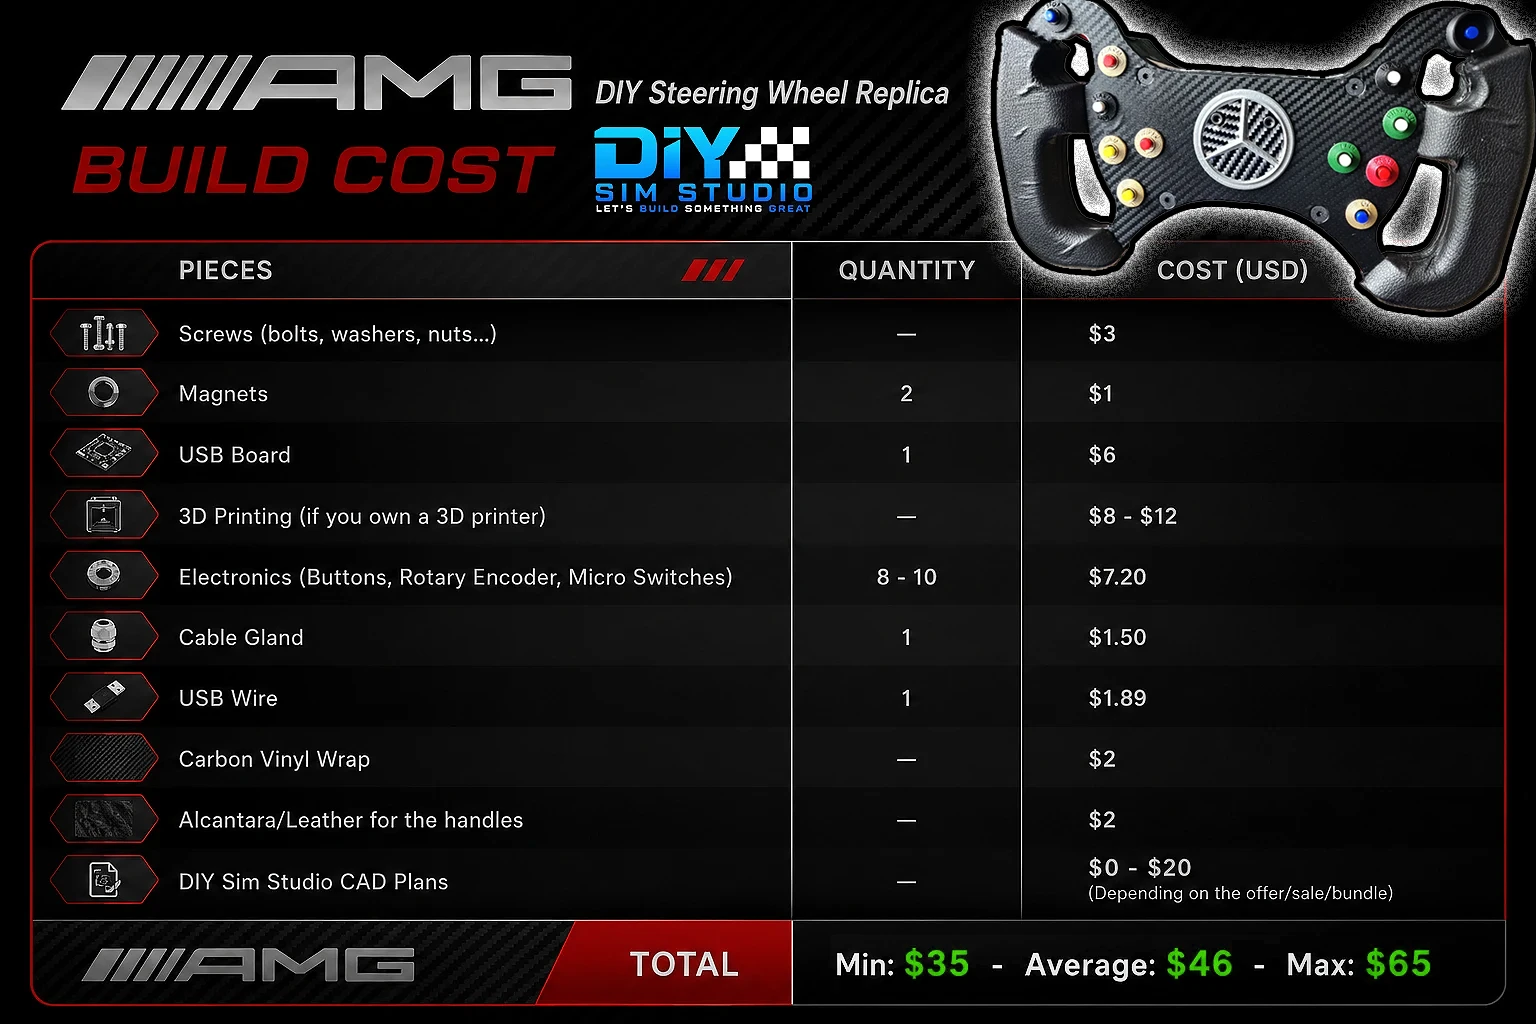
It’s excellent value for money. Plus, you get to learn DIY skills and have the satisfaction of making the product yourself.
I hope you enjoyed this tutorial, thank you for reading and see you soon!