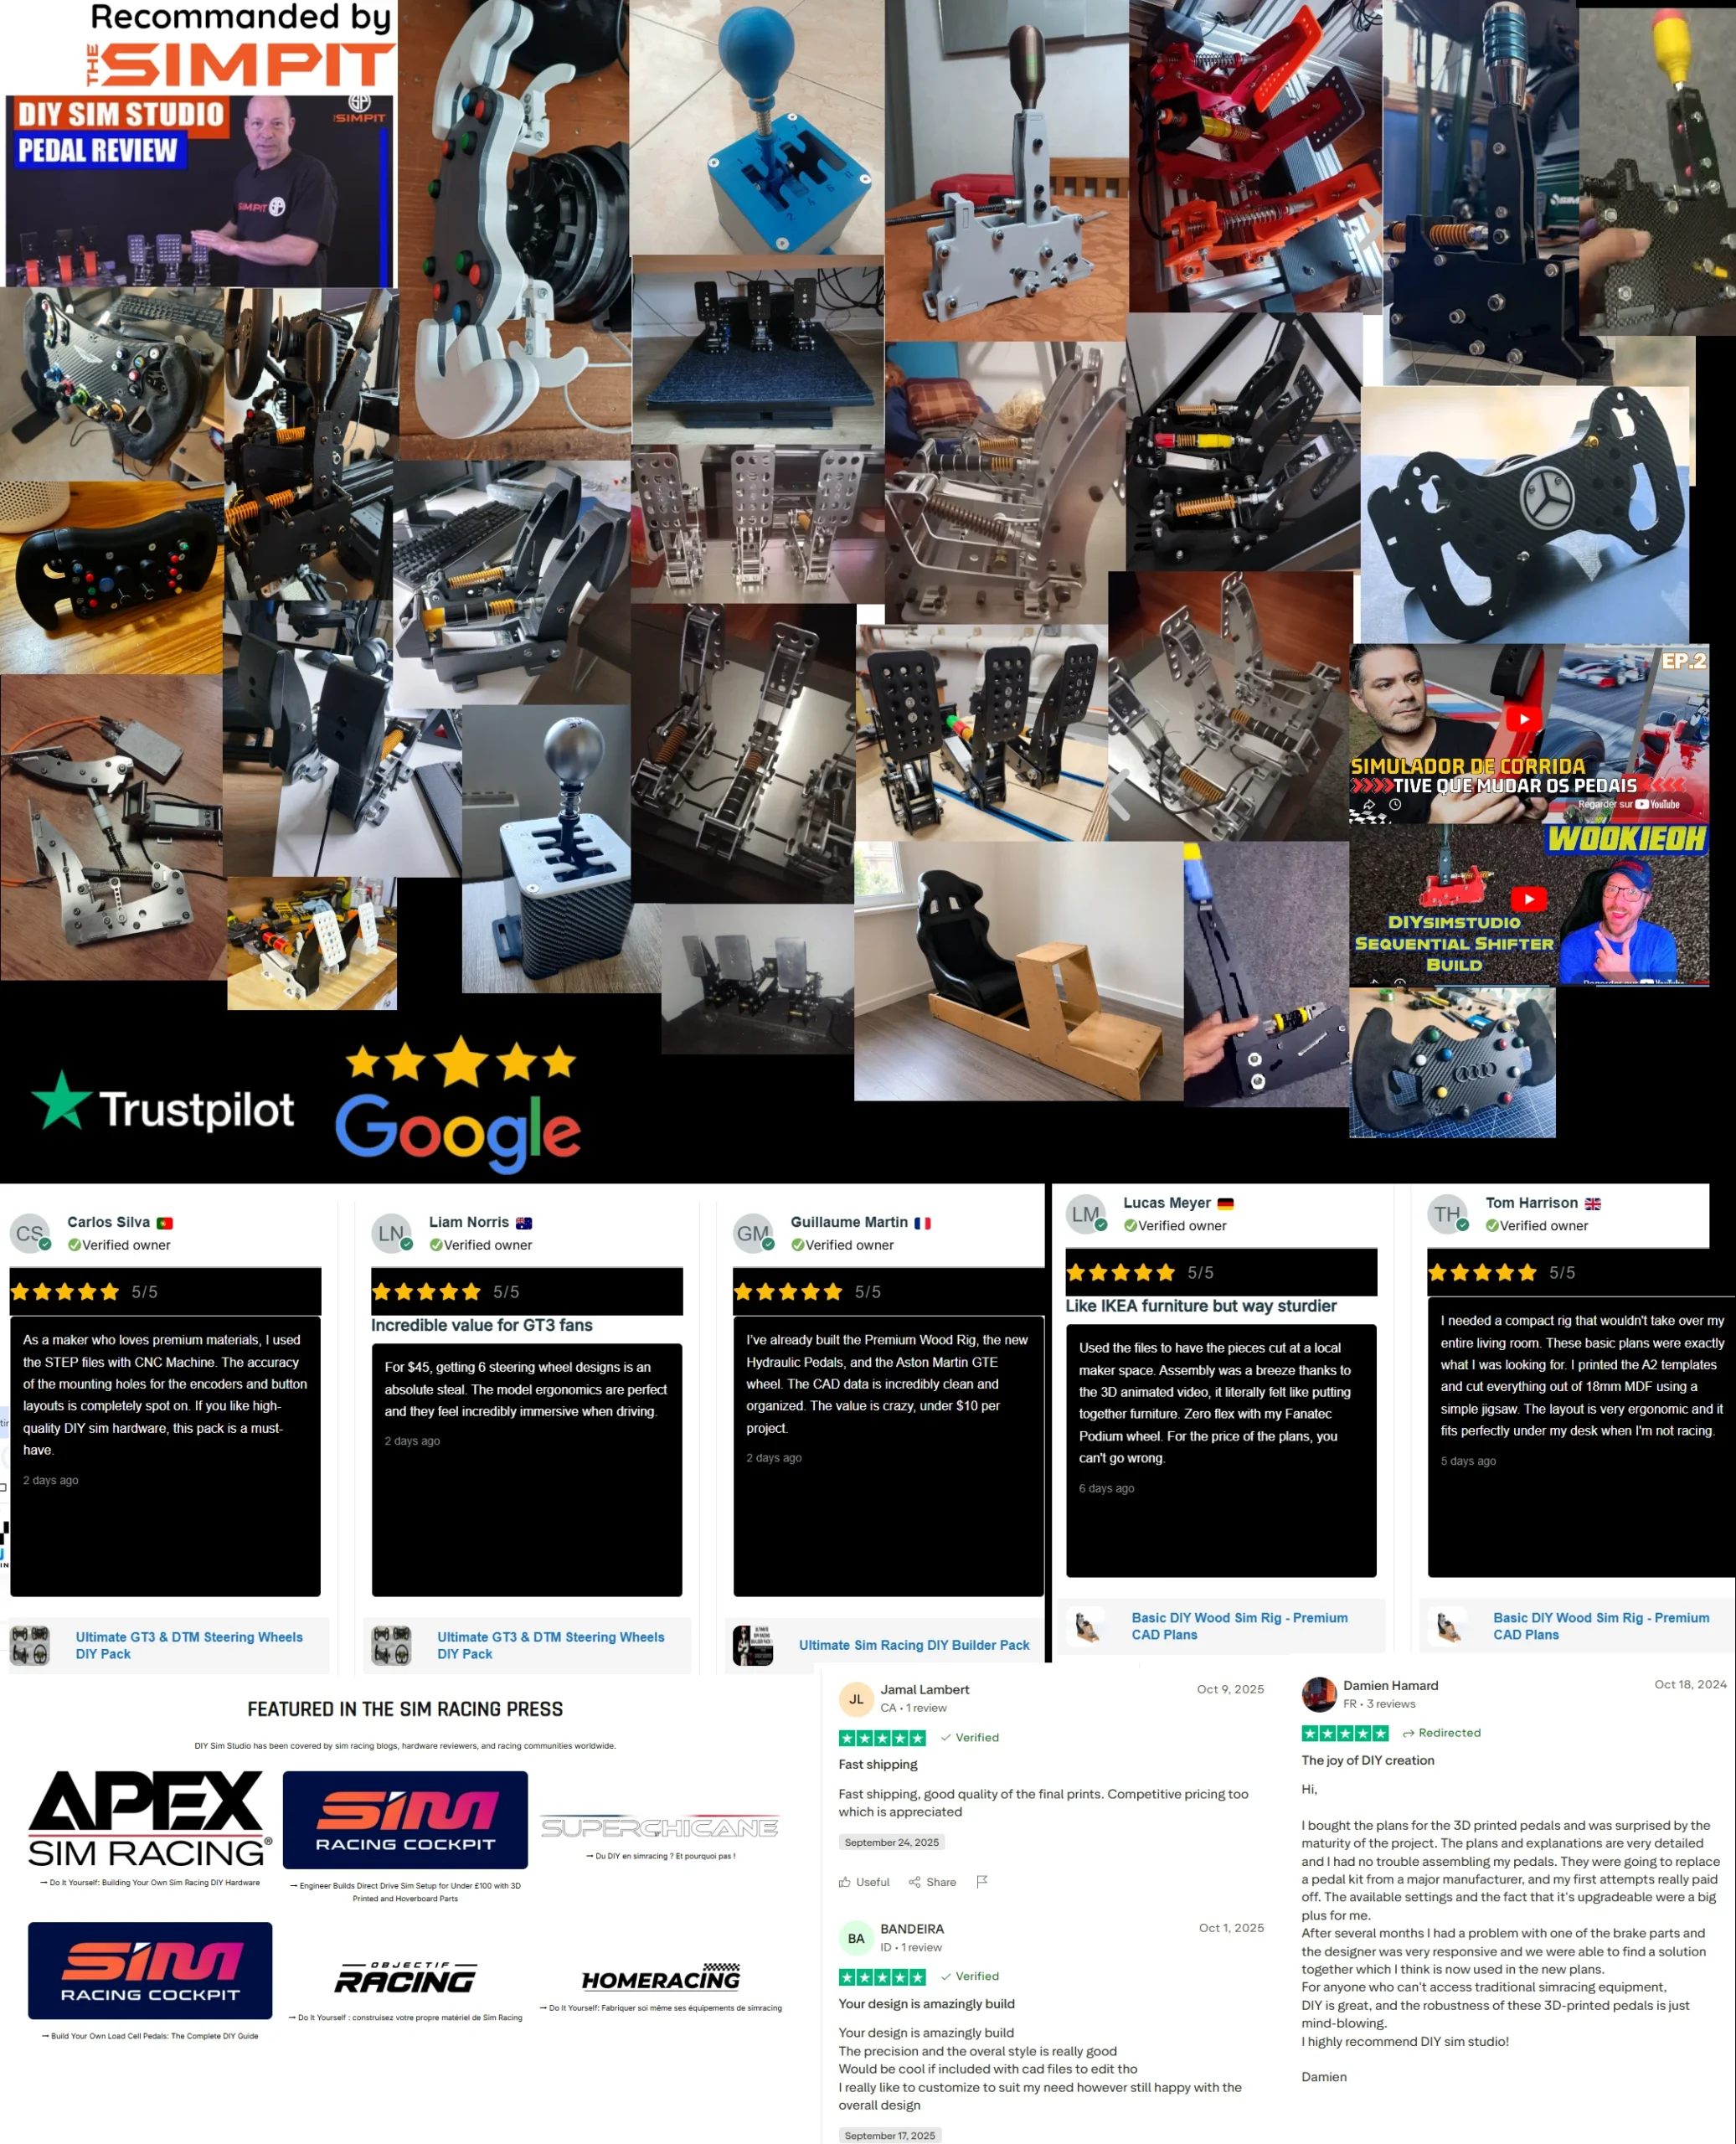
Here I will explain to you how to make a DIY Sequential Shifter. It will be quite easy and quick to do. This sim racing shifter is strong, adjustable, easy and inexpensive to build.
There is almost no difference between the 3D printed version and the metal version (laser cut or CNC machined). The assembly will be almost the same. You can use this tutorial if you have opted for a steel/aluminium shifter.
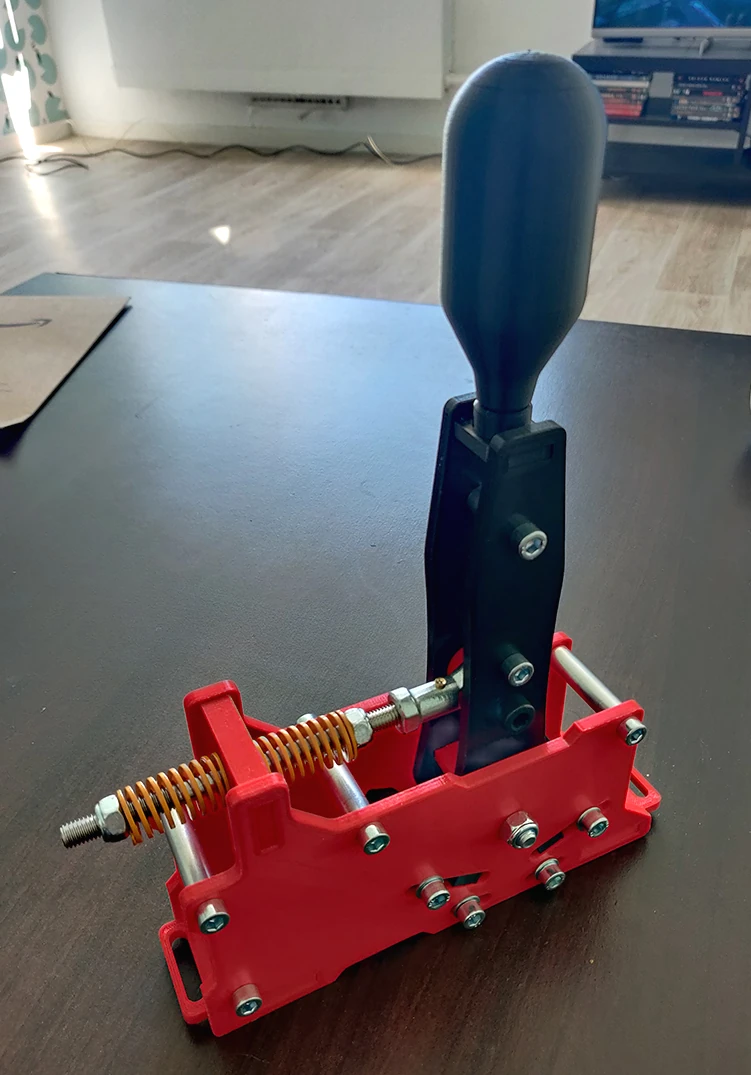
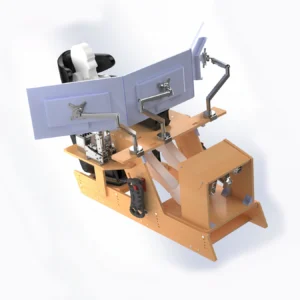
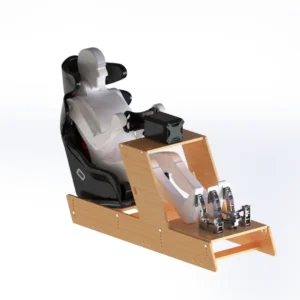
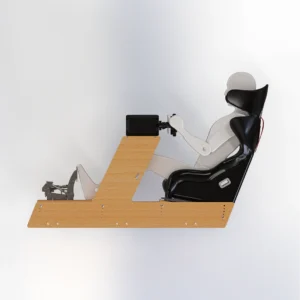
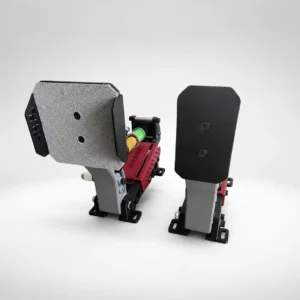
Here is what I will help you achieve:
The CAD File available is here : ↗️ Sim Racing Sequential Shifter
First step, you need to look at this video :
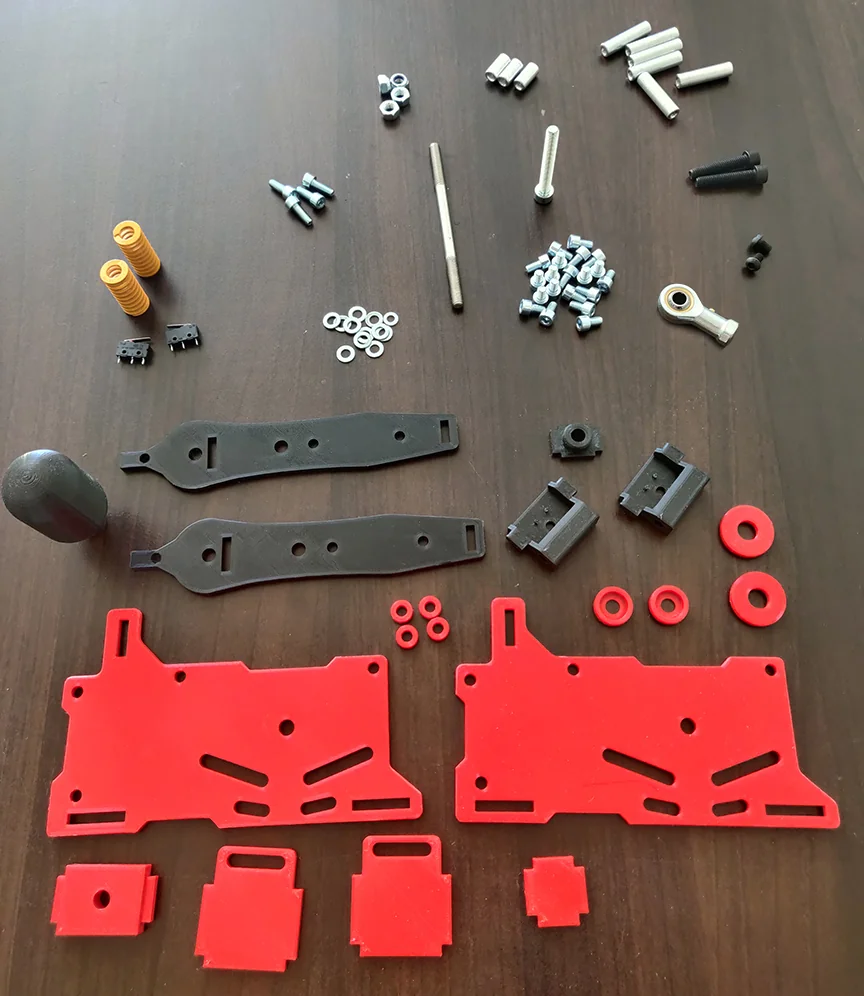
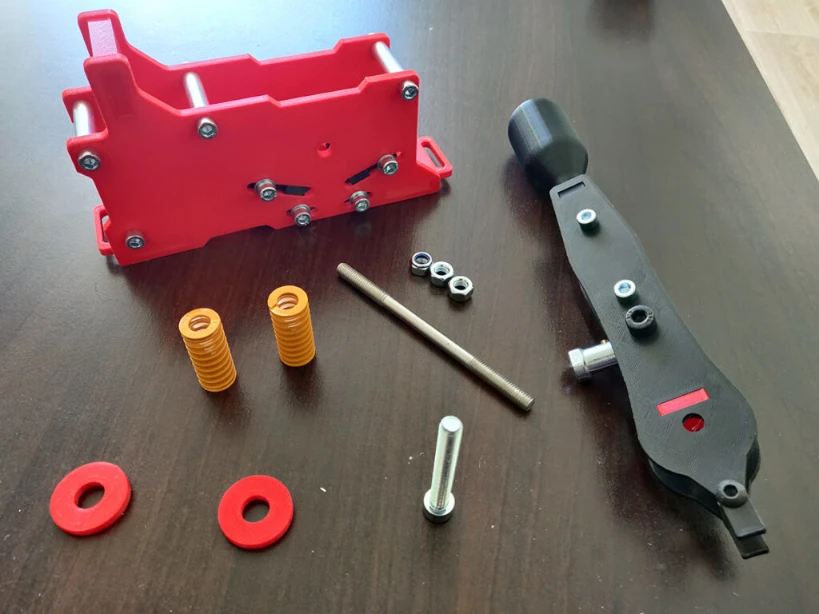
DIY SEQUENTIAL SHIFTER REQUIRED PARTS
Find what you need in the DIY Tools section.
Here’s what you’ll need to build the shifter.
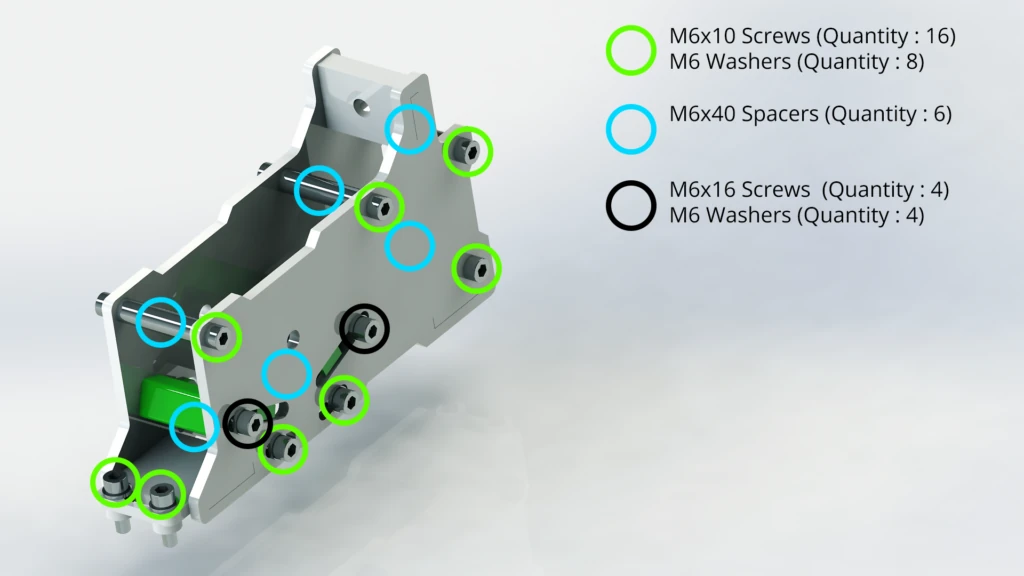
The Screws:
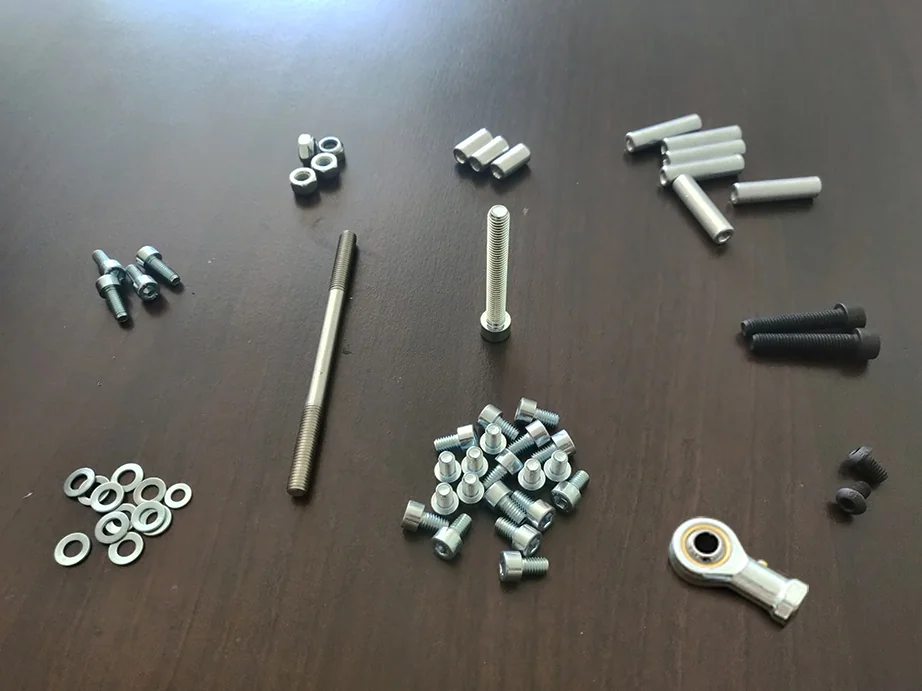
| Diameter x Length – Screws | Quantity |
| M8x40 | 2 |
| M6x10 | 20 |
| M6x10 Button Head Screw | 2 |
| M8x60 | 1 |
| M8x130 Half Thread Rod | 1 |
| M6x16 | 4 |
| Diameter – Nuts | Quantity |
| M8 Lock Nut | 4 |
| Diameter – Washers | Quantity |
| M6 | 12 |
| Diameter x Length – Spacers | Quantity |
| M6x20 | 3 |
| M6X40 | 6 |
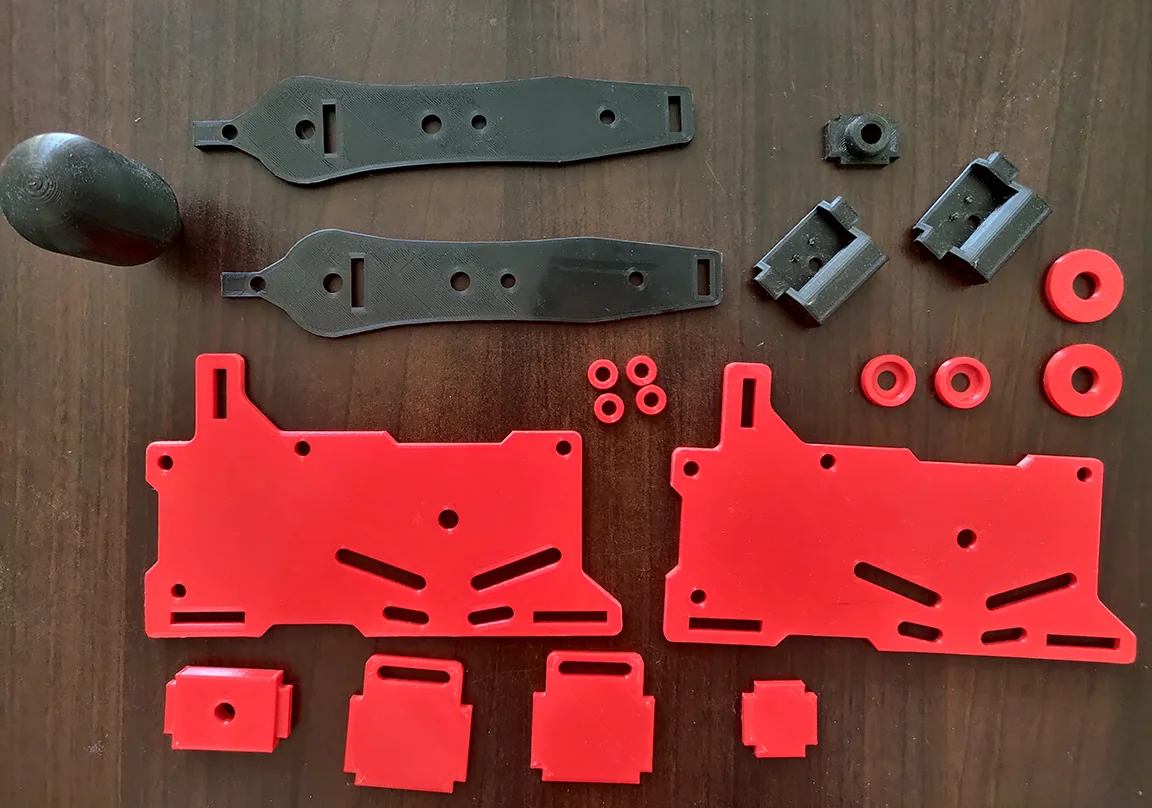
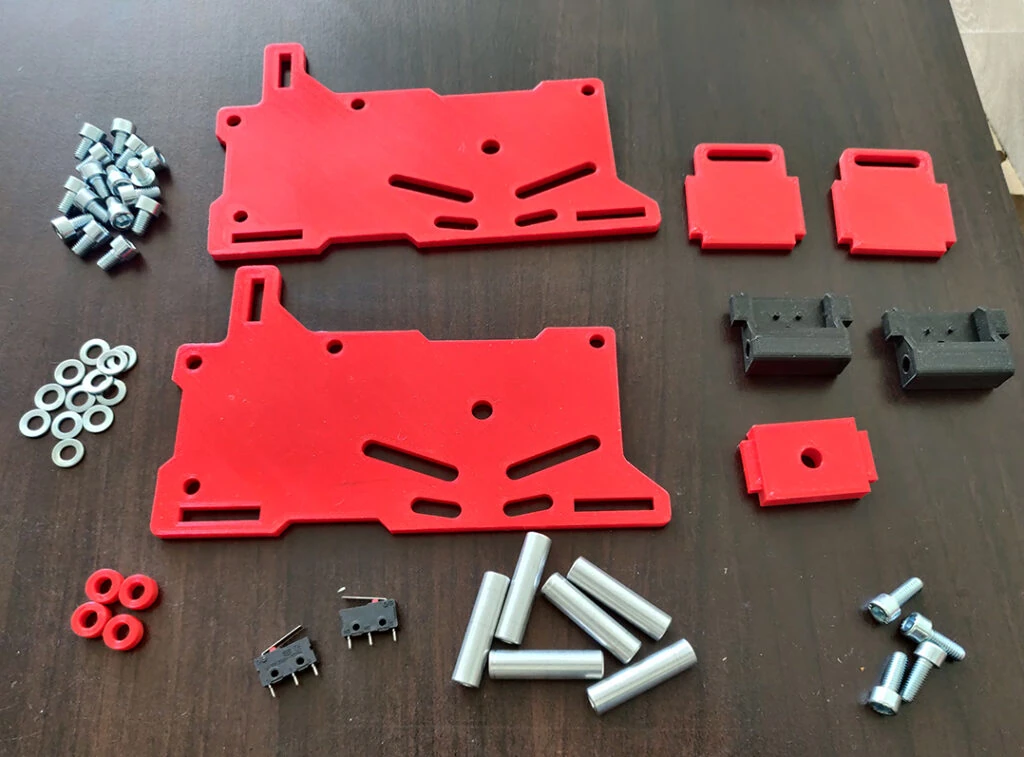
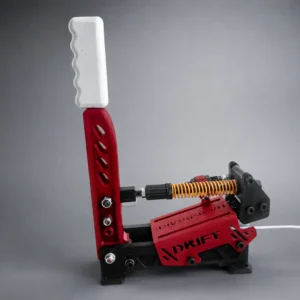
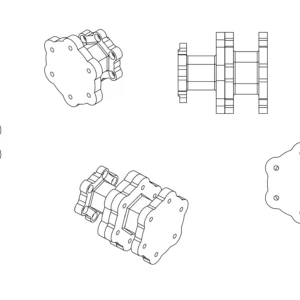
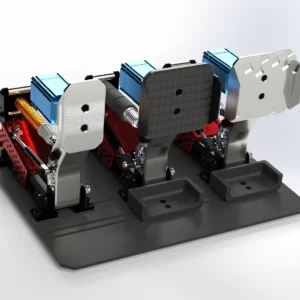
3D Printed Sequential Shifter Parts:
Printed by :
Looking for high-quality 3D printing services? With Treatstock, you can easily get instant quotes from professional manufacturers worldwide. Upload your design today and get your free, no-obligation quote in minutes! 👉 Get Your Quote Now
The Springs and Microswitches:
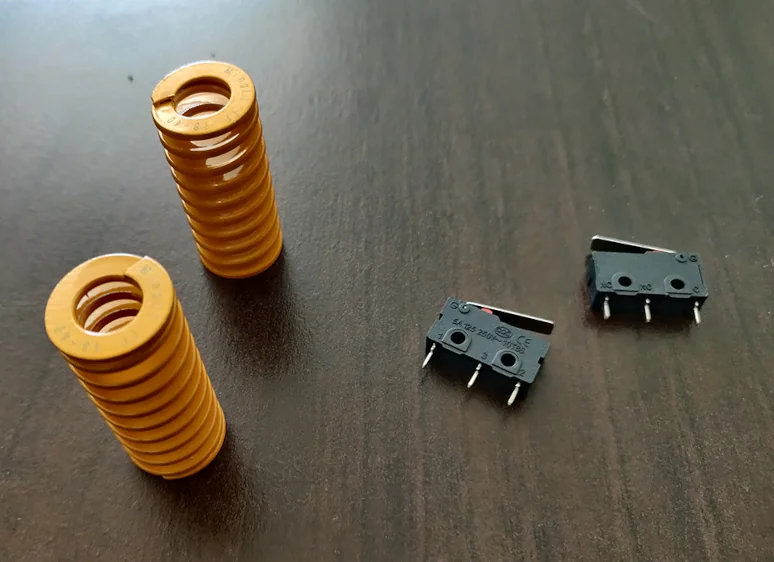
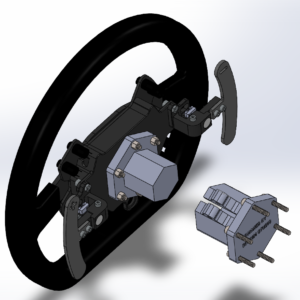
All required parts:
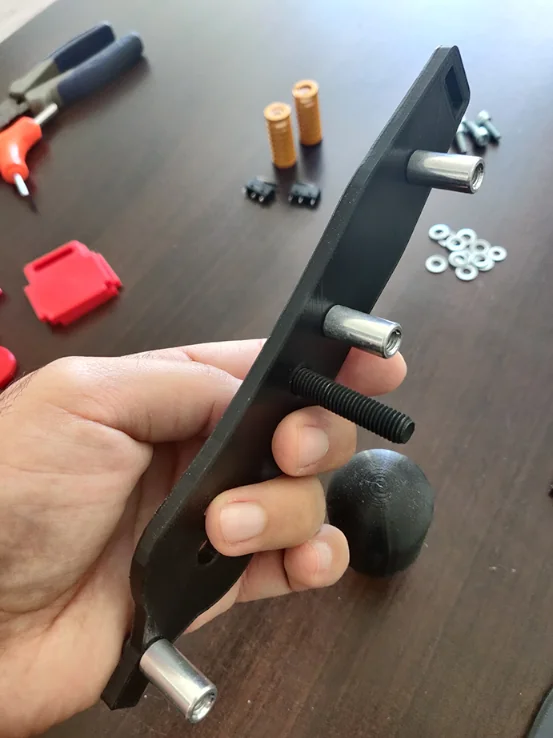
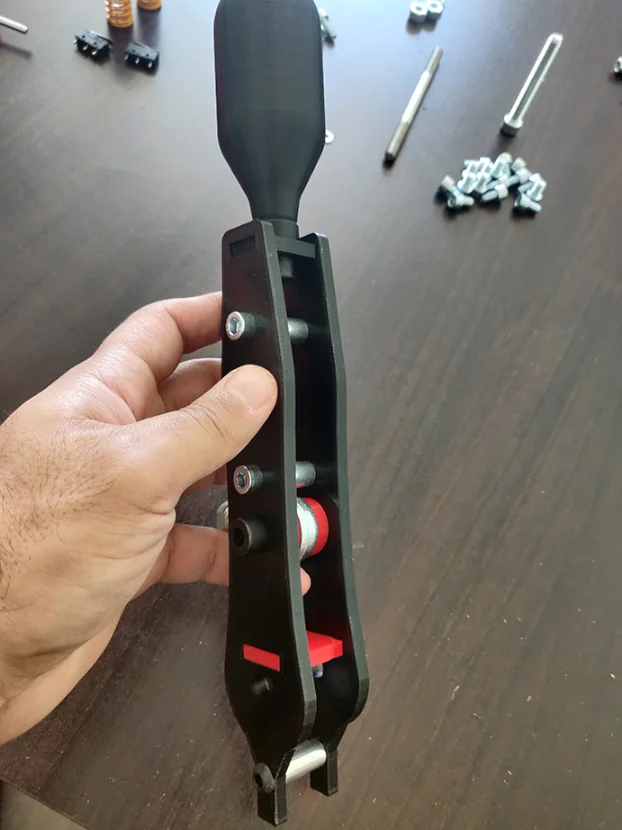
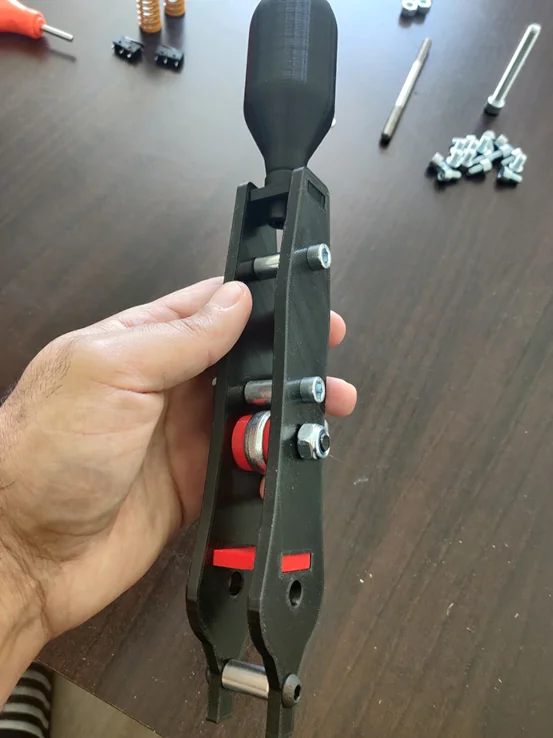
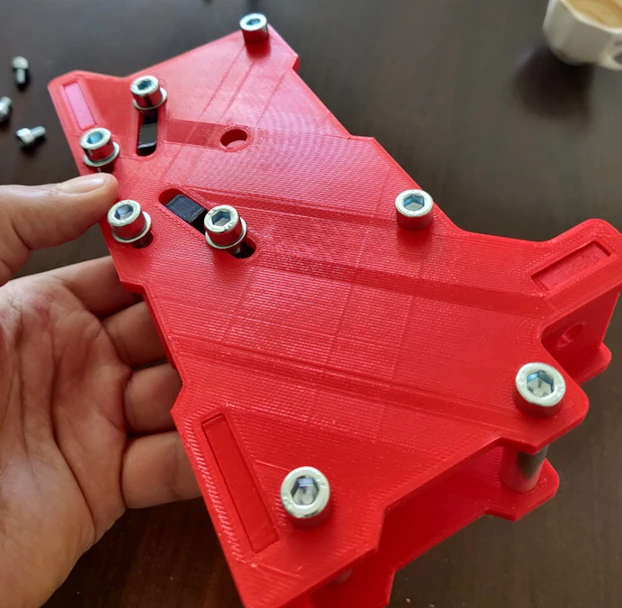
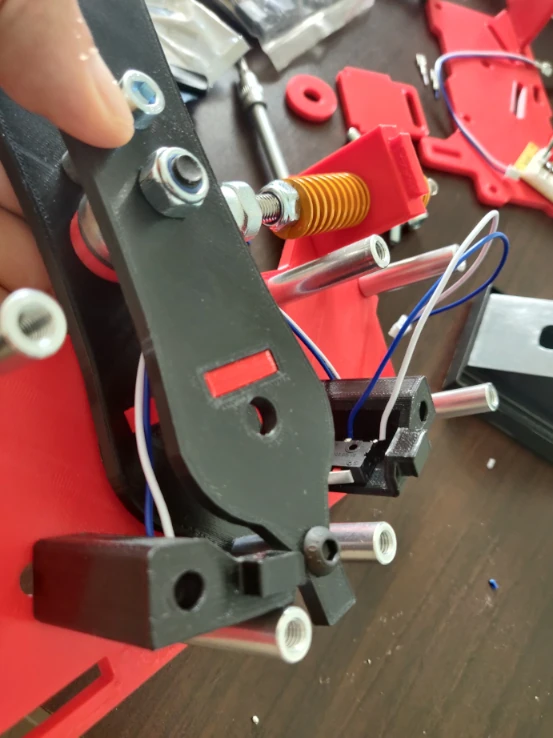
STEP 1: DIY Sequential Shifter Mobile part
To begin, we will assemble the mobile part.
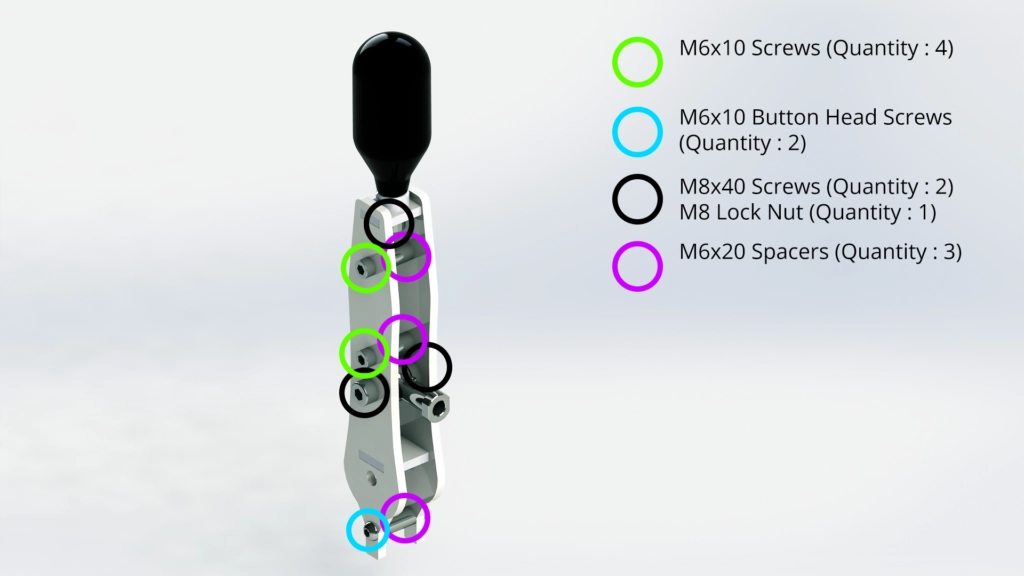
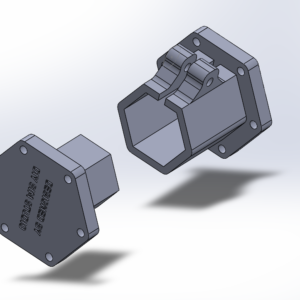
The required parts:
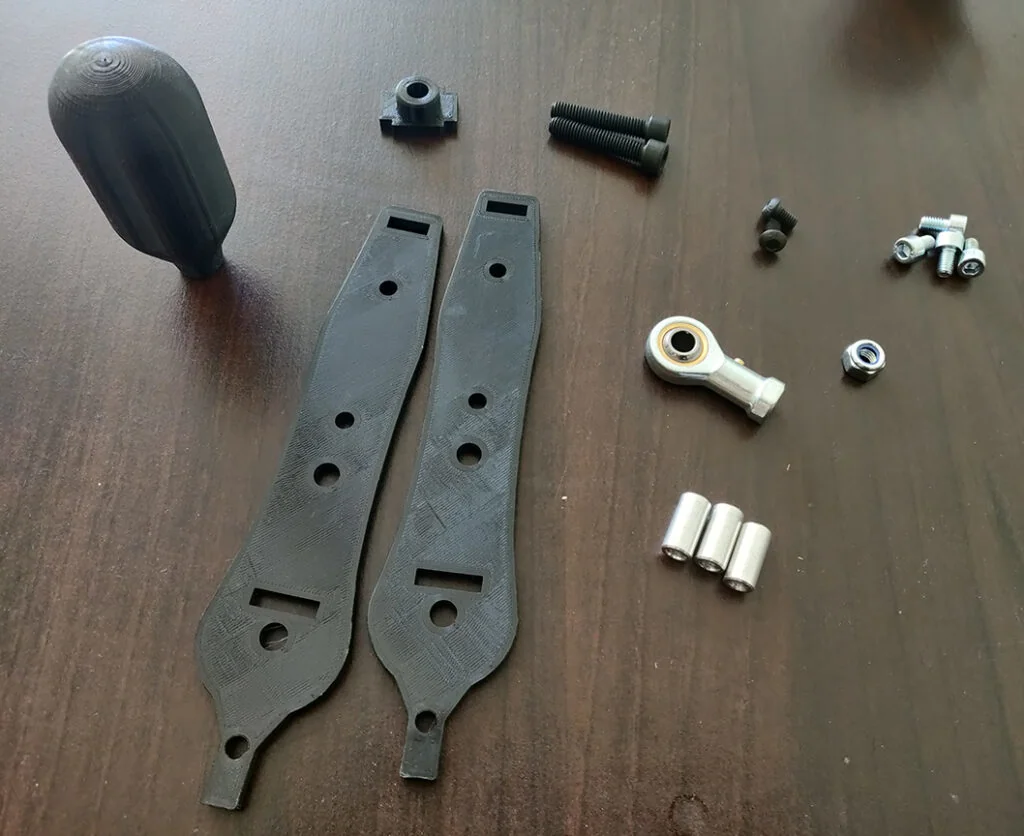
Assemble the first plate. You must insert the screws and spacers, after that the bottom mortise, M8 Female rodend and its centralizers (red in the photos).
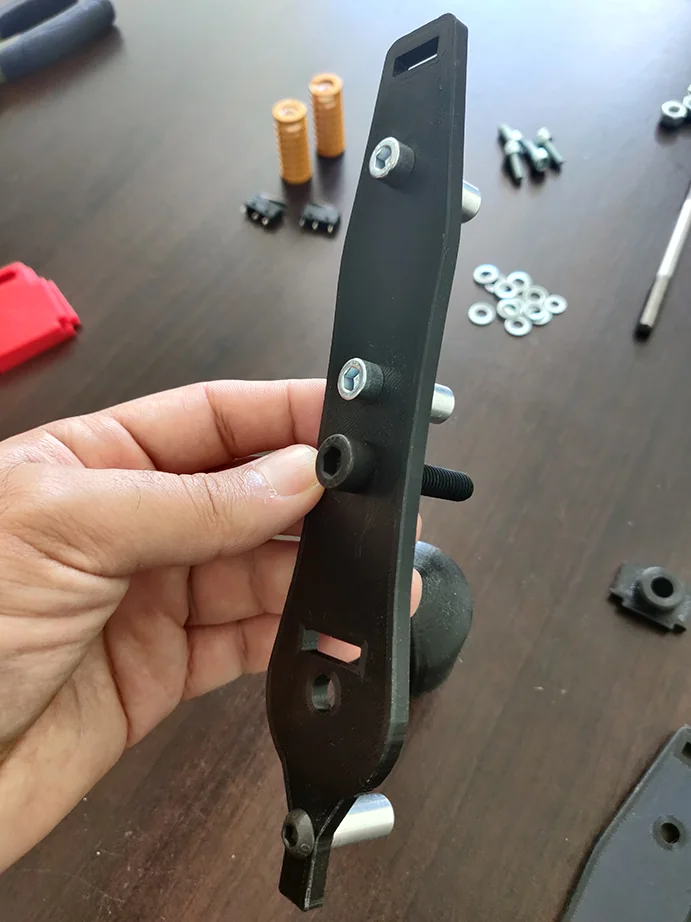
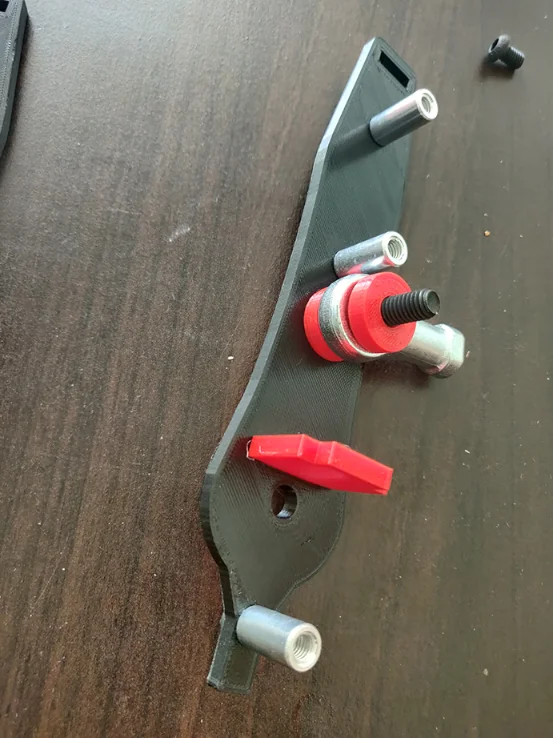
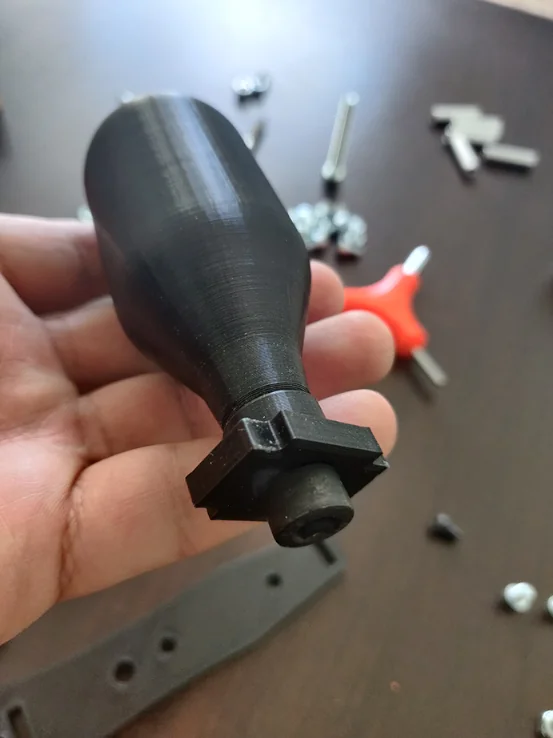
You must then assemble the knob and its support by screwing it.
And finally, fix the second plate.

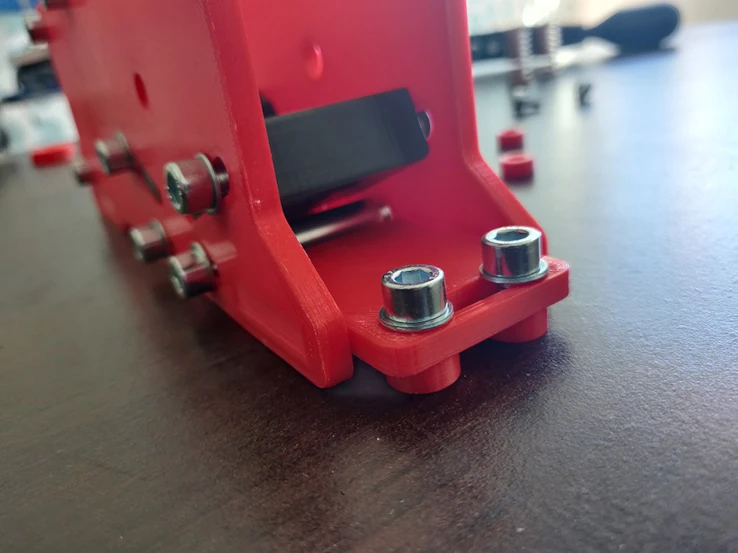
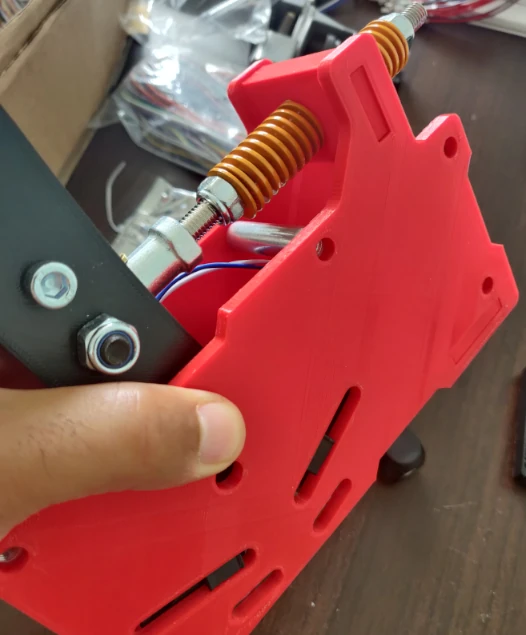
STEP 2: DIY Sequential Shifter Fixed part
Now we will assemble the fixed part.
The required parts:
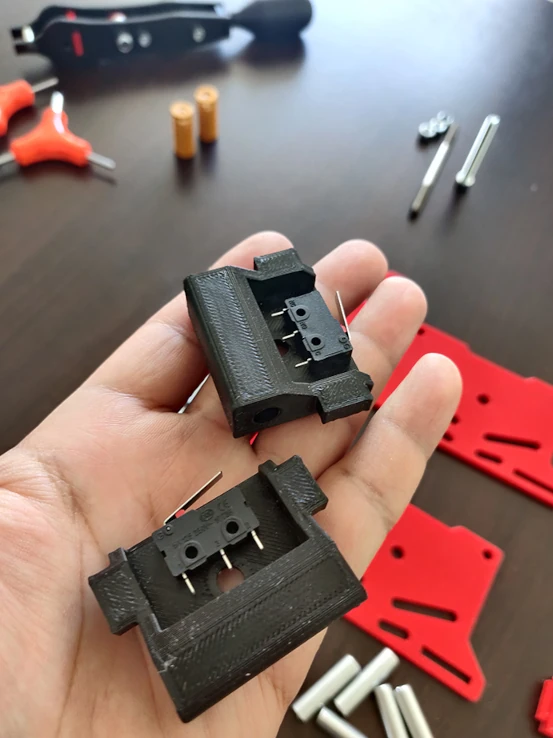
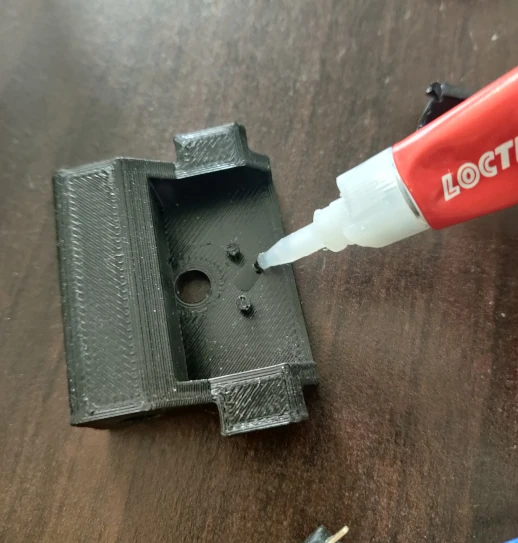
As with the mobile part, you must first make the fixings on a single plate. Don’t forget to solder the wires on the microswitches before sticking them (with glue) on their supports.
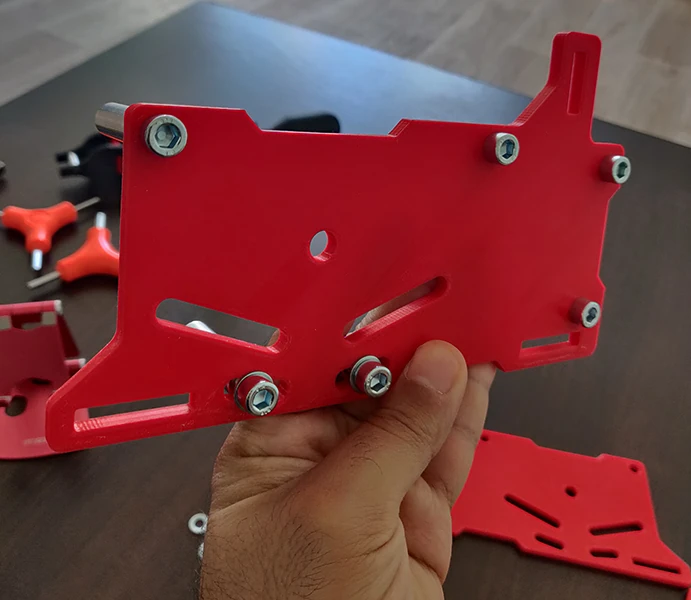
Now you can finish fixing the second plate.
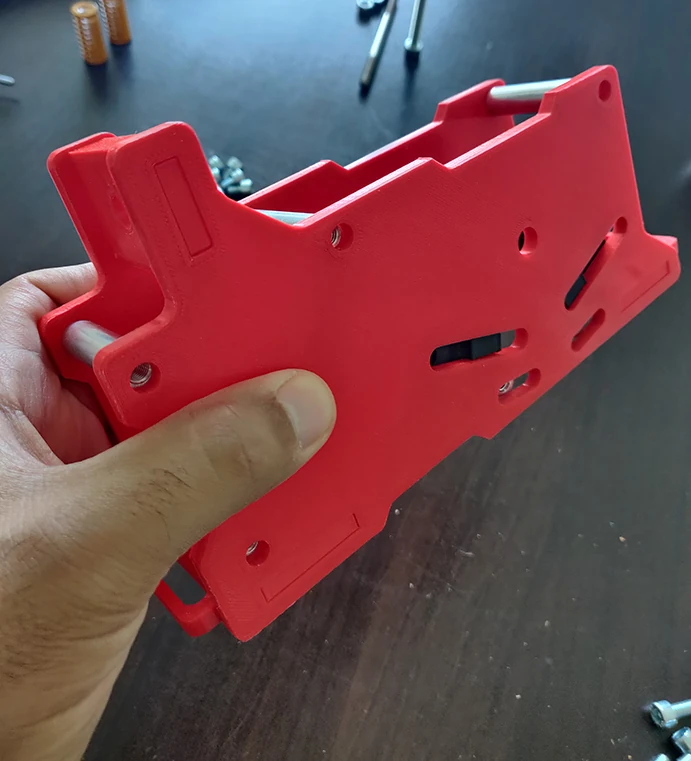

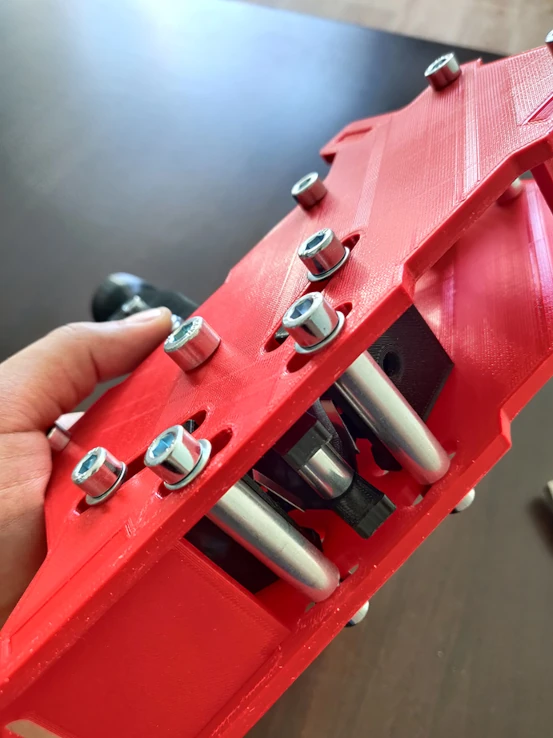
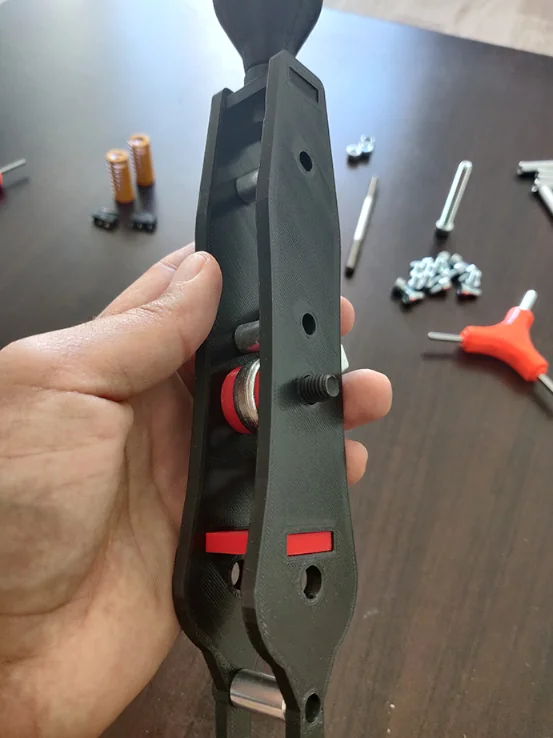
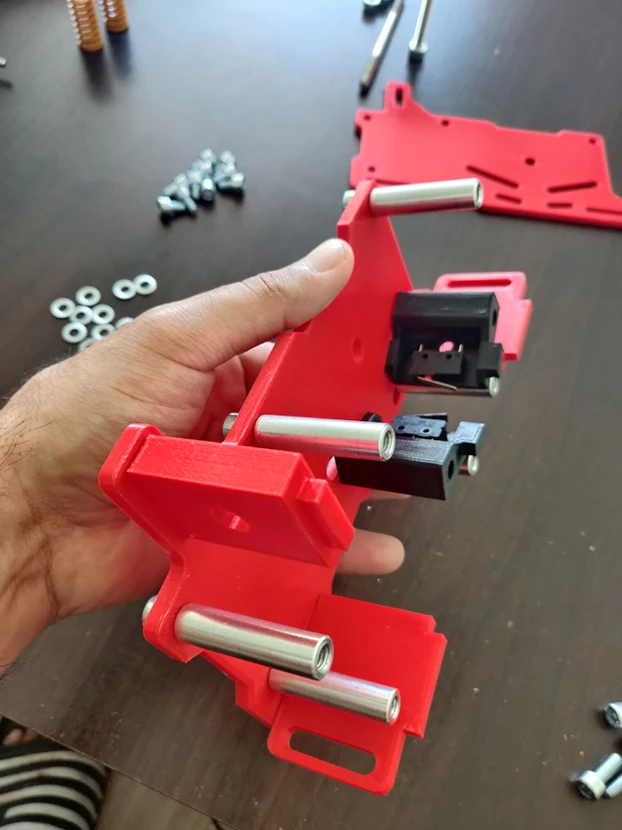
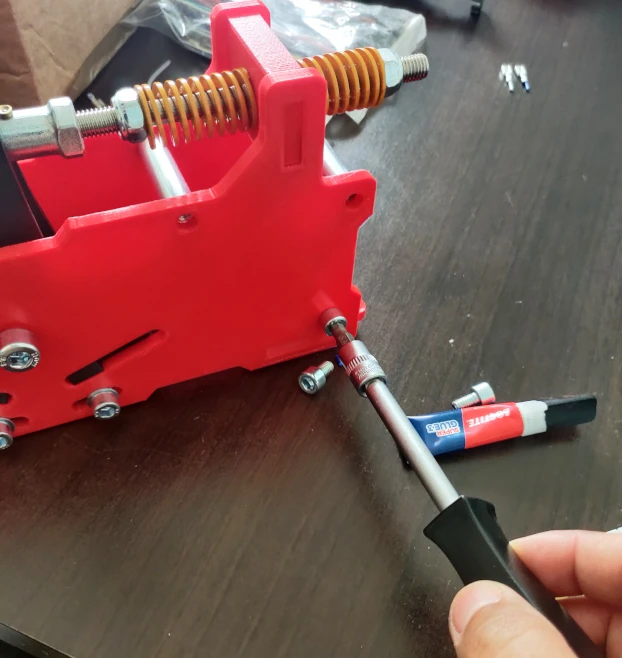
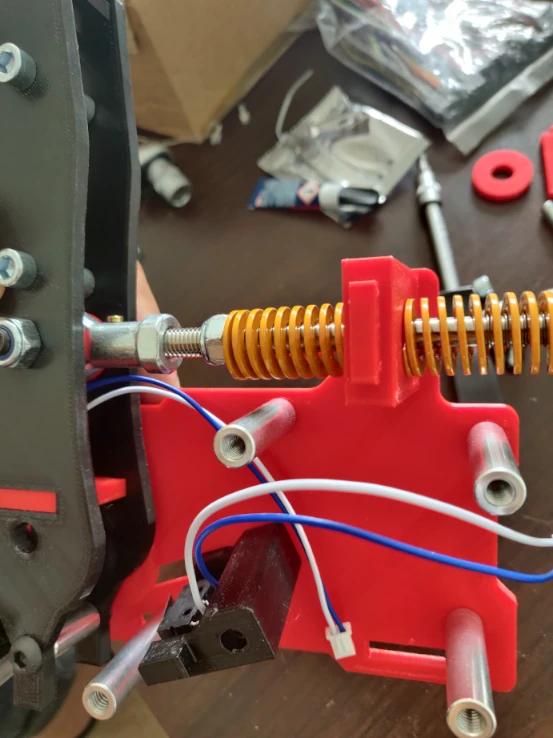
STEP 3: DIY Sequential Shifter final assembly
Now we will assemble the mobile part and the fixed part, as well as the springs.
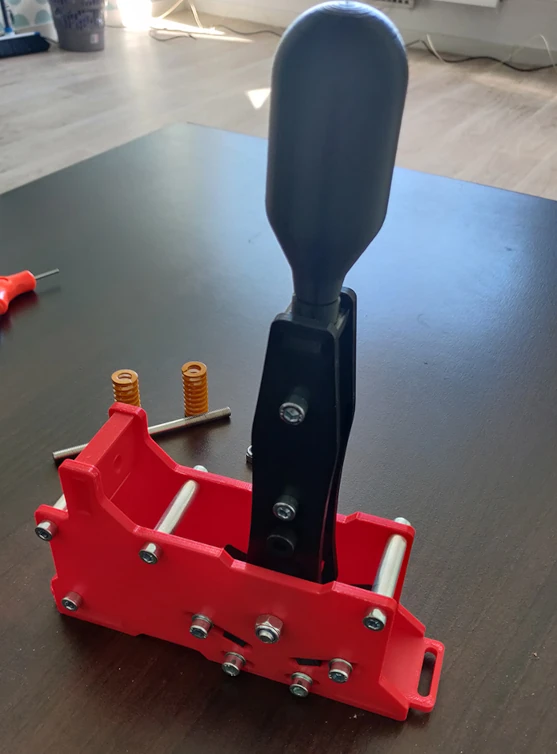
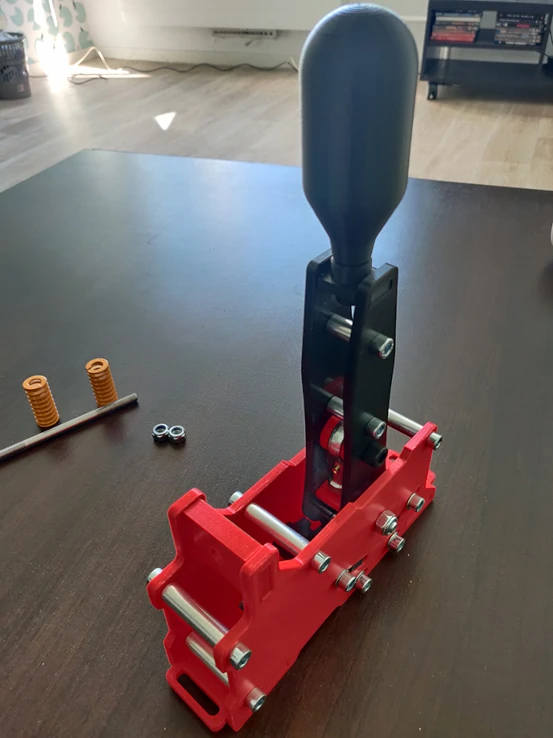
You must now insert the M8x130 screw and the two springs, as well as the two nuts.
STEP 4: Soldering
You have now completed the assembly, you need to move on to soldering. There are two solutions: Arduino Pro Micro and and 0 Delay Usb Arcade Board (the easiest, and used for the H Shifter).
For the Arduino solution, here is the soldering diagram:

The Arduino Sketch is provided in the file.
- Arduino Pro Micro Board
- Micro USB Cable
- Arduino software: https://www.arduino.cc/en/software
- Joystick library (mandatory): https://github.com/MHeironimus/Arduin…
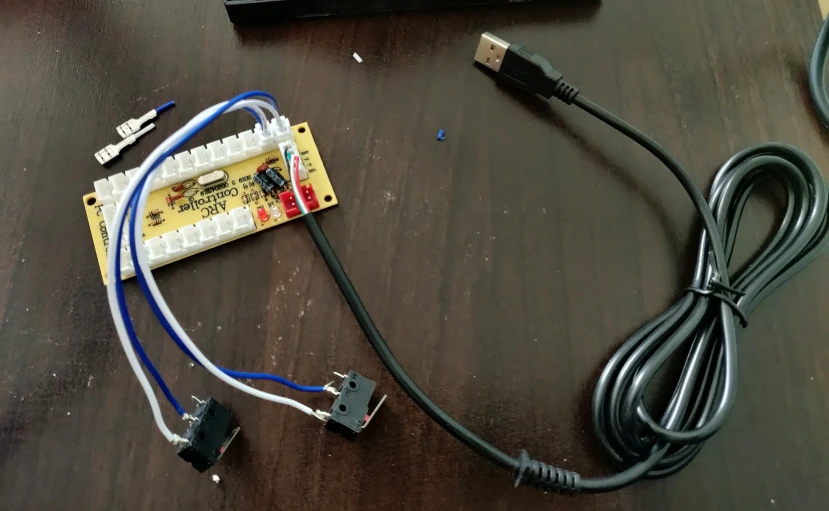
Here I will show you the solution with the 0 Delay Usb Arcade Board, which is easier and plug and play.
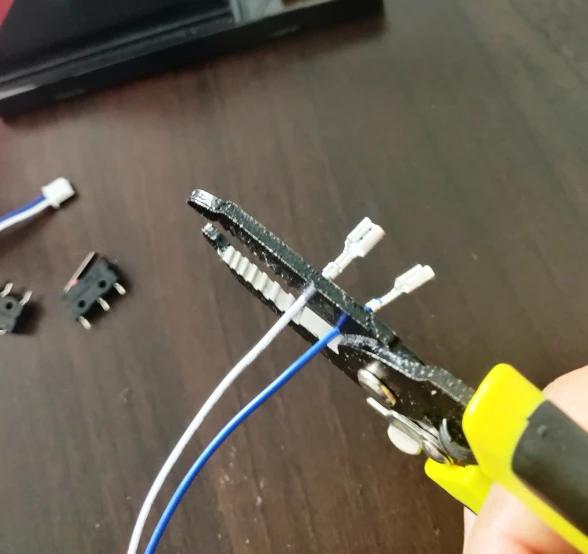
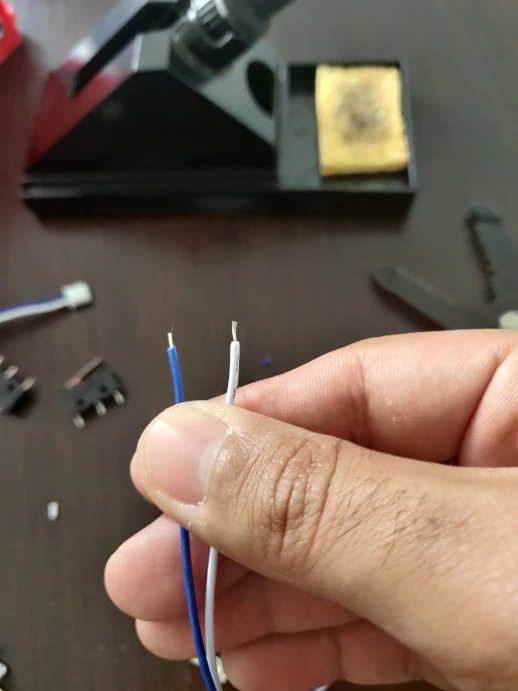
To begin, you must solder the 2 pin connectors to the microswitches. I used this Wire cable stripper and an Electric Soldering Iron.
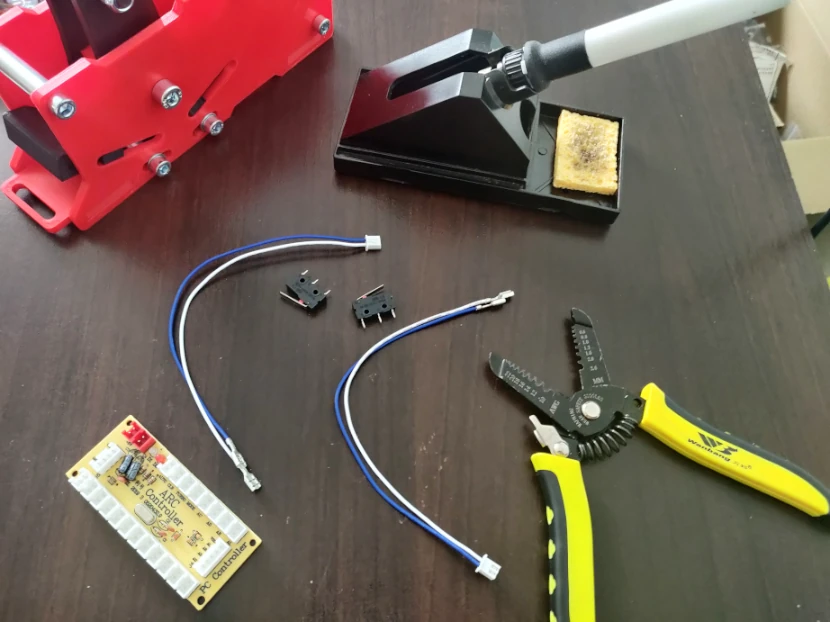
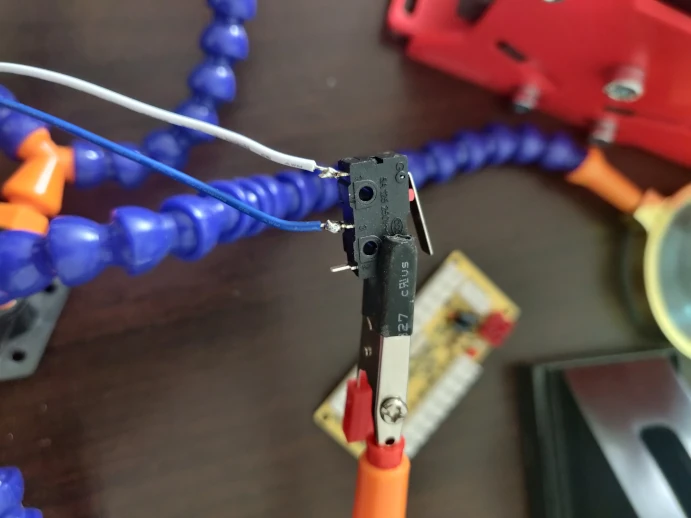
The microswitches must be connected on the USB board.
Remove the plate from the fixed part and remove the two microswitches supports.
Now glue the microswitches to their supports. You will need to fit your microswitches onto the two small tips.
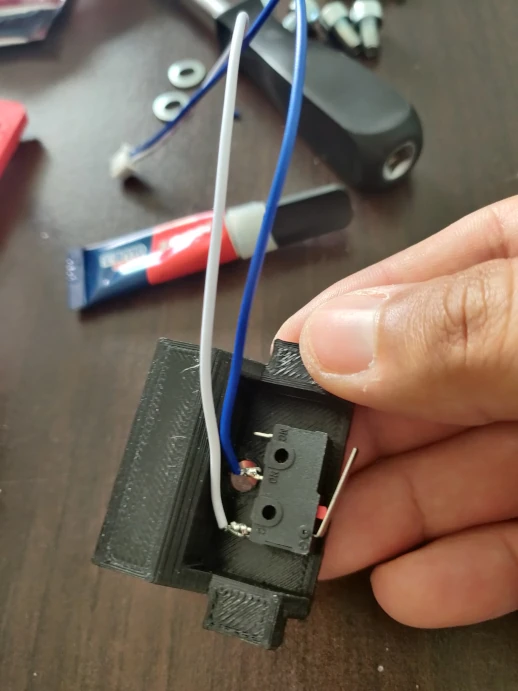
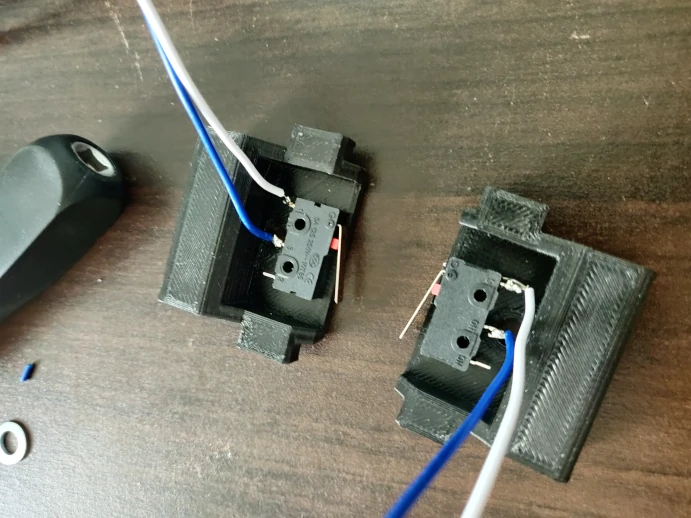
You can now reassemble the microswitches. If you want avoid wires collisions, place the wires of the microswitch which is in front between the red mortise and the female rodend.
Reassemble the plate and fix the USB board to the inner side of the plate.

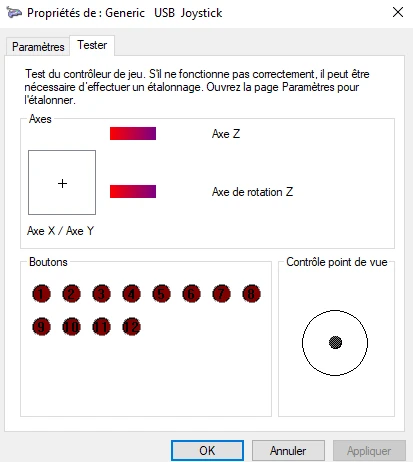
You can connect your shifter to your PC and test the microswitches with the Windows game controller.
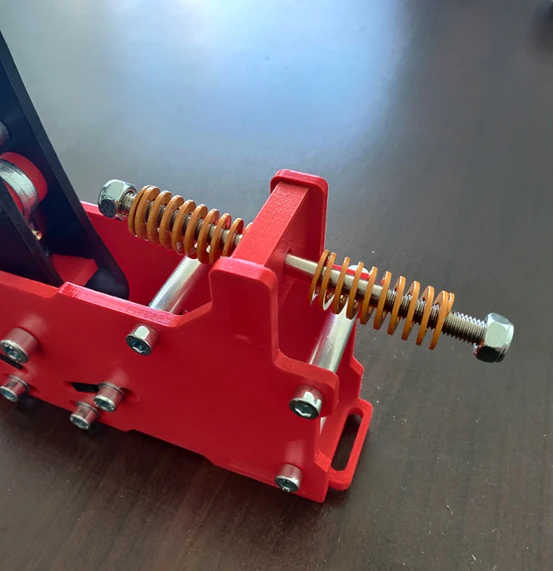
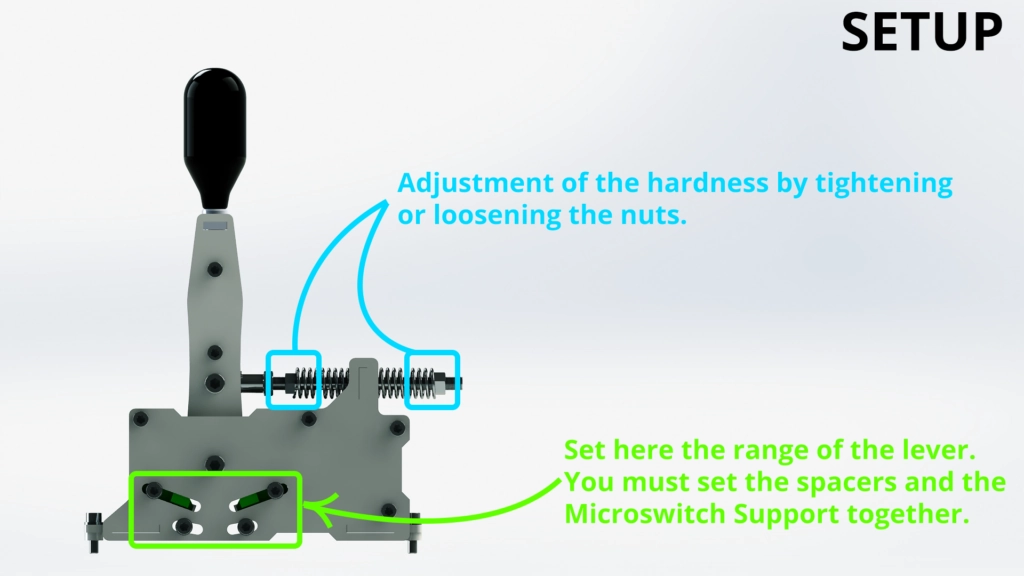
STEP 5: Adjusting your 3D Printed Sequential Shifter
Now, you need to adjust your springs (using the nuts and tightening the M8x130 screw). In neutral gear, the mobile part must be straight (90° angle), and the springs must be slightly compressed. You also can adjust the range limit of the lever.
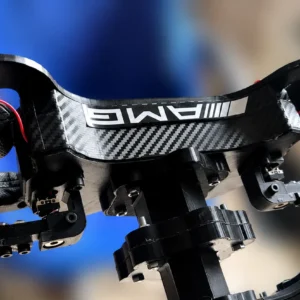
Congratulations! Your DIY Sequential Shifter is complete, you can now enjoy it in your favorite games.
The CAD files are available in the shop: Sim Racing Sequential Shifter
If you have any questions or issues while making this Shifter, you can post in the comment section, I will help you as soon as possible.


That’s a great design and I’m trying to replicate the shifter. Parts have already been ordered and files for the 3D printer have been purchased.
Are there any recommended settings and materials for the 3D printer?
Hello,
Thanks for your purchase Florian.
As for the H Shifter, I recommend PLA or ABS. You can apply 20% infill for all parts except for the part Spring Support – Quantity 1.stl, for this one I recommend 80% or 100%. Here are recommendations for printing 3D solid parts: https://markforged.com/resources/learn/design-for-additive-manufacturing-plastics-composites/understanding-3d-printing-strength/3d-printing-settings-impacting-part-strength?__geom=%E2%9C%AA
Best regards,
DIY SIM STUDIO
Hello, I have 3D printed and I like your sequential shifter.
I used the ‘0 Delay Usb Arcade Board’, but the Z-axis and Z-rotation are hijacking my MOZA R5 steering wheel and preventing me from using my wheel. How would I delete the Z-axis and Z-rotation that appear in the ‘0 Delay Usb Arcade Board’?
Thanks.
Hello Laini,
Can you try another usb plug ?
Have you contacted Moza to explain this issue ? Maybe they know this issue and how to fix it.
It you don’t find a solution, you need to use an Arduino pro micro board.
Best regards,
DIY Sim Studio
Could you post the springs spec
Hello,
You can find it in the BOM tab of the product page.